Now that the tubing and cables are done, time to fill this thing up with fluid. Before I did an entire system fill, there were 2 things I needed to do.
Needed to flush the radiator of any particulates. I have heard in a lot of reviews that radiators can have all kinds of metal shards inside time left over from the manufacturing process. I detached the radiator from the rest of the loop, and flushed it with distilled water. Pleased to find very little in they way of particulates, so drained it and reattached the tubing.
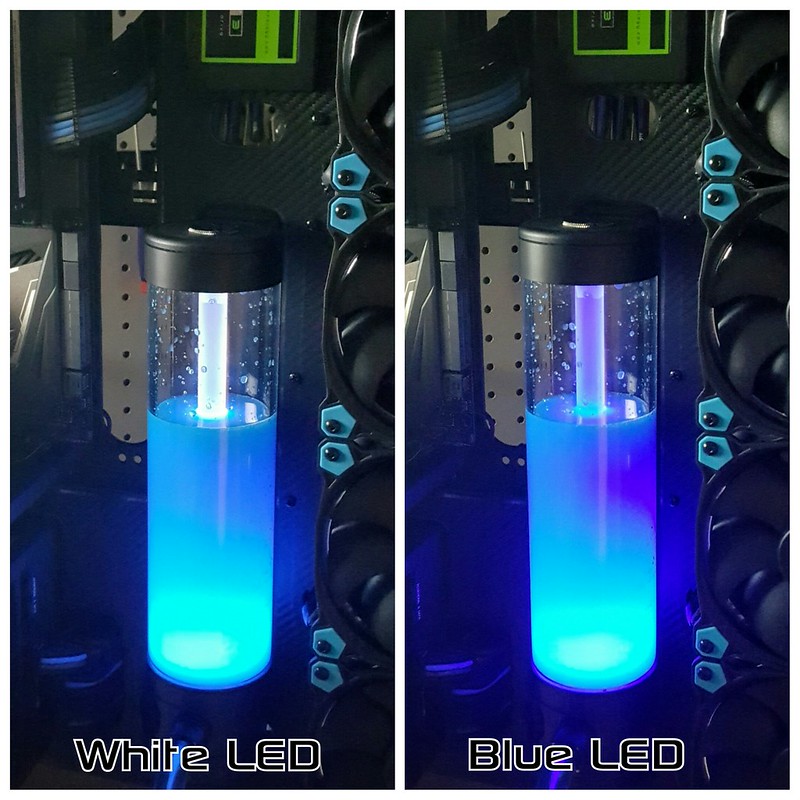
Then had to decide on what color of LED I wanted to use in the Res, being that is was one of the few lights in the system that wasn’t RGB. I filled it up a little over halfway, added a bit of Blue Dye, and first tried the White LED, which is the photo on the left. It looked good, but wanted to try blue as well.
At first I was worried that the blue would look purple and not match the rest of my system (kinda like it does in the picture on the right). But in real life, it is the perfect color blue, and seems to light up the entire Res a bit better than the white one, so going to stick with the blue LED for now. Its an easy change if I decide to go with the white sometime in the future.
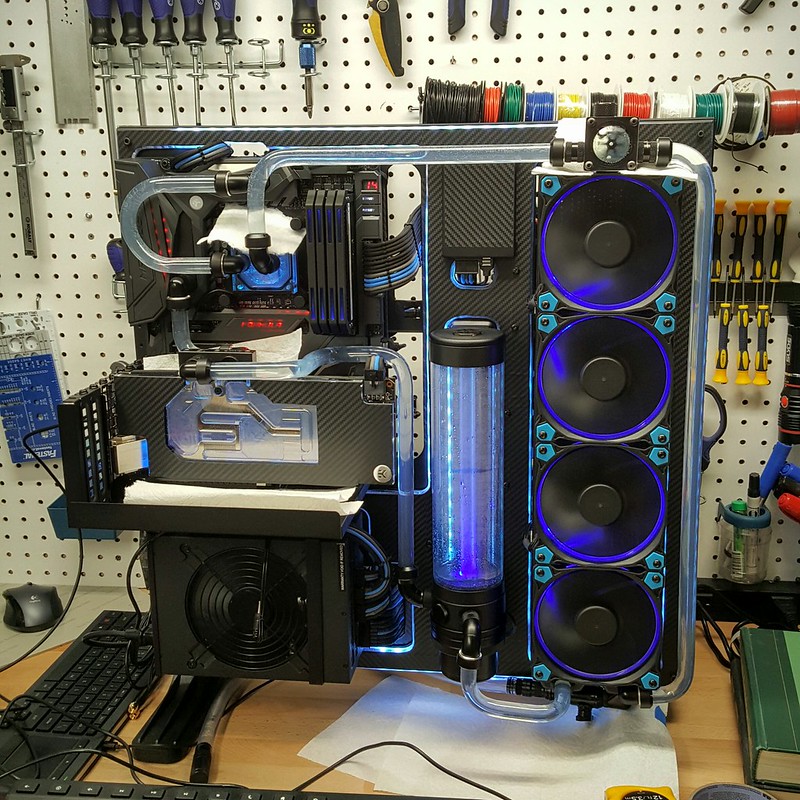
After deciding on the LED color, I drained the Res, connected the tubing to the rest of the system, and began filling with distilled water for the first official “Leak Test”. Quick note of filling a system with this XSPC Photon Res… you will need a book, which you can see in the bottom right of my photo below. The case/res has to be tilted at an angle during the fill process, or the opening will keep backing up with air bubbles. The first 5 minutes of the fill process were very frustrating until I figured this out. After sliding a good size book under the right leg of the case, filing became very easy.
Was able to fill the whole system in a just a few minutes, alternating between running the pump and tilting the case to release air bubbles. It looks like it is going to take around 1.4 liters to completely fill the system loop and res. I then ran it for a few hours, and didn't find a single drop of water outside of the loop. Leak test completed successfully.


very nice blog and content i will follow you
ReplyDelete