

I had initially purchased some a few 10in RGB LED connector wires to make it easy for me to run the various “tracks” of lighting. These ended up being too stiff and rigid, and the connectors were very thick, so went with the old standby of soldering every wire. I had to add these wires because the LED light strips were not pliable enough be make the bends around the corners of the channels I had cut out.
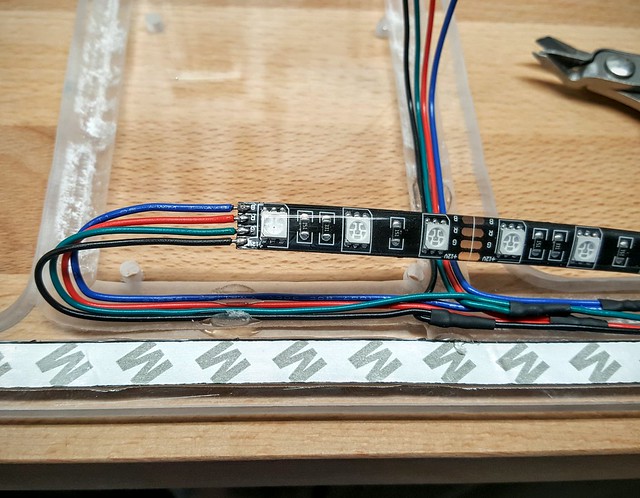
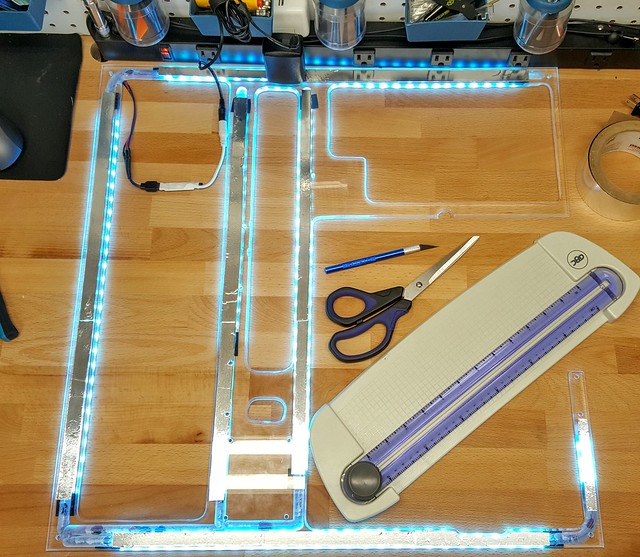
In addition to soldering the 4 required wires to each segment of LED strip, I also used hot glue in a few places to keep everything where it should be. Below you can see all the strips have been applied, and the lights have been turned on to test.
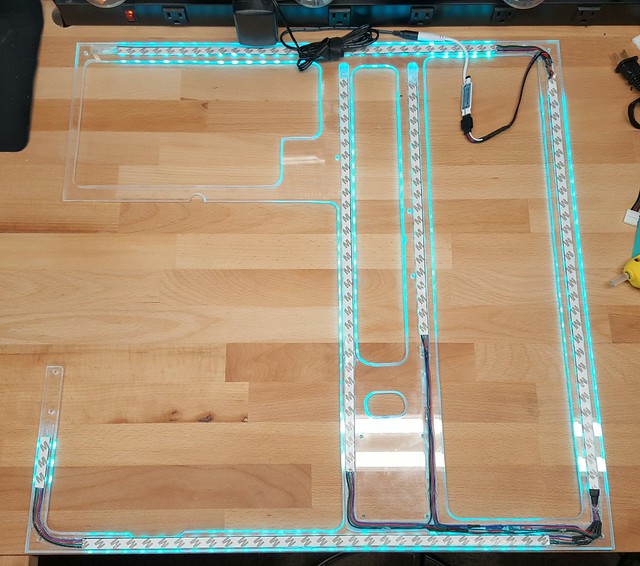
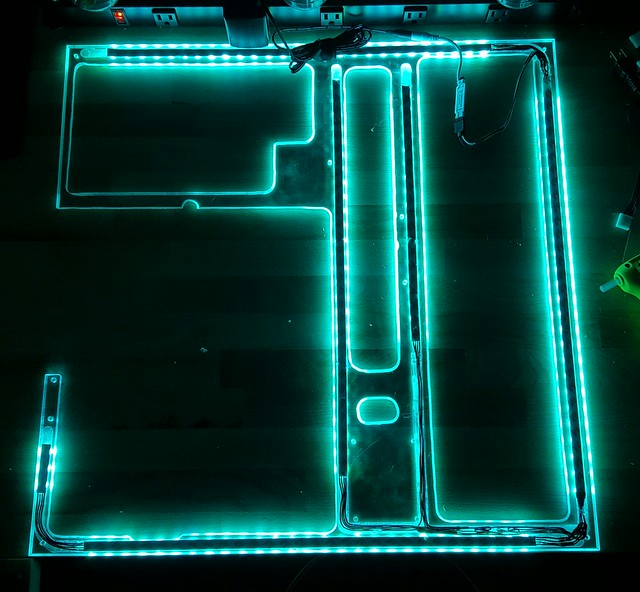
Same test as above from the back of the panel, but with the lights off. Note that this is not the final color that I plan on using. It looks cool, and has a nice “TRON” theme going on, but will probably go for a more Royal Blue when done.
In an attempt to get as much light as possible to shine through the sides, I put reflective duct tape behind the light strips. It did help a bit, but applying it to the front had a much more noticeable effect.
Here is the reflective duct tape being applied to the front of the acrylic panel, on top of the LEDs. You can see in the side by side example below, I get a much more even light through the sides when the reflective tape is applied.
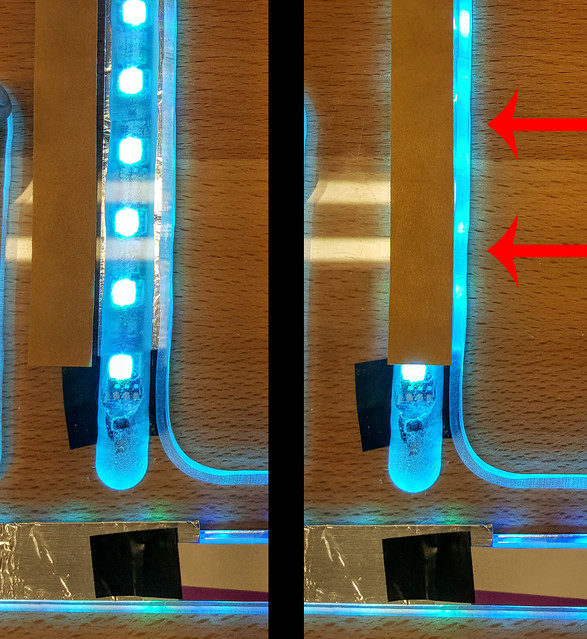
View from the front with the reflective tape applied.
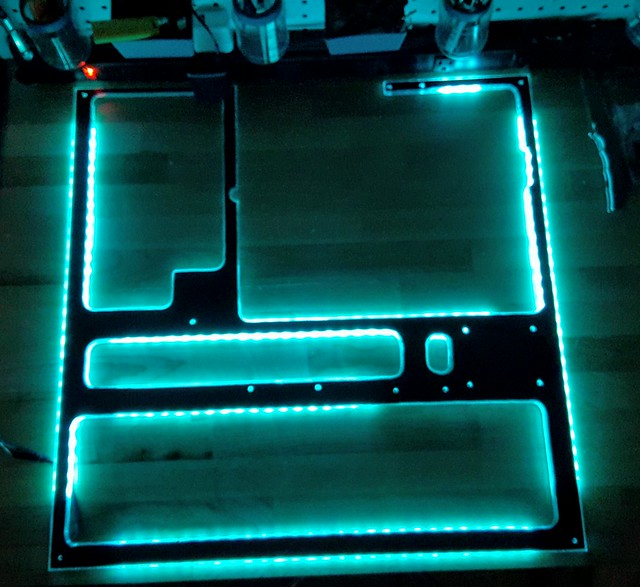
After verifying the light diffusion was about what I wanted for the panel, I went ahead and applied the Carbon Fibre Vinyl to the top of the acrylic panel. Not only does this ensure the light is only emitted through the sides of the panel, but it also cleans the look of the panel up, and covers all of the extra holes and cut-outs that are spread around the surface of the P5.
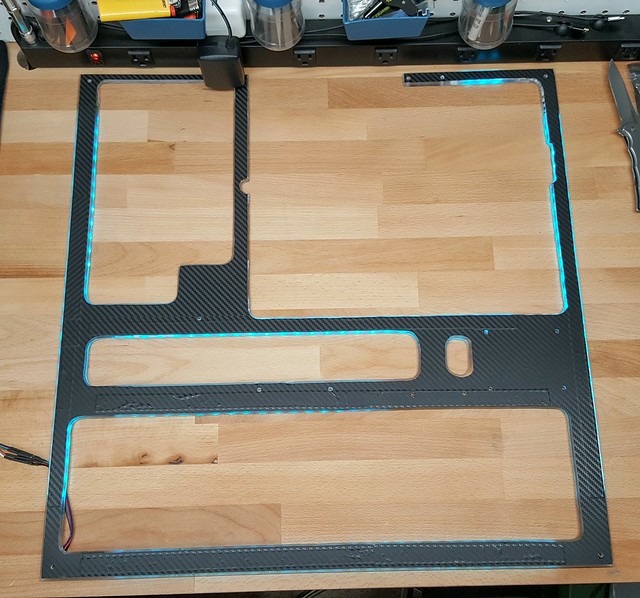
Same as above, but with the lights off. You can see the screw holes in the panel, but once everything is put together, the only light showing will be along the edges of the panel.
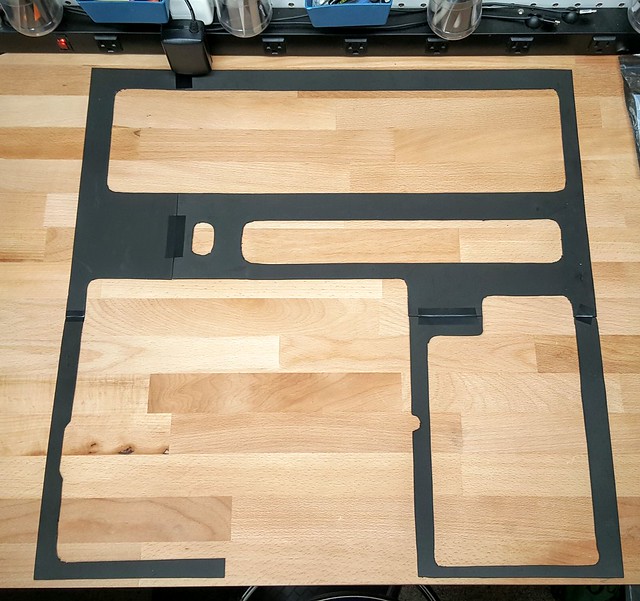
I explained in a previous post that I used and router to shaved a beveled edge on the top half of every side and cut-out. The goal was to allow for the light to shine up towards the components and not just out the sides. Here is a nice close up of what the edges look like.

Made a quick “gasket” out of 2mm black foam that will go between the acrylic panel and the case. I was worried about cracking when applying pressure to the screws, and couldn’t really use rubber washers as it might make the light diffusion look uneven. Even it that wouldn’t really happen, it was pretty simple to make this gasket, so I went ahead and did it.
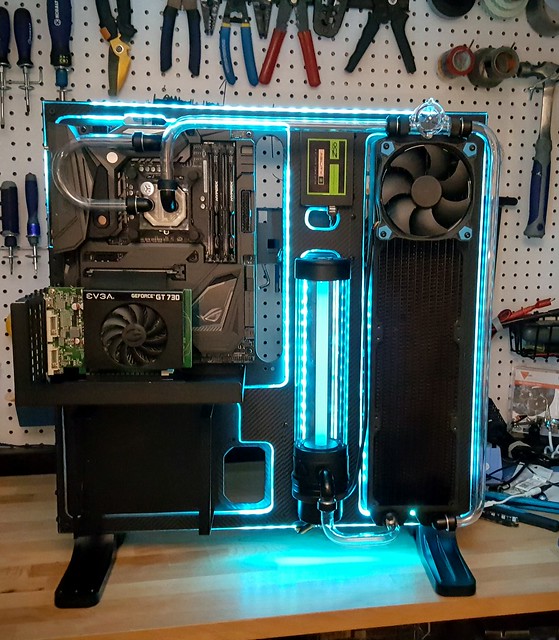
Now we have the panel installed, and did a test run of the lights with the primary components installed to get a better look at how it will shine around them. The pictures below are taken at 3 different lighting levels. Really liking the way this is starting to look. Not going for the “TRON” look, but kind of diggin’ it now...
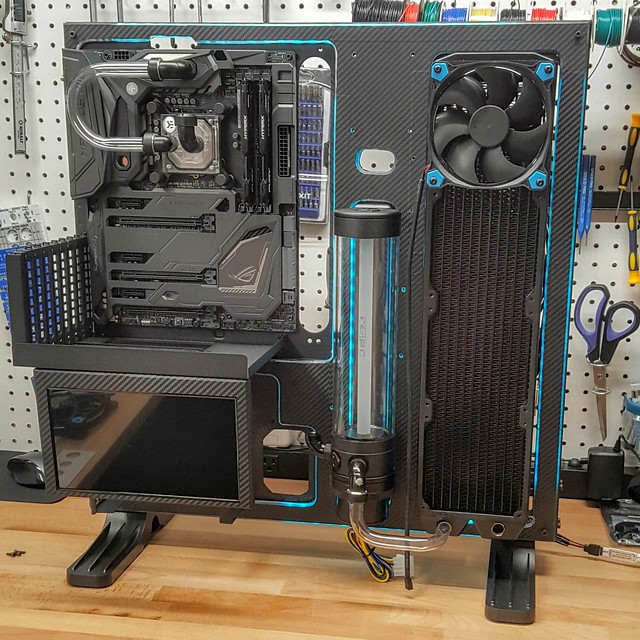
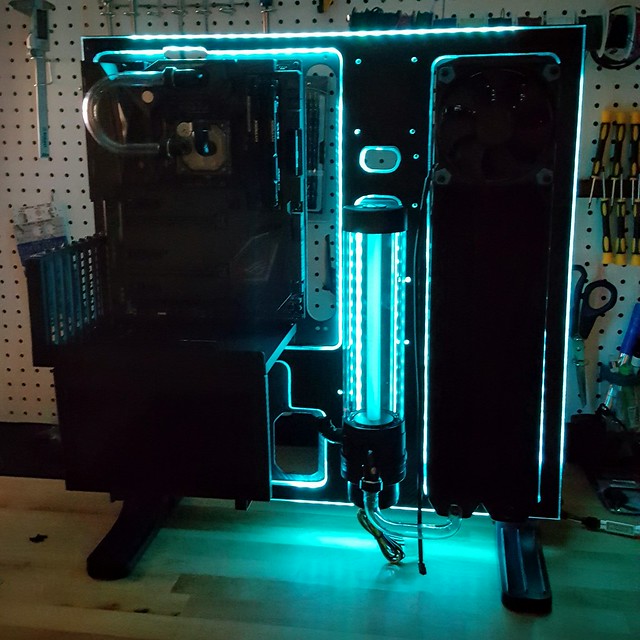
I have a feeling the reservoir is going to look awesome once filled with some pastel blue liquid with that LED shine behind it.
Next up, going to go over the hardware that will make up the rest of the build, and any modifications I have to do to make things look the way I want them to.
No comments:
Post a Comment