- Building a Stackable, Open Air Mining Case
- Building a Mining Rig Stand / Rack with Wheels
- Parts List & Assembling the Ethereum Rig
- Performance Tweaks to Maximize profitability
- Cryptocurrency Mining Rig Build – Video Overview
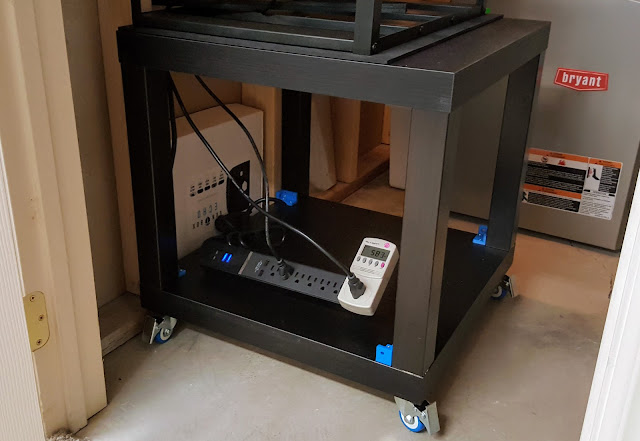
With case completed, we need something to hold it up. With this many GPUs running, all with fans, it is not a good idea to have these near the ground where they can easily pick up dust and debris. This build is too wide for a standard server rack, so I went with some IKEA Lack end tables. These are very inexpensive ($9 each), and I have used them before for other projects, like a stand for my TableTop Arcade system, and an Enclosure for my 3D Printer.

The castors are optional, but as mine will be housed in a utility room, I may have to move things around when servicing HVAC components, so easily scooting things around using wheels is a must for me. Full material list is as follows:
- IKEA Lack End Table (x2)
- SPACECARE 4 Pack of 2" Swivel Caster Blue Polyurethane Wheels with Brake (x1)
- Optional: Corner Supports (x4)
Assemble the first end table as shown in the instructions provided by IKEA. If you have never assembled anything from IKEA, they make it incredibly simple. Once assembled, you will only be using the top of the 2nd end table, the legs can be discarded. We need the top of the 2nd table to act as a base for the stands, to give the bottom some rigidity, and have a good mounting platform for the castors.

The next step is optional, but recommended. You could just use gorilla glue to attached the bottom slab to the table legs, but I chose to also provide some corner brackets to secure things a bit more. I didn’t have any on hand, so I printed a set of 4 on my 3D printer. With those completed, I glued things together with Gorilla Glue, then used these brackets to hold everything in place firmly.

Once everything was dried, I flipped the stand over and measured for the castors. You will not use the hole that is already in the stand, and will need to drill your own starter holes for the mounting plates. Install all of the castors, and flip the stand back over.


Done! Before moving on, I wanted to quickly share what I have done to ensure the room this will be housed in doesn’t get too hot. During the summer it won’t really be and issue being that the blower for the AC keeps the room pretty chilly, but that will change come winter when the furnace is running. I already have a direct vent to the outdoors to allow for carbon monoxide produced by the furnace and water heater to escape. I purchased an inexpensive 9in fan, and mounted it to the base of the vent, allowing it to remove heat from the room quicker and more efficiently.

Next post will cover adding the components to the system.


No comments:
Post a Comment