Now that we have some really nice looking white GPU Waterblocks, we needed some backplates to match. Originally we were going to purchase metal backplates, and just paint them as we did the waterblock shrouds. Luckily we came across another option that allowed for further customization and required no additional painting! A company called V1 Tech offers a lot of different design options for both the “logo” and colors.
Install of these backplates is pretty easy, and there are 2 options you can choose. You can use small rare earth magnets to secure the backplate to the GPU mounting screws, or double sided adhesive tape. We had to use the tape, as the screws in the Heatkiller block are not magnetic. Here you can see the double sided tape on top of the screws.
We removed the tabs on the other side of the tape, and lowered the backplate in to place. It lined up perfectly with our GPU, and although can be taken off if needed, it is secured very well.
Here you can see why we went with this particular backplate. Not only does it have the white the primary theme of the case will feature, but also has a great “Titan X” graphic featuring the secondary color of our theme.
Here is a side view of one of these plates installed. Obviously these will provide no cooling benefits, but even metal backplates are said to not really provide any benefits in that regard.
In addition to the GPU backplates, we also found a plate to cover the generic HB SLI Bridge for this setup. Also installed with double sided tape.
Here we have the plates installed along with the waterblock, sitting next to the motherboard. Really liking how the colors are coming together, and the Titan X graphic looks great. Excited to see these installed, and with some custom RGB LEDs backing them up.
Next up, painting our RAM heatsinks to match the color theme we have going with the GPUs and Motherboard.
To jump to other parts of this build log, head over to the Project Index.
Before jumping into the next part of the build, wanted to quickly explain the name of the project for those that don’t consider themselves “Tolkien Nerds”. The Tower of Ecthelion, also known as the White Tower, was a tall white tower atop Minas Tirith which contained the throne of the King of Gondor. That is where the name comes from, and I thought it very fitting for the particular case we are using in this build.
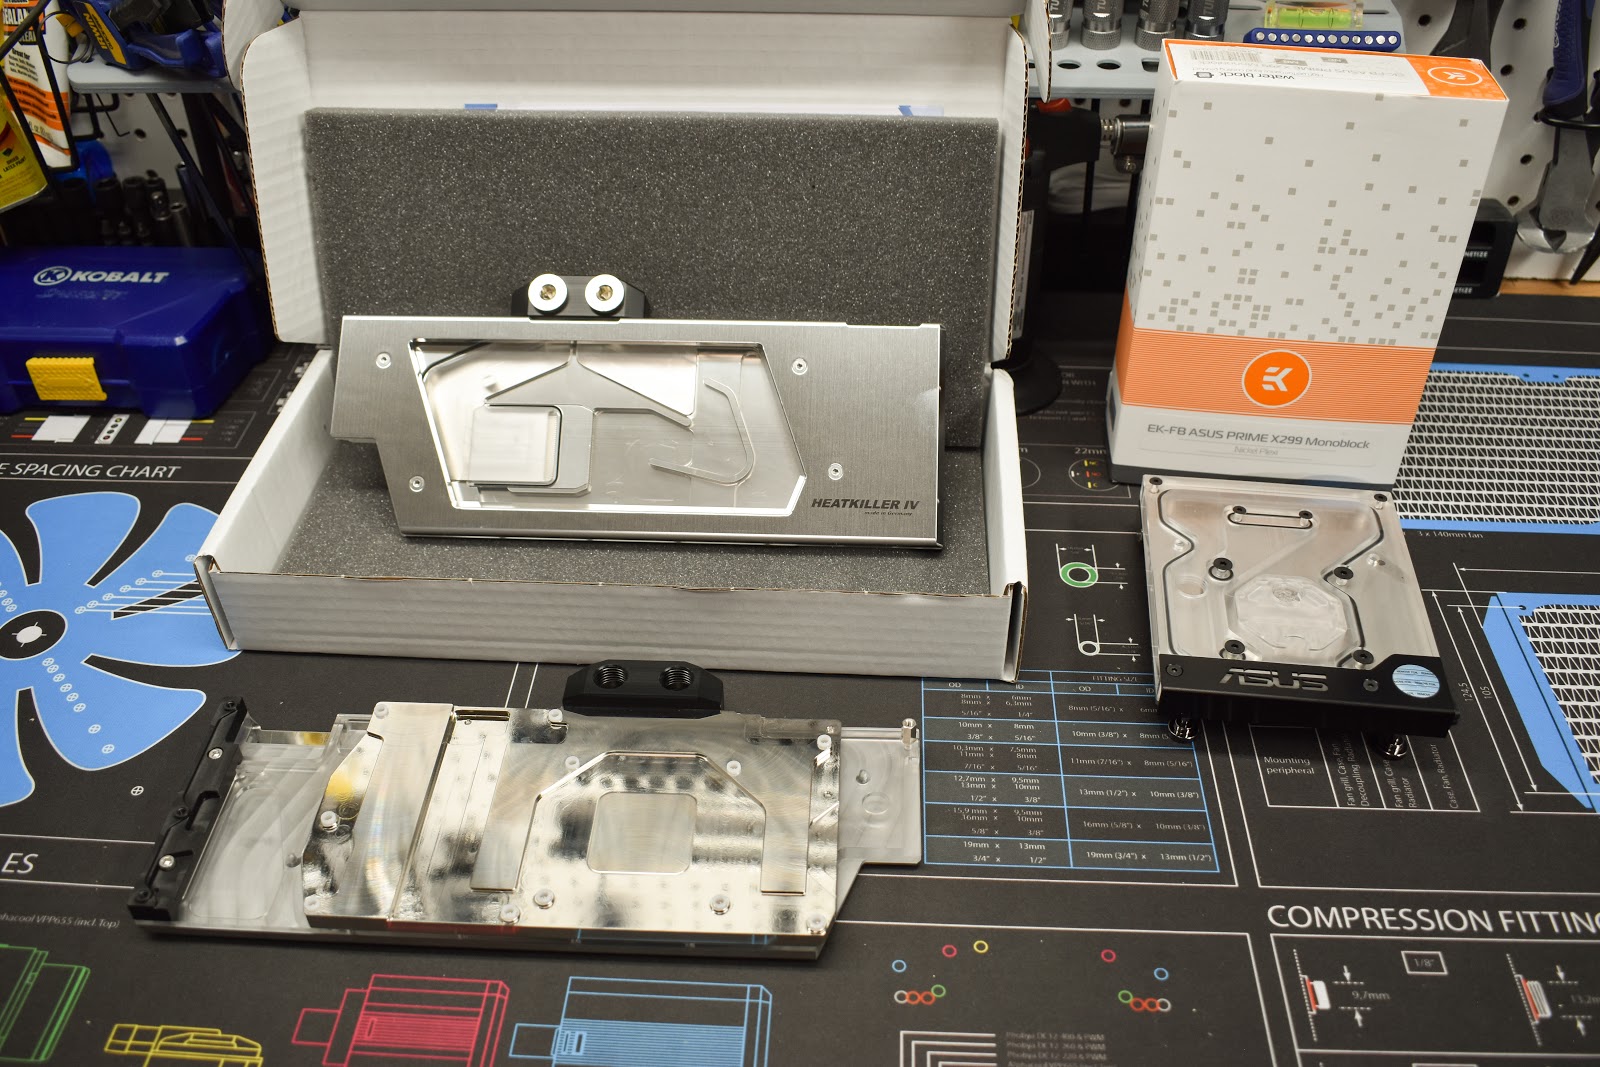
We will be using a total of 3 waterblocks for this build. To cool the Nvidia Titan X GPUs, we selected a Heatkilller Nickel Acrylic block. The pictures online made it look like the shroud around the acrylic was white, which would have matched our theme well. When they arrived, we found that they are actually a polished chrome look.
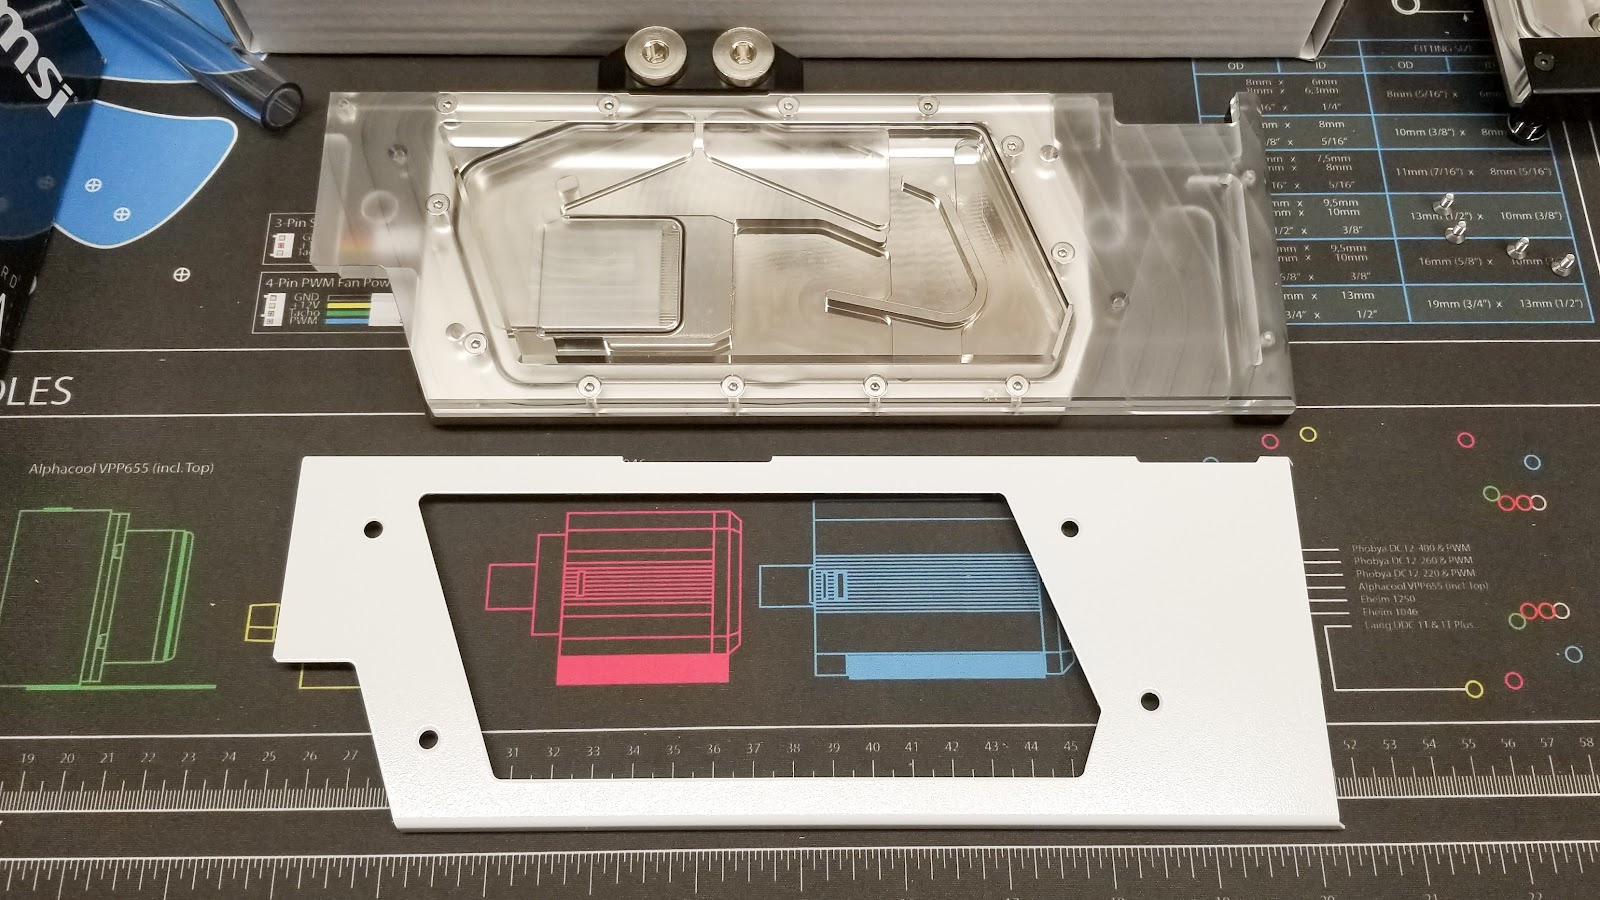
So I took out the matte white spray paint, and went to town. After a few coats, we had the exact look we originally wanted when purchasing these blocks.
x
Much better!
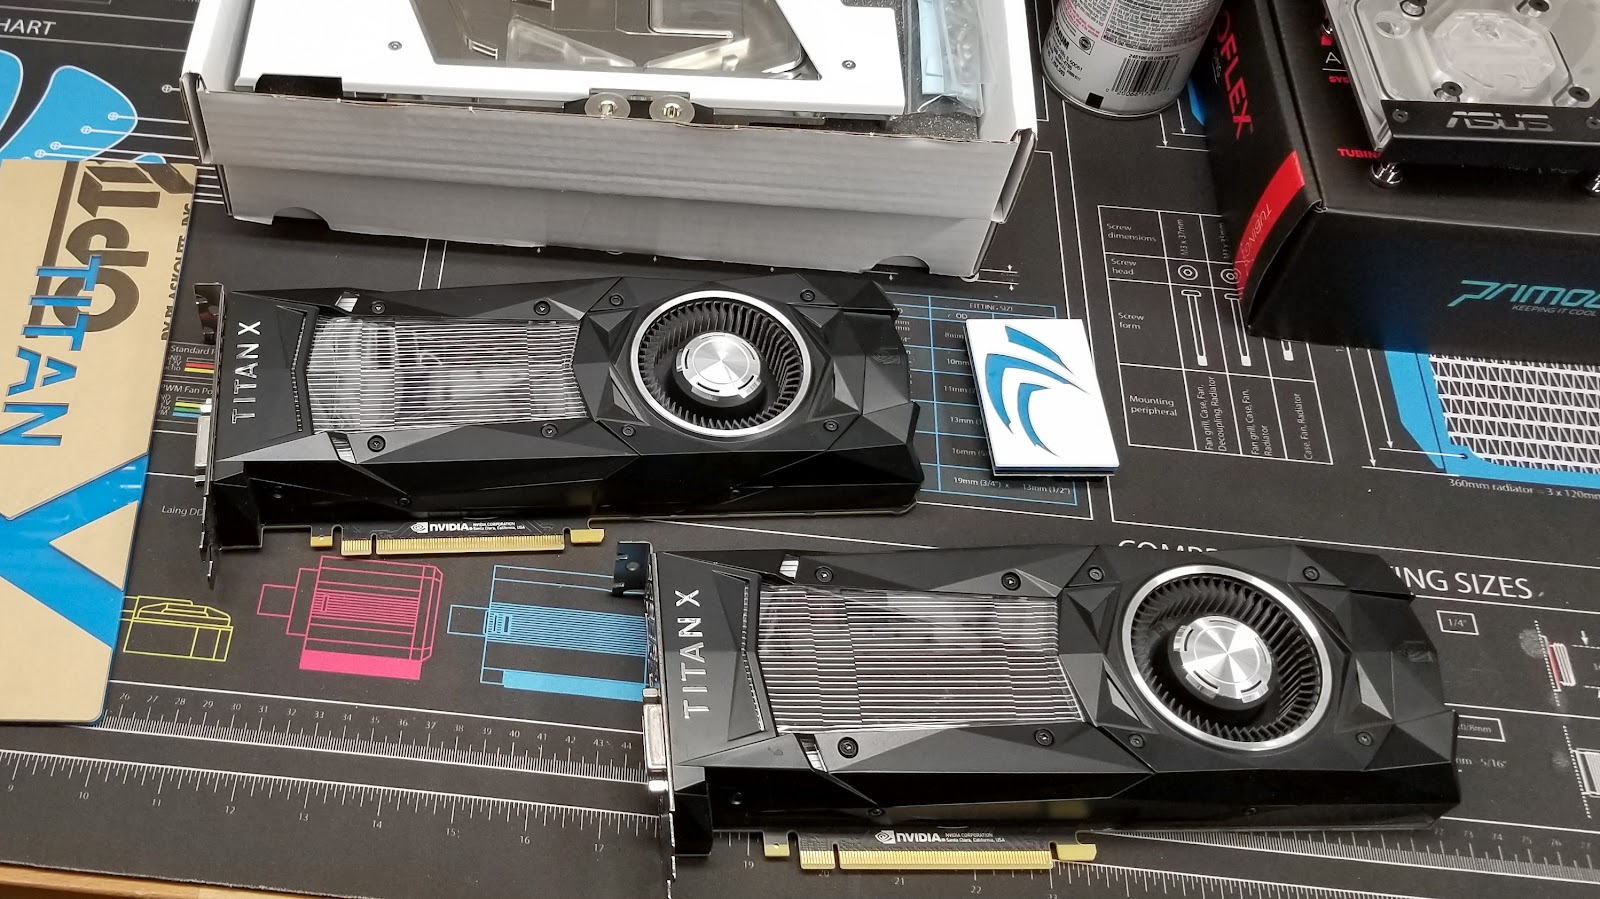
With the block mod out of the way, we set out to remove the stock blower heatsink from the Titan’s. These were fairly easy to take apart, but I found these particular cards used a lot more screws than the EVGA GTX 1080Ti SC2 had, which I recently installed on my primary rig.
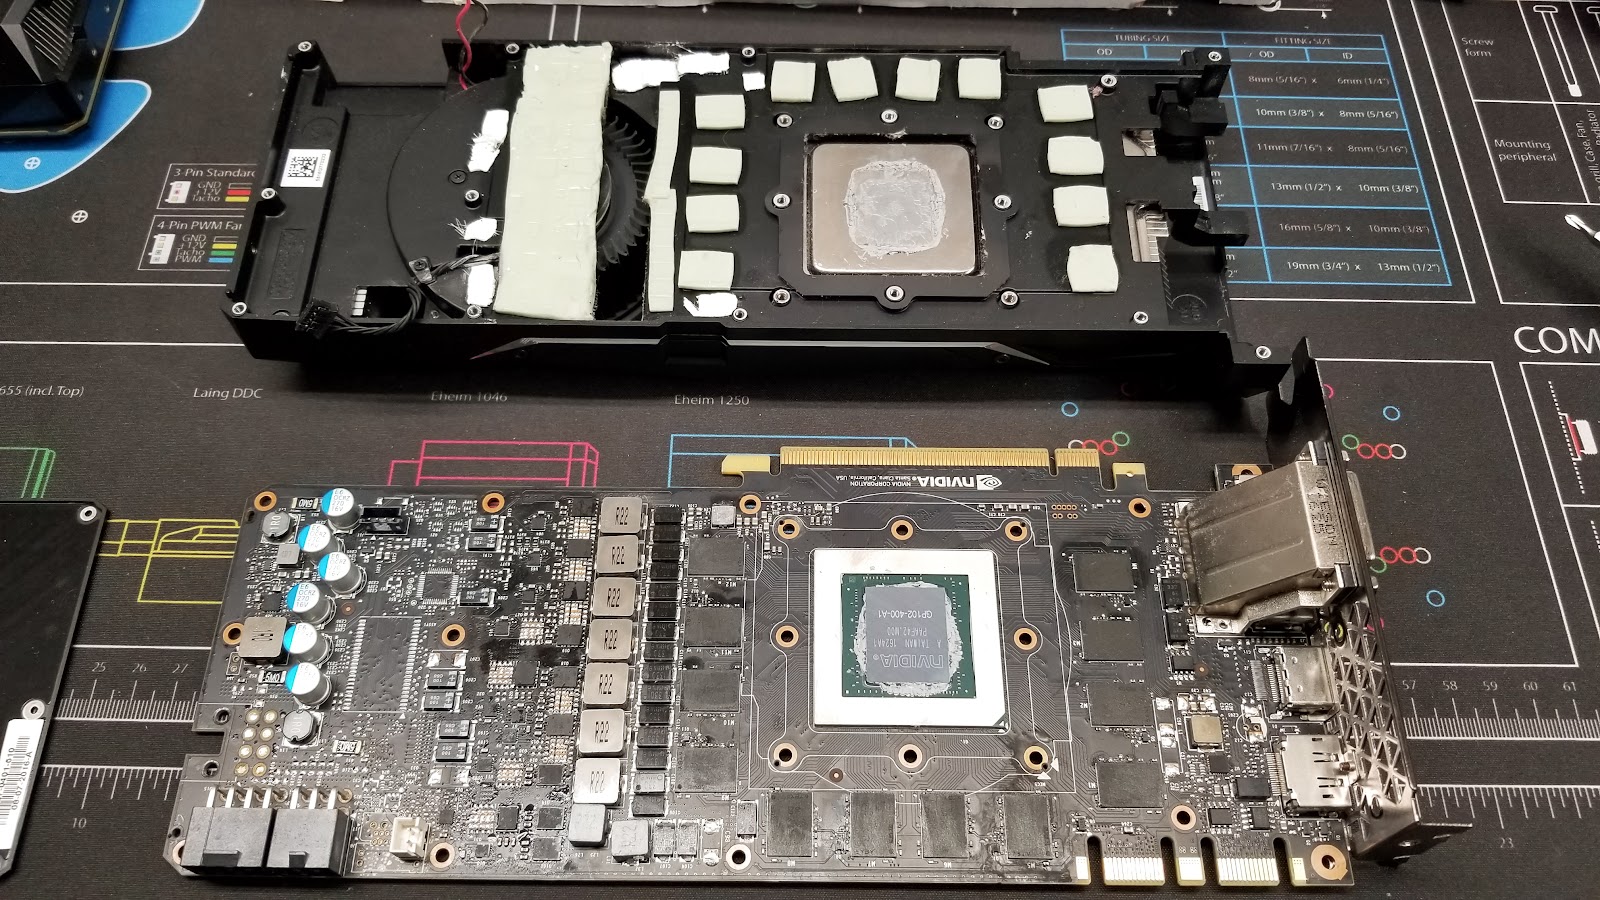
Here we have the naked GPU, ready to be cleaned off and have new thermal pads applied.
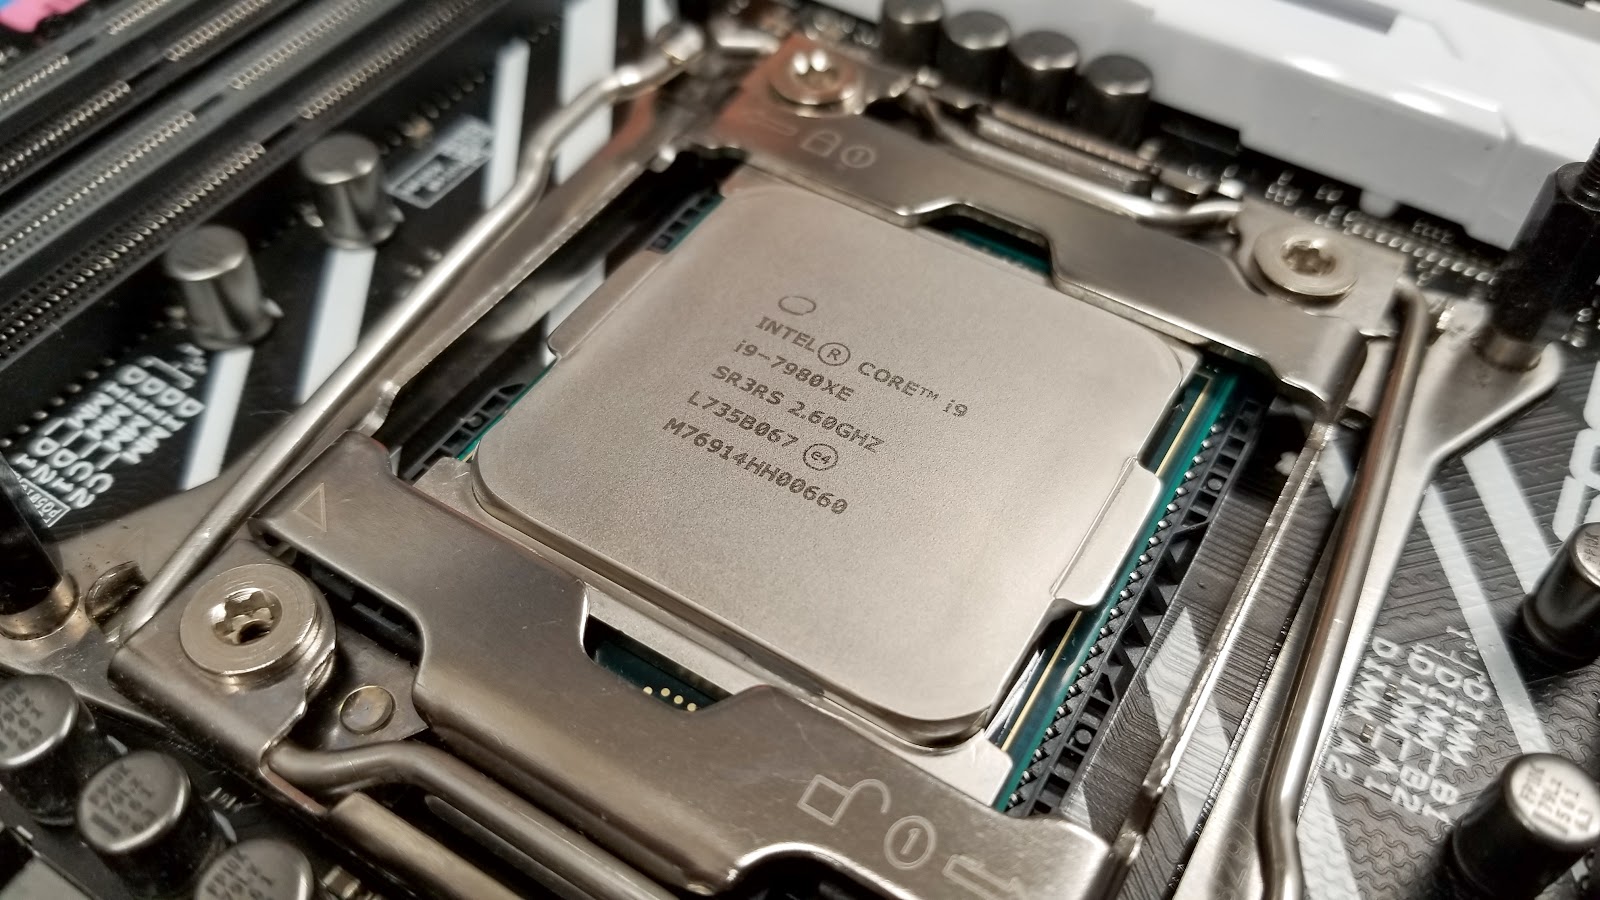
With the new pads on, we slapped on some thermal compound and attached the waterblock to the GPUs. Now on to the CPU block. For this build we are using an Intel i9-7980 Extreme CPU with an incredible 18 cores! When overclocked this thing gets HOT, so we went with a block that will do an excellent job cooling this large CPU, and part of the Motherboard as well.
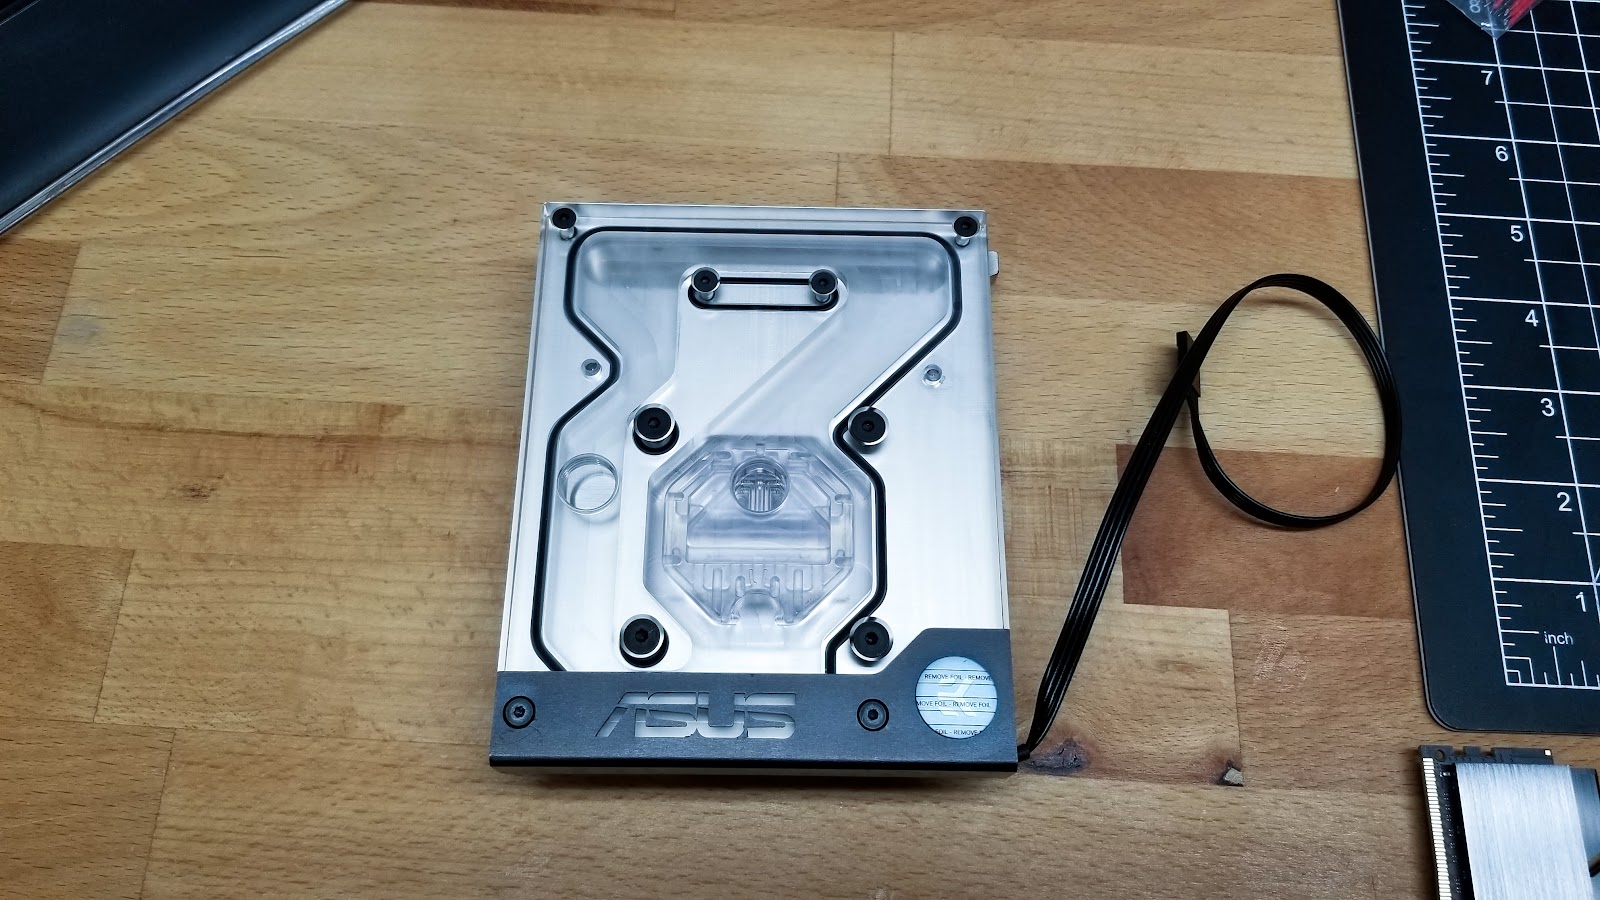
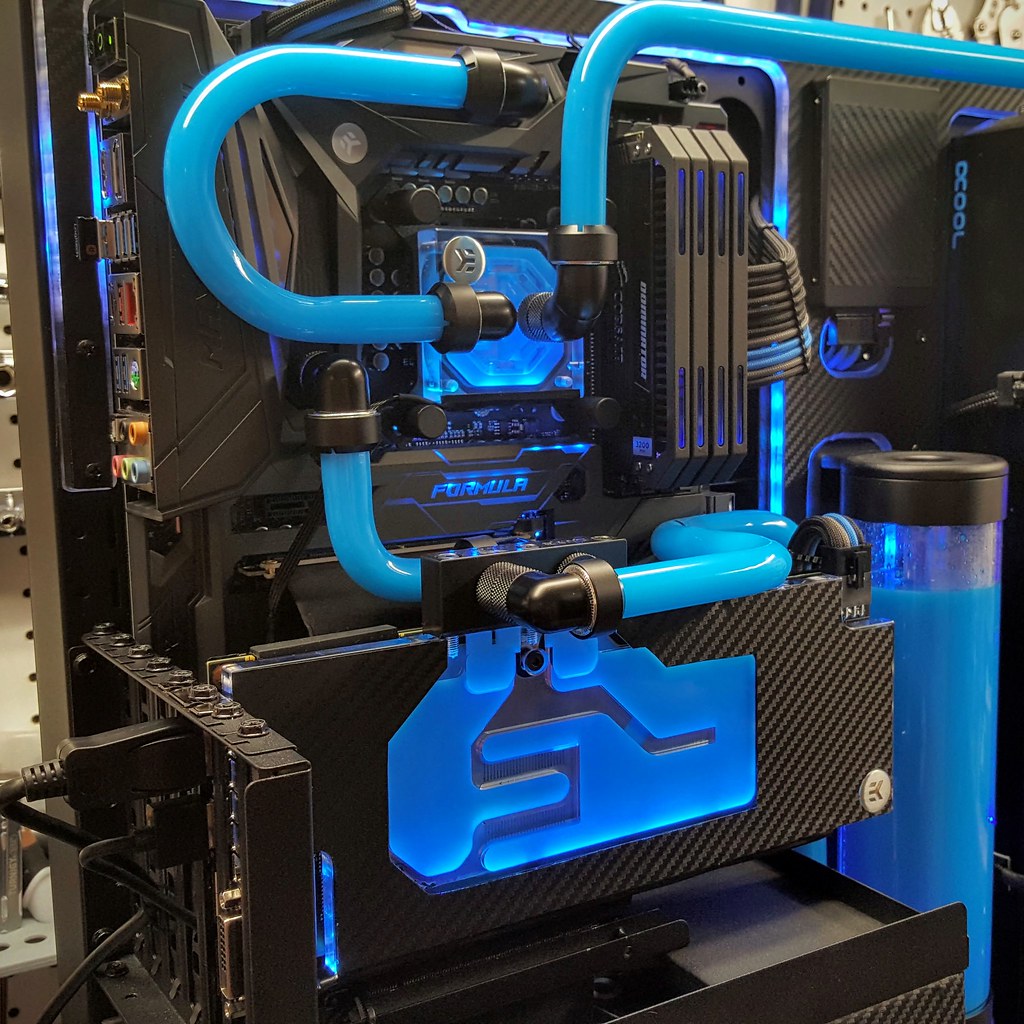
Here we have the EK-FB ASUS Prime X299 Monoblock. Its large, heavy, and even has RGB LEDs on the bottom to give a nice “glow” to the fluid as it passes through the block.
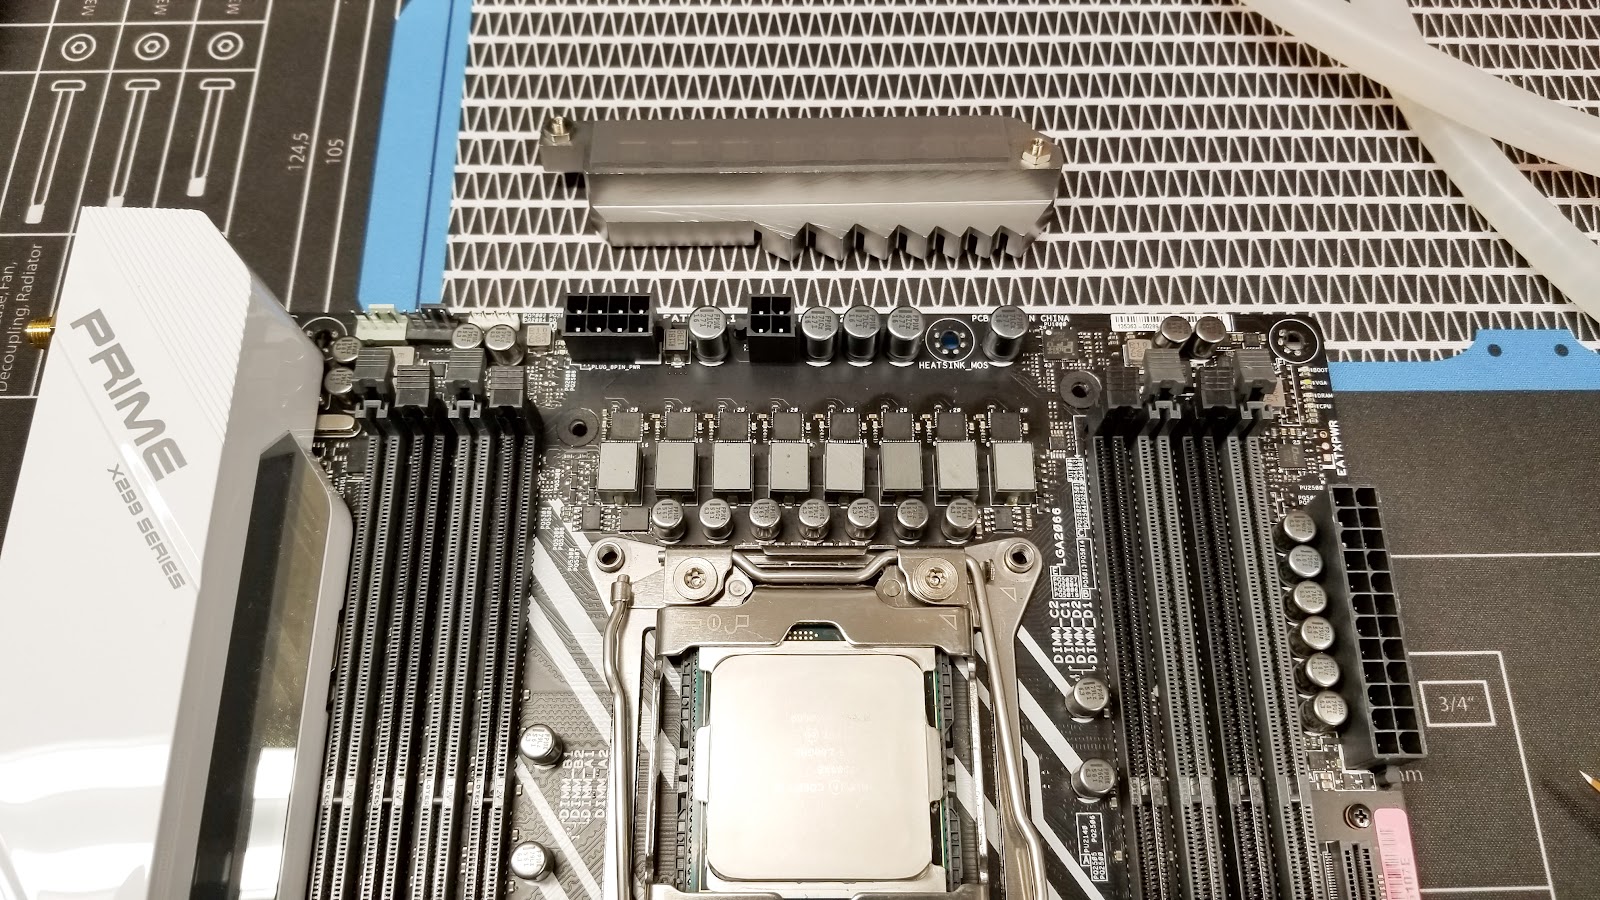
Since this is a Monoblock, it also cools the MOSFET modules on the Motherboard. We had to take off the heatsink over the MOSFETs as the first step, and then apply a new thermal pad.
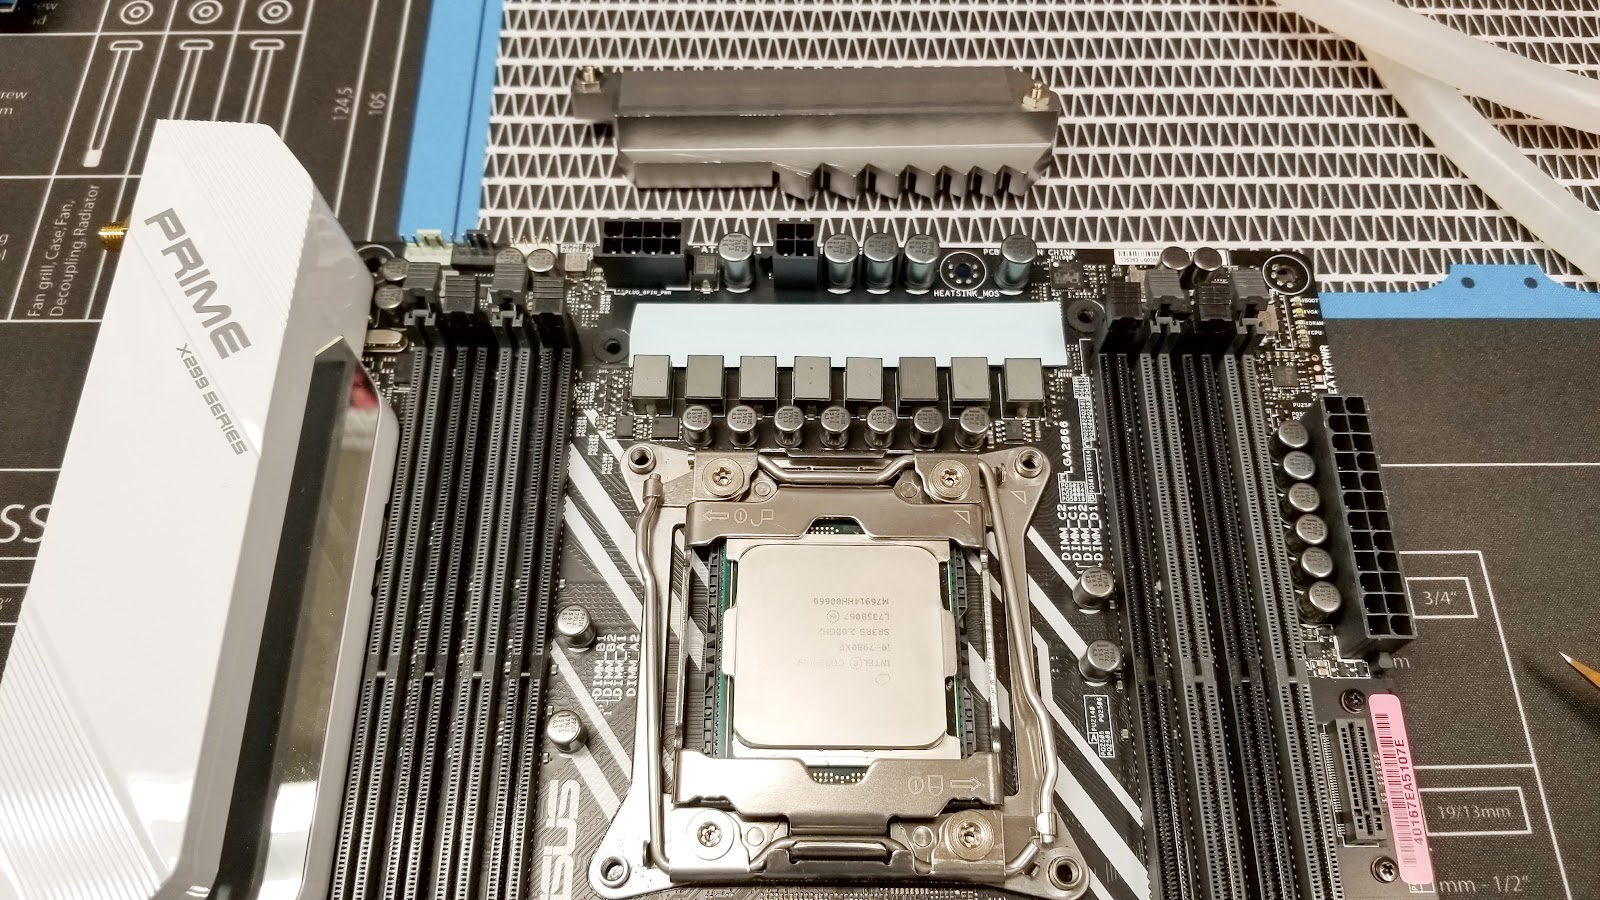
With that, we applied thermal compound to the top of the CPU and secured the Monoblock to the motherboard. Note that for this particular block, you will use the backplate that originally came with the heatsink cooling the MOSFETs.
And here it is installed. Great looking waterblock, and really excited to see it all glowing with opaque fluid running through it.
Next up, glaming up the GPUs with color acrylic backplates. To jump to other parts of this build log, head over to the Project Index.
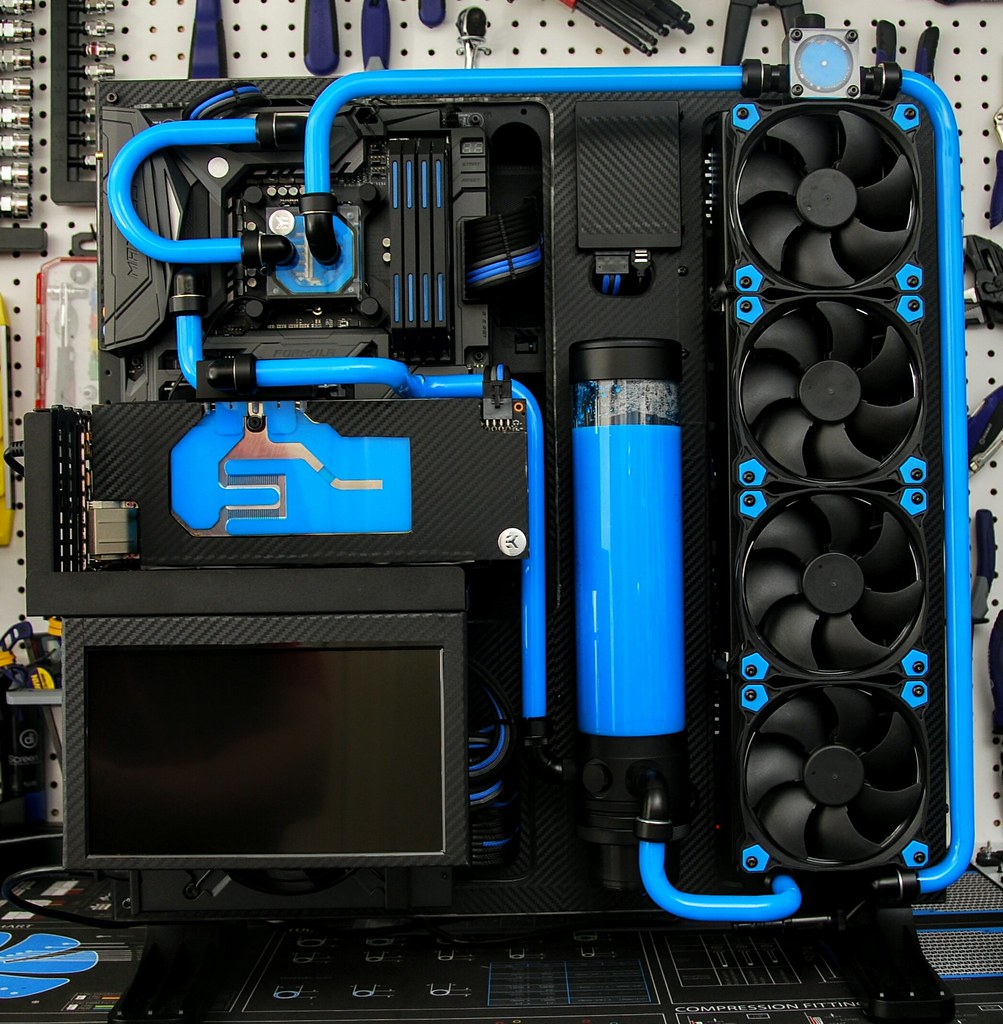
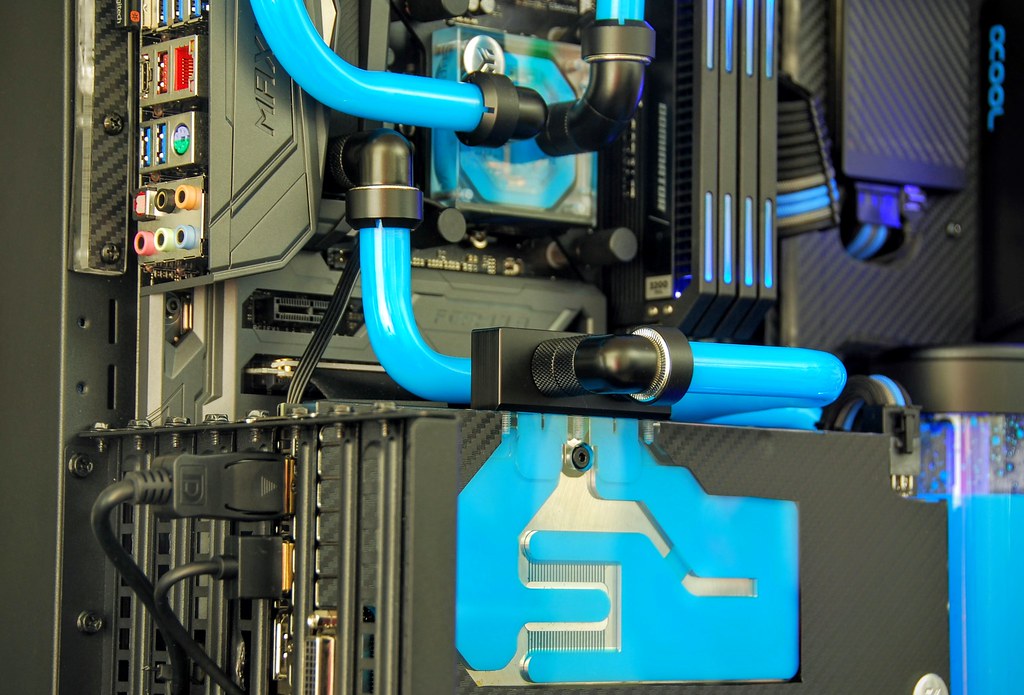
For this build we will be utilizing a dual loop setup. The First loop will be opaque white and will cool the CPU and Motherboard via a MonoBlock from EK. The Second loop will cool the 2x Nvidia Titan X's in SLI. The color will be blue, and using the same liquid additive that looked great in my Project Open Core (build log here), Mayhems Pastel Blue.
The Tower 900 case allows for some interesting design choices. You can keep all of the "prettier" parts of the build towards the front of the case, and showcase nice hardline bends, while keeping the less attractive parts of the build hidden in the back, and leverage soft tubing for easier setup. Here is the diagram I made for this build to figure out how things would layout, and get a final fitting count.
For the fittings, as before I will primarily be using Monsoon Hardline fittings and various Barrow fittings for the rest of the build. In addition to the dual loops, I have also built in a drain tube using flex tubing and a ball valve for easy fluid changes.
Next up we will start "modding" some of the hardware to match our color theme.
To jump to other parts of this build log, head over to the Project Index.
It's time for another custom Liquid Cooled build, and this time we are utilizing the MASSIVE Thermaltake Tower 900 case! This is a commissioned build, using some extreme hardware, and I am really excited to get started.
Will feature dual liquid loops, one for the i9-7980 Extreme CPU, and the other cooling 2x Nvidia Titan X Pascals in SLI. We will incorporate a little bit of acrylic work to clean things up, along with some painting, and RGB lighting. Take a look at all the components below to see just how impressive (and powerful) this build will be when completed. I present Project Ecthelion!
I have been running my current Custom PC setup for about 6 months, and for the most part, have been very pleased with everything. The only issue I have faced, is the small display I mounted to show system stats has very poor viewing angles, making it hard to see from where I sit/stand.
I also have received more questions about that particular part of my system than any other post both on this blog and my YouTube channel. So I decided to upgrade that particular component, and archive the entire process. In addition to the info on this post, I will also make an overview video and posts it at the bottom.
The previous display was a 9in LCD panel. The new one, is a Toguard 10.1 Inch IPS display. Here is the Amazon Link. It is almost twice the cost of the 9in one, but the panel quality is a LOT better, so worth it in my opinion.
Here is a picture from the back. The 9in was a bit easier to mount as it had a camera/tripod mounting hole, that I secured it to the GPU bracket with. This new display has no such mount, but does have 4 mounting holes on the back of the display.
From the bottom you can see the various connectors. All I am concerned with are the 12V DC power port, and the HDMI input.
The front plastic made to look like brushed aluminum. I probably would have left it as is, if it weren't for the TOGUARD logo. So I covered just the front bezel with my Carbon Fiber Vinyl wrap.
I gave it a quick test before making the mounting bracket just to verify everything would work the way I needed it to. Here we are showing connections from the PC to the Display. Note the 12V DC plug is coming directly from a 4pin Molex connection that I wired specifically to power this display.
The initial tests passed with flying colors. Not yet mounted, but running CAM perfectly. On to the mounting bracket construction.
To make the bracket, I grabbed some sheet metal that I had left over from another project. I measured both the exterior dimensions and the location of the mounting screw holes.
Once I had everything marked, cut out the piece, drilled the holes, and used my bench vise to make a nice 90 degree bend to accommodate mounting the display under the GPU bracket.
To secure the display to the mounting bracket, I am using M4-7 socket cap screws, and a few washers. The length was a bit too long, as the mounting holes were not very deep, so I used some nuts to shorten the length of the screws.
After everything was drilled, cut, and bent, added a few passes of black spray paint to match the color theme of the PC build. Also shown here is the 6mm screw I used to secure the mounting plate to the GPU bracket.
Here is the hole I drilled in the GPU bracket.
And here is where the 6mm screw will go.
With the mounting plate secured the the GPU bracket, we can now attache the display.
Here is a shot from the back to show how the screws are securing the display to the case.
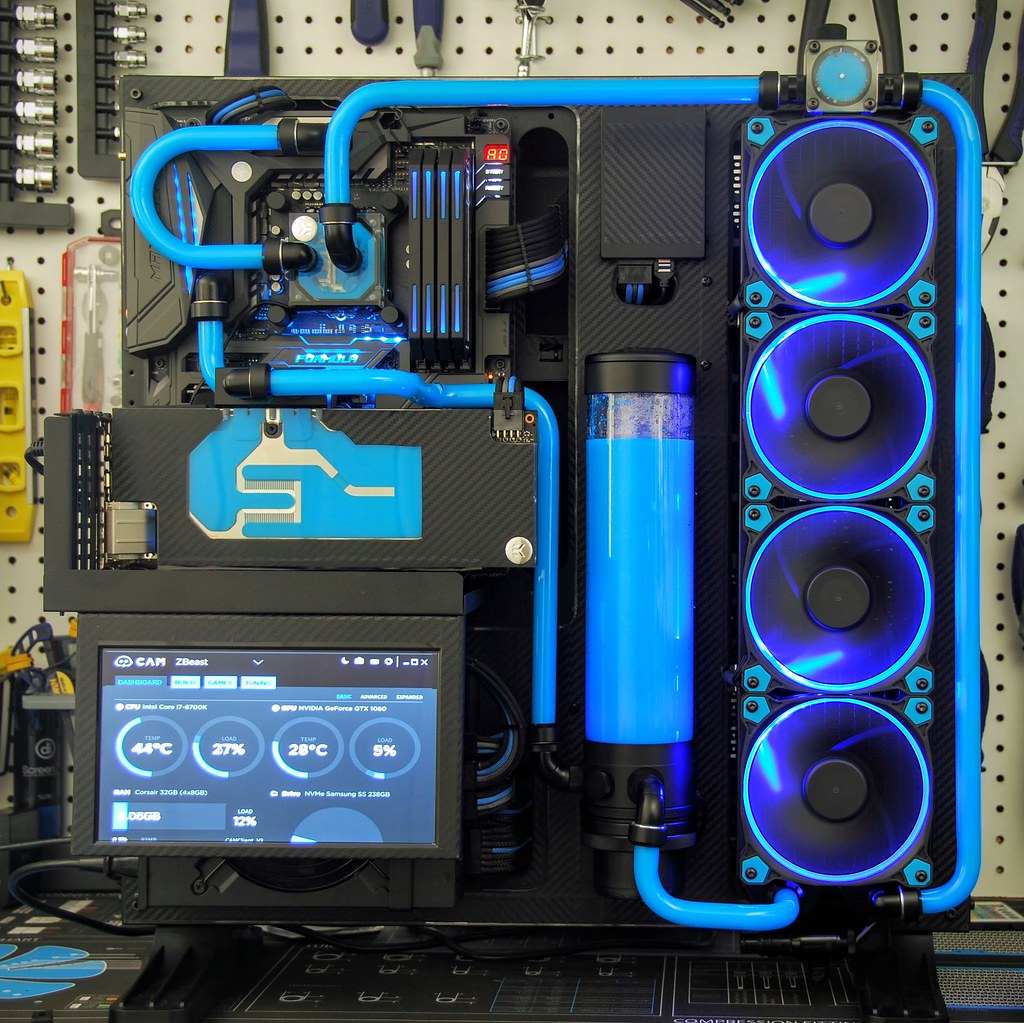
And a final shot from the front to show the new upgraded display installed and running CAM.
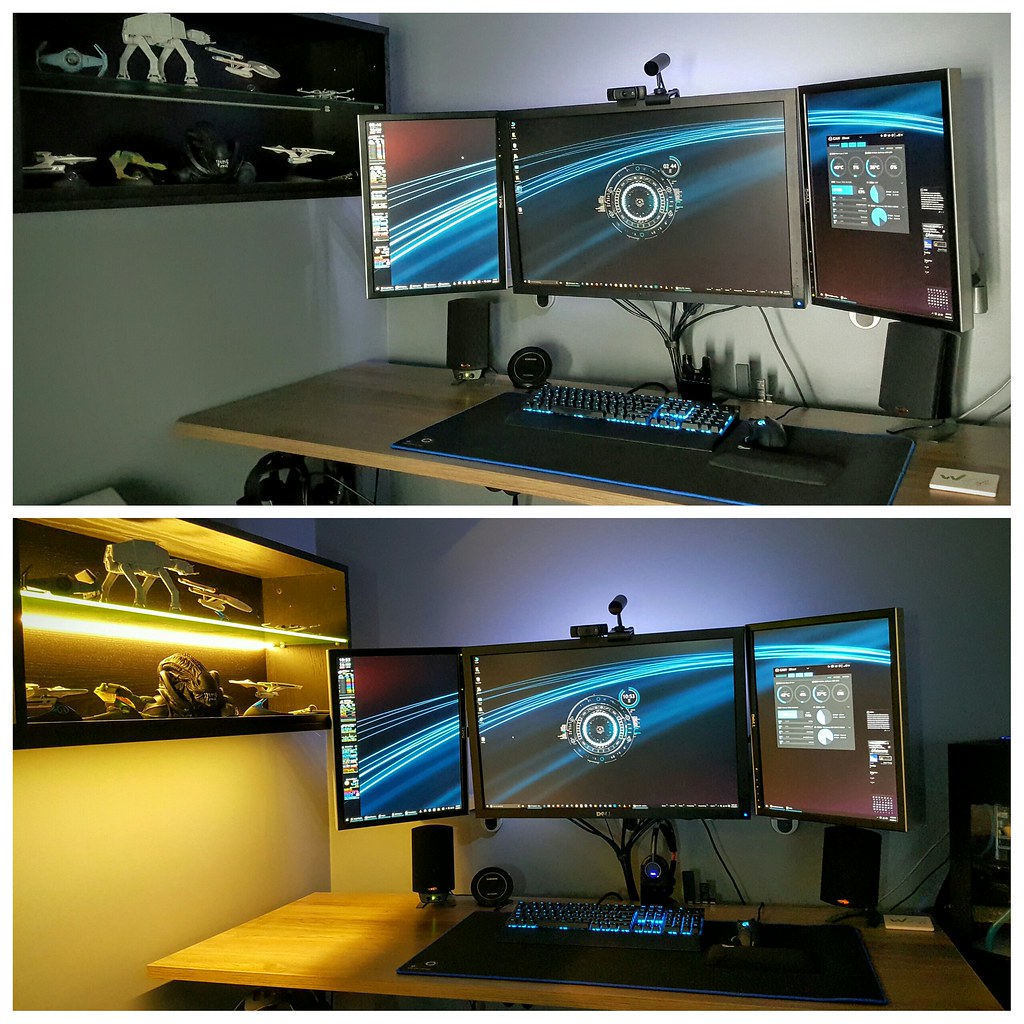
I will show in the video more detail on how to get the NZXT CAM Monitoring software up and running, but just for reference, here is what my displays look like, with this new on set up as the 4th monitor of my system. Desktop Screen Capture of all 4 monitor.
Here is the video. If you have any questions be sure to hit me up in the comments. Thanks!
If you need to go back and take a look at other posts for the this build, here is a quick navigation index you can utilize.
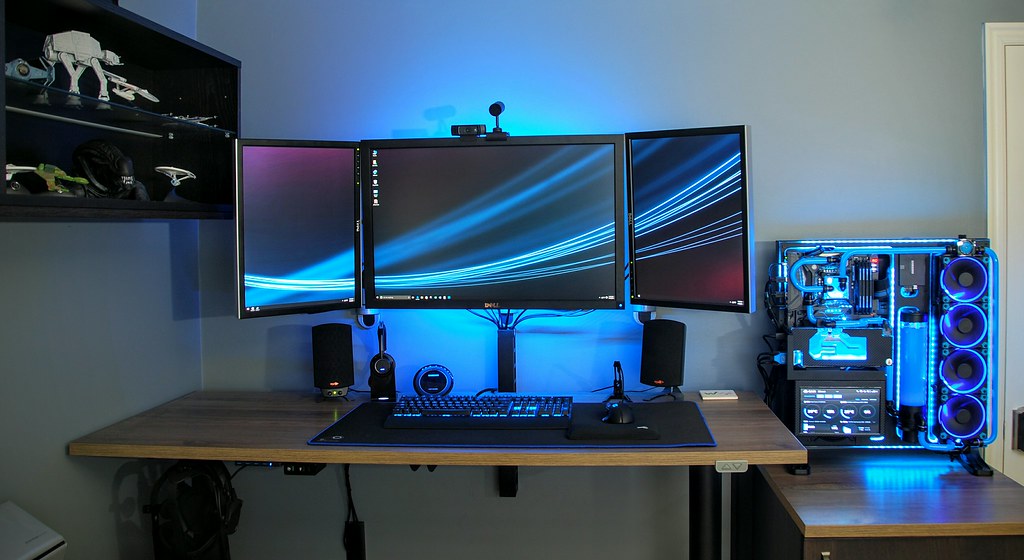
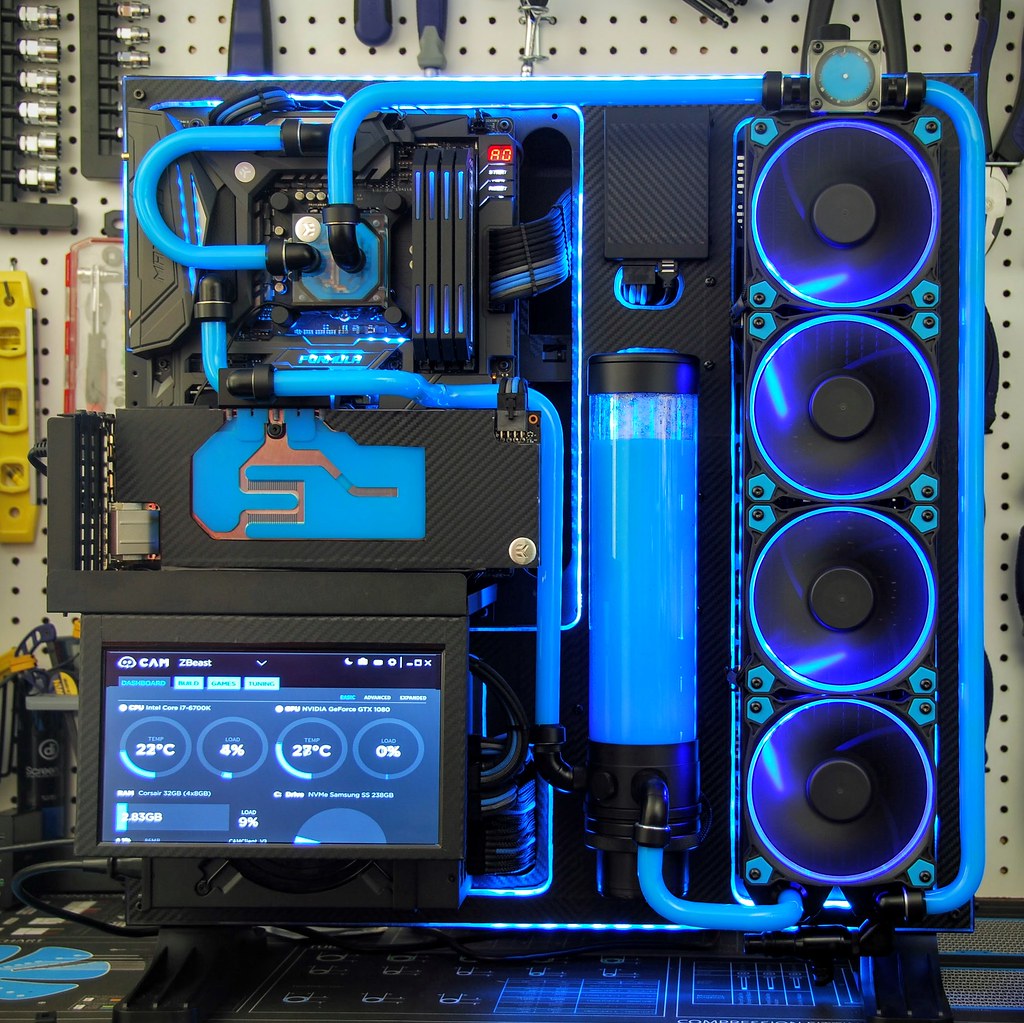
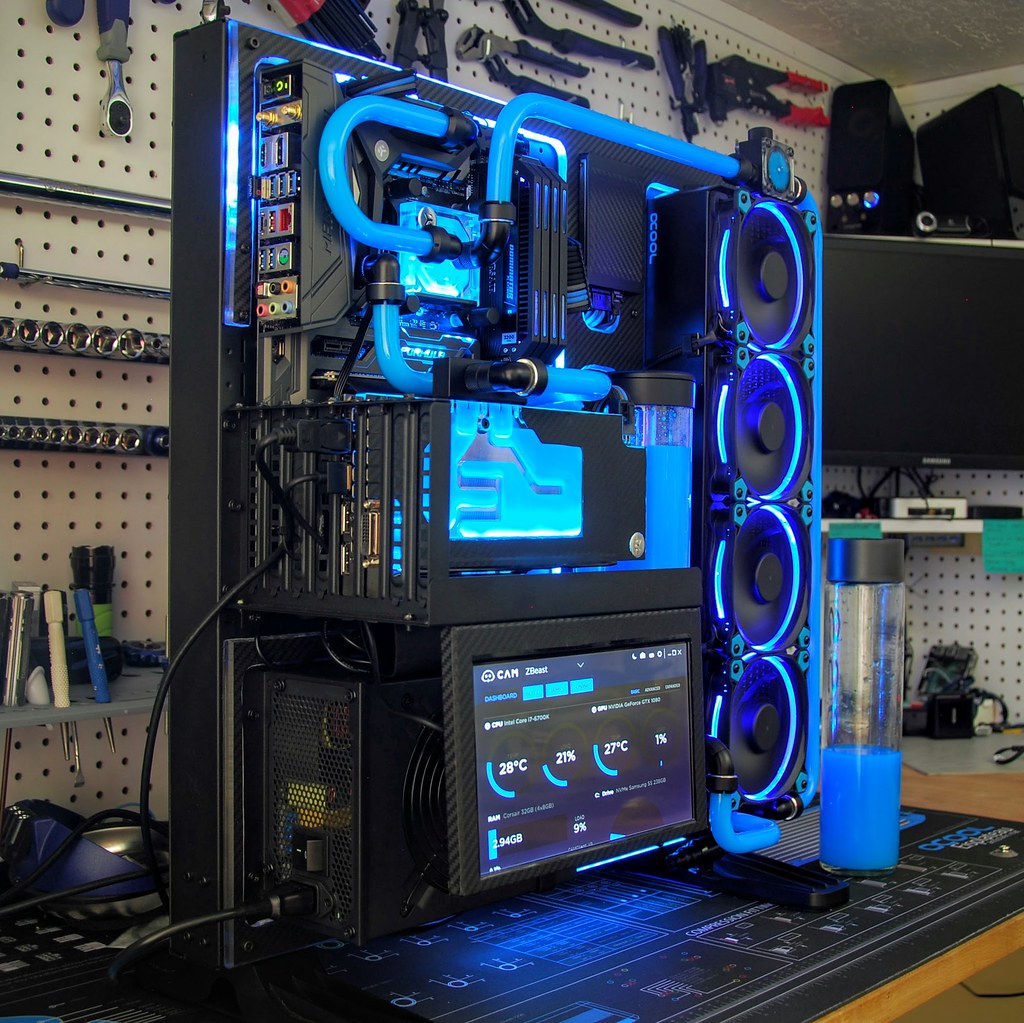
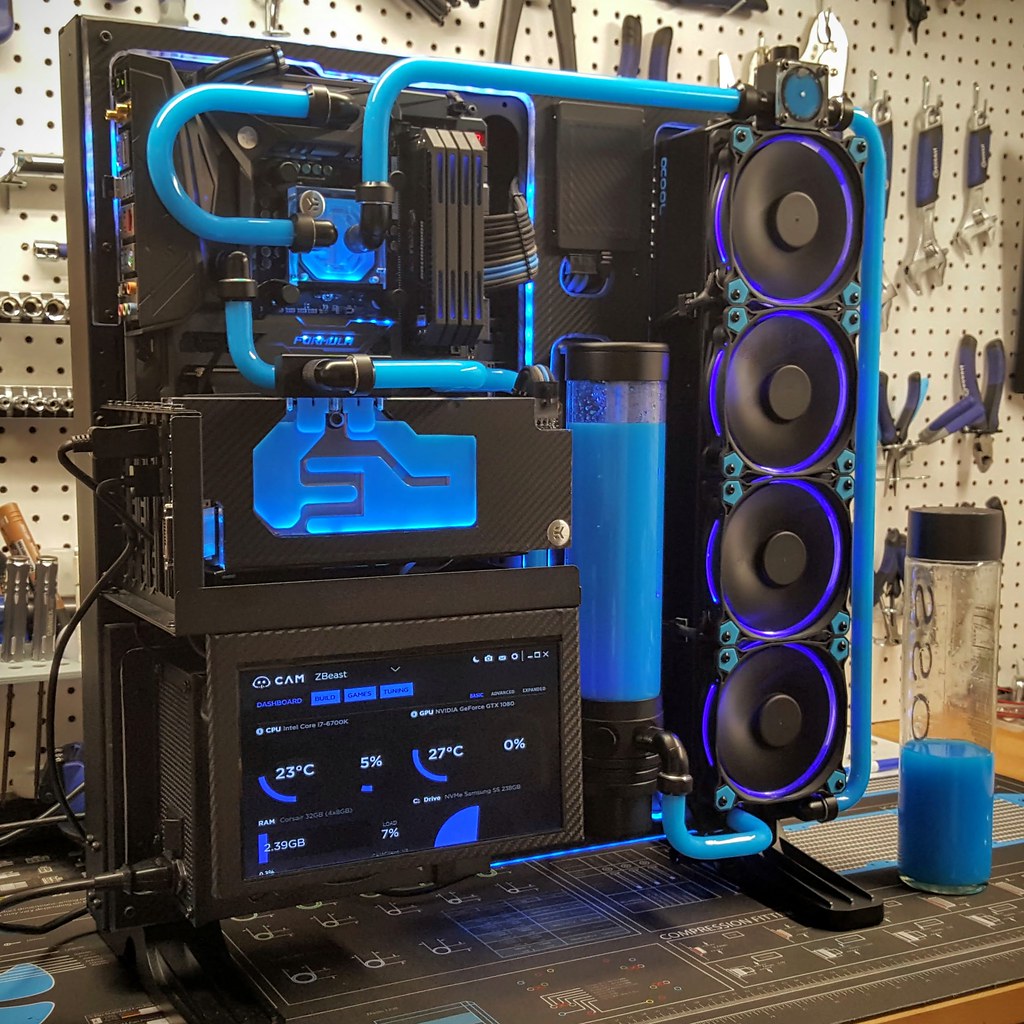
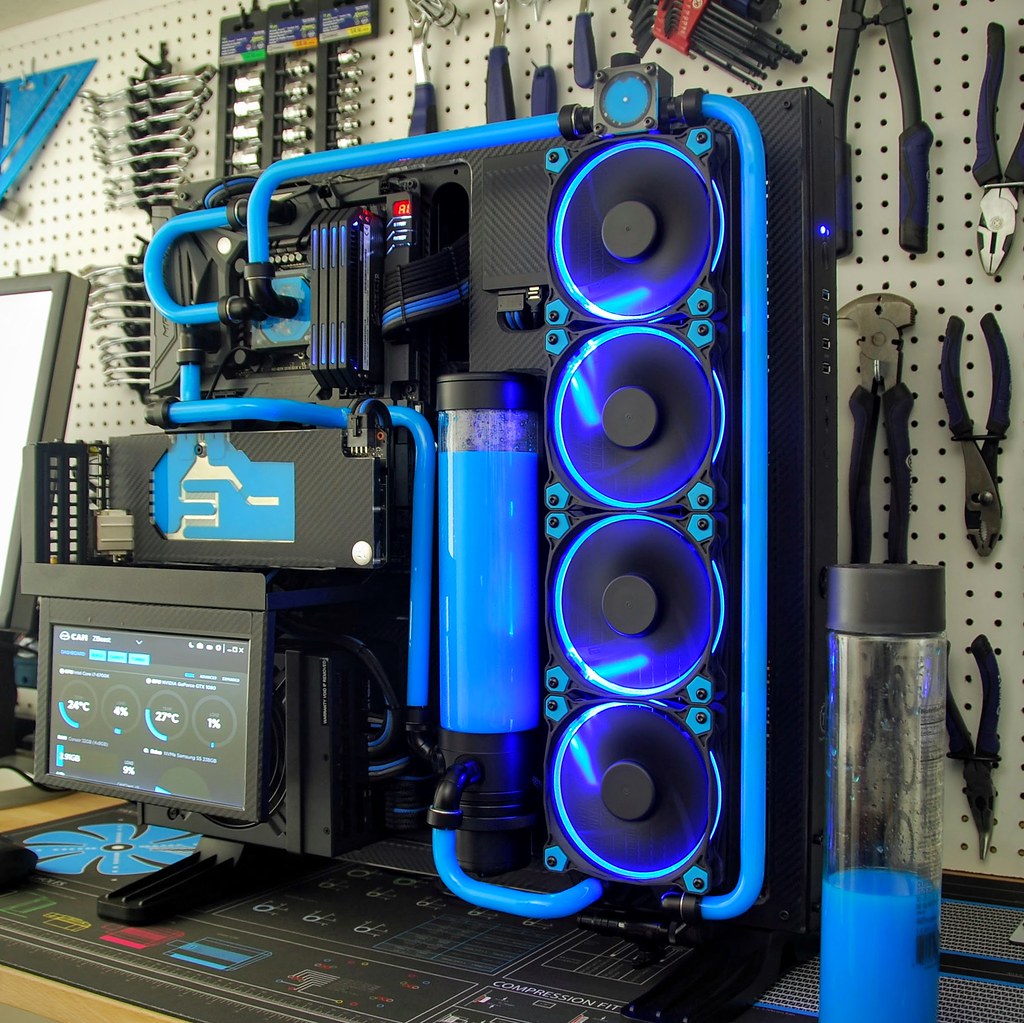
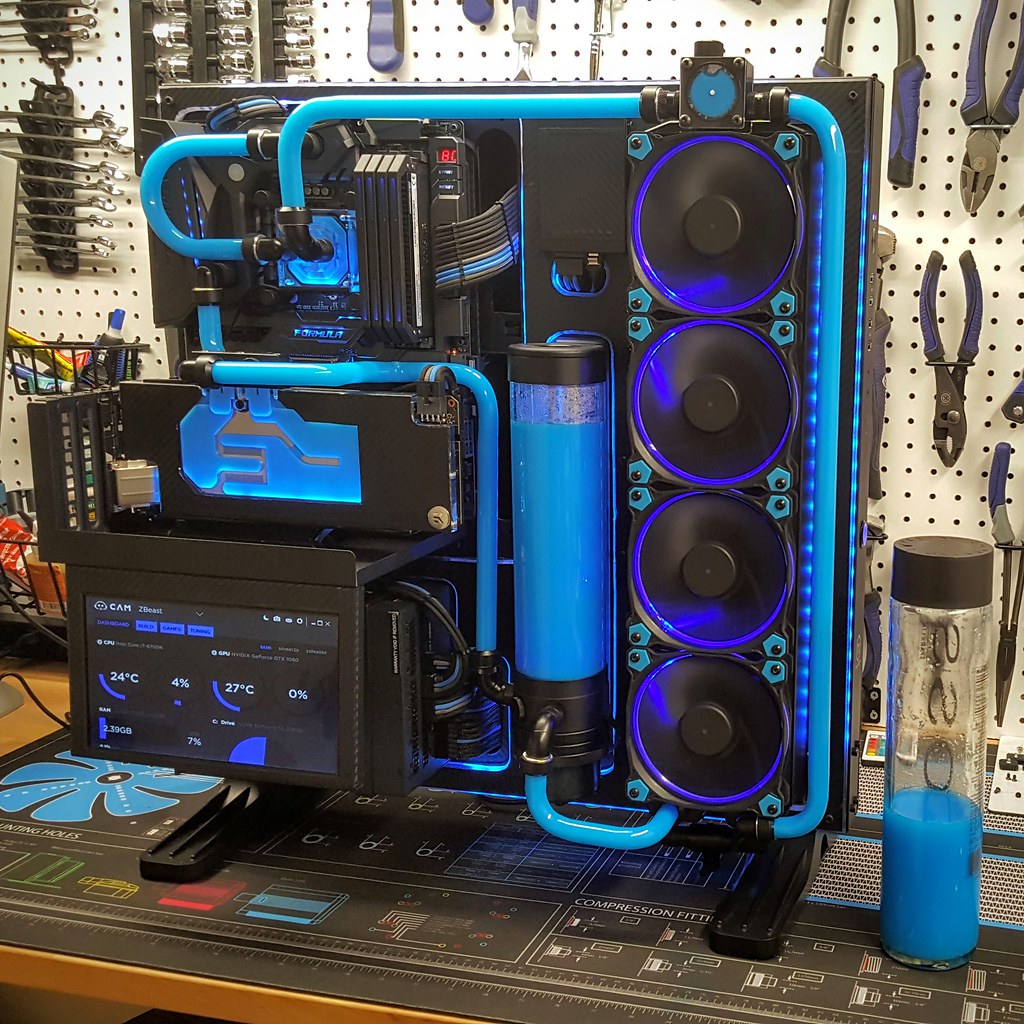
With this last set of pictures, I am officially wrapping up the build. Its has been a fun project, and I am excited to see what others can do with this particular case. Thanks to all those who commented.
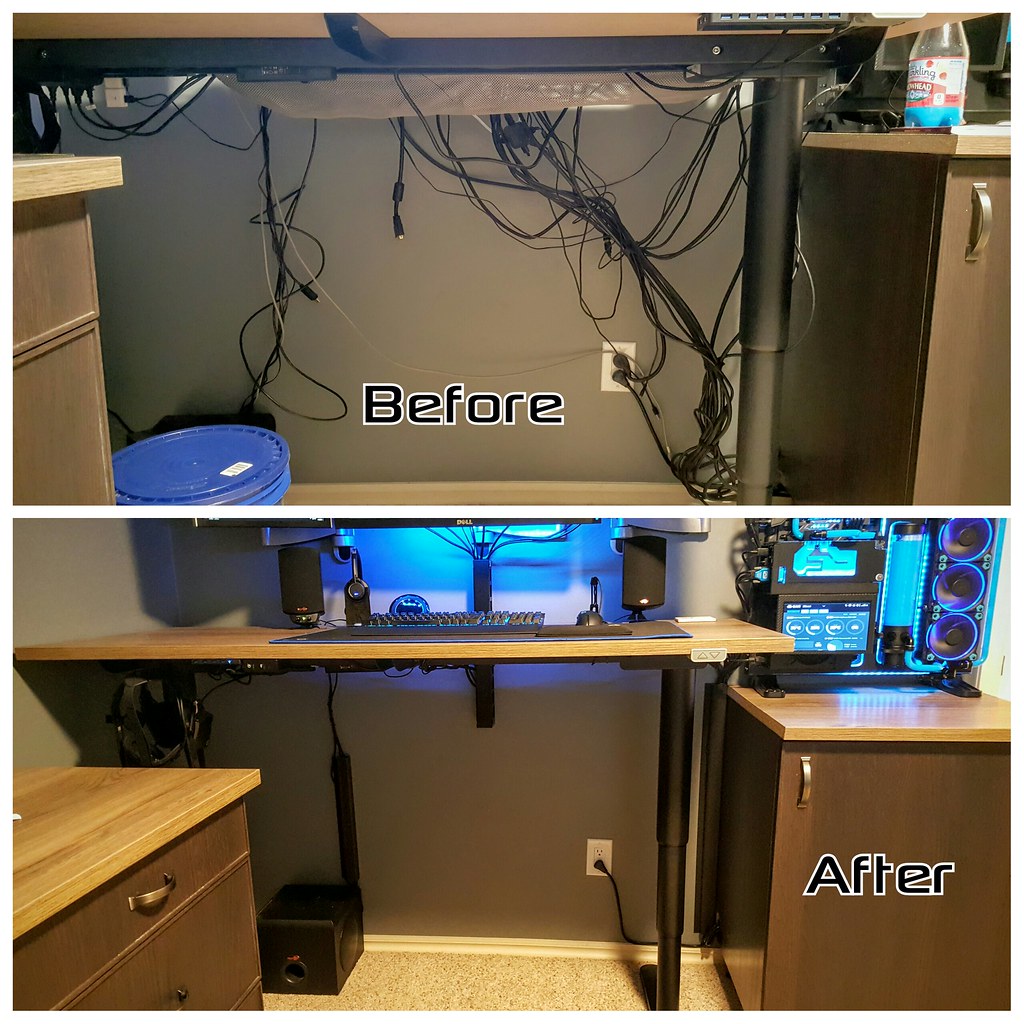
Here is some of the cable management I had to do in order for everything work work properly and of course look nice.
And here is a "BookEnd" for the project that will allow for faster navigation between the various posts that were set up for this build.
This build is DONE!! That doesn't mean I won't make any changes, as I am a constantly tinkering with things, but the core system is ready to go. I still need to moidfy a few things at my desk and route cables before I move it over, but still calling the project done at this point.
Not really any reason to describe each picture, so just going to post a bunch of them from different angles.