Featured Post

My Online Courses

Welcome to my project blog! To help you create your own versions of my projects, I've launched a series of comprehensive online courses....

Sunday, May 6, 2018

Project Ecthelion: Acrylic Divider MOD

Although I really like the Thermaltake Tower 900, there are a few things that visually I want to change. It has some large cavities towards that back that are made to route cables and tubing.  In function is is fine, but I don't like the way its looks, along with the extra row of holes and grommets. So I decided to use a section of white acrylic to cover up the areas that I find unsightly. Here is a rough sketch of what I planned to do.


In addition to wrapping the acrylic around the central storage area, I will also drill out holes for the hardline tubing to pass through.  Those holes will be cut down the road once I get the tubing bends situated and measured.

Here we have the prep tape and measurements to begin cutting the acrylic.


I opted to cut in the garage as acrylic is messy to deal with. Using some claps and a T-Square I secured everything down, and made my cuts using a jigsaw with a blade made to cut Plexiglas / acrylic.


Here we have it installed in the case. I kind of wish I would have used a matte white finish instead of glossy, but the end result will still work out.


As mentioned before, this will have to come out to drill a few more holes later in the project. Should be an easy modification.

To jump to other parts of this build log, head over to the Project Index.

Friday, May 4, 2018

Project Ecthelion: RAM Heatsink Color MOD

Continuing with the color theme we have going for the case, GPUs and Motherboard, we need to modify the 64GB of GSkill Trident Z RAM we have going into this system.  The actual heatsinks are great, with a gunmetal finish, but the red plastic highlights have to go.


Bring on the Spray Paint!  These were a bit trickier than larger components as I wasn't able to hang them from a wire like I normally do when painting. Having them propped up a bit worked, and I let them dry overnight to ensure the paint wouldn't easily rub or scratch off.


Once installed on the RAM, they look great.  Glad they were pretty easy to take on and off, otherwise I probably would have scratch a bit of paint in the process.


Here are a few shots of the RAM installed next to the white motherboard shroud and Monoblock.


Here we have them next to the modified GPU waterblocks.  Really liking how these components are coming together.


Installed, and very impressive.


Next up, going to make an acrylic backing for the case to hide some of the holes and openings for a cleaner look.

To jump to other parts of this build log, head over to the Project Index.


Thursday, May 3, 2018

Project Ecthelion: GPU Acrylic Backplates / SLI Bridge

Now that we have some really nice looking white GPU Waterblocks, we needed some backplates to match. Originally we were going to purchase metal backplates, and just paint them as we did the waterblock shrouds.  Luckily we came across another option that allowed for further customization and required no additional painting!  A company called V1 Tech offers a lot of different design options for both the “logo” and colors.

Install of these backplates is pretty easy, and there are 2 options you can choose. You can use small rare earth magnets to secure the backplate to the GPU mounting screws, or double sided adhesive tape.  We had to use the tape, as the screws in the Heatkiller block are not magnetic. Here you can see the double sided tape on top of the screws.


We removed the tabs on the other side of the tape, and lowered the backplate in to place. It lined up perfectly with our GPU, and although can be taken off if needed, it is secured very well.


Here you can see why we went with this particular backplate. Not only does it have the white the primary theme of the case will feature, but also has a great “Titan X” graphic featuring the secondary color of our theme.


Here is a side view of one of these plates installed. Obviously these will provide no cooling benefits, but even metal backplates are said to not really provide any benefits in that regard.


In addition to the GPU backplates, we also found a plate to cover the generic HB SLI Bridge for this setup. Also installed with double sided tape.


Here we have the plates installed along with the waterblock, sitting next to the motherboard.  Really liking how the colors are coming together, and the Titan X graphic looks great.  Excited to see these installed, and with some custom RGB LEDs backing them up.


Next up, painting our RAM heatsinks to match the color theme we have going with the GPUs and Motherboard.

To jump to other parts of this build log, head over to the Project Index.

Tuesday, May 1, 2018

Project Ecthelion: Waterblock Install GPU / CPU


Before jumping into the next part of the build, wanted to quickly explain the name of the project for those that don’t consider themselves “Tolkien Nerds”.  The Tower of Ecthelion, also known as the White Tower, was a tall white tower atop Minas Tirith which contained the throne of the King of Gondor. That is where the name comes from, and I thought it very fitting for the particular case we are using in this build.


We will be using a total of 3 waterblocks for this build. To cool the Nvidia Titan X GPUs, we selected a Heatkilller Nickel Acrylic block. The pictures online made it look like the shroud around the acrylic was white, which would have matched our theme well.  When they arrived, we found that they are actually a polished chrome look.


So I took out the matte white spray paint, and went to town. After a few coats, we had the exact look we originally wanted when purchasing these blocks.


x


Much better!


With the block mod out of the way, we set out to remove the stock blower heatsink from the Titan’s. These were fairly easy to take apart, but I found these particular cards used a lot more screws than the EVGA GTX 1080Ti SC2 had, which I recently installed on my primary rig.


Here we have the naked GPU, ready to be cleaned off and have new thermal pads applied.


With the new pads on, we slapped on some thermal compound and attached the waterblock to the GPUs.  Now on to the CPU block. For this build we are using an Intel i9-7980 Extreme CPU with an incredible 18 cores!  When overclocked this thing gets HOT, so we went with a block that will do an excellent job cooling this large CPU, and part of the Motherboard as well.


Here we have the EK-FB ASUS Prime X299 Monoblock. Its large, heavy, and even has RGB LEDs on the bottom to give a nice “glow” to the fluid as it passes through the block.


Since this is a Monoblock, it also cools the MOSFET modules on the Motherboard. We had to take off the heatsink over the MOSFETs as the first step, and then apply a new thermal pad.


With that, we applied thermal compound to the top of the CPU and secured the Monoblock to the motherboard. Note that for this particular block, you will use the backplate that originally came with the heatsink cooling the MOSFETs.


And here it is installed. Great looking waterblock, and really excited to see it all glowing with opaque fluid running through it.


Next up, glaming up the GPUs with color acrylic backplates.

To jump to other parts of this build log, head over to the Project Index.

Monday, April 30, 2018

Project Ecthelion: Fittings and Loop Design

For this build we will be utilizing a dual loop setup.  The First loop will be opaque white and will cool the CPU and Motherboard via a MonoBlock from EK.  The Second loop will cool the 2x Nvidia Titan X's in SLI.  The color will be blue, and using the same liquid additive that looked great in my Project Open Core (build log here), Mayhems Pastel Blue.


The Tower 900 case allows for some interesting design choices.  You can keep all of the "prettier" parts of the build towards the front of the case, and showcase nice hardline bends, while keeping the less attractive parts of the build hidden in the back, and leverage soft tubing for easier setup. Here is the diagram I made for this build to figure out how things would layout, and get a final fitting count.


For the fittings, as before I will primarily be using Monsoon Hardline fittings and various Barrow fittings for the rest of the build.  In addition to the dual loops, I have also built in a drain tube using flex tubing and a ball valve for easy fluid changes.


Next up we will start "modding" some of the hardware to match our color theme.

To jump to other parts of this build log, head over to the Project Index.

Project Ecthelion: Thermaltake Tower 900 Build (Intro)

Introduction

It's time for another custom Liquid Cooled build, and this time we are utilizing the MASSIVE Thermaltake Tower 900 case!  This is a commissioned build, using some extreme hardware, and I am really excited to get started.

Will feature dual liquid loops, one for the i9-7980 Extreme CPU, and the other cooling 2x Nvidia Titan X Pascals in SLI. We will incorporate a little bit of acrylic work to clean things up, along with some painting, and RGB lighting.  Take a look at all the components below to see just how impressive (and powerful) this build will be when completed. I present Project Ecthelion!


Project Index

Component List

Component Type (PC Hardware)

  • Case Thermaltake Tower 900 White  x1
  • Motherboard ASUS Prime x299 Deluxe  x1
  • CPU Intel i9-7980XE Extreme 18 Core Processor  x1
  • RAM G.SKILL 64GB (4 x 16GB) TridentZ Series DDR4 PC4-27200 3400MHZ  x1
  • Video Cards Nvidia Titan X Pascal  x2 SLI  x2
  • GPU Backplate Titan X Design x2 Color Backplates  x2
  • SSD NVMe Samsung 960 Pro M.2 2TB x2 (RAID)  x2
  • SSD 2.5in Samsung 860 EVO 1TB x1
  • Power Supply EVGA SuperNOVA 1000 P2 80+ PLATINUM, 1000W  x1
  • Custom Cables Blue and Black sleeved  x1
  • OS (Dual Boot) Windows 10 x64 / OSX (HackinTosh)
  • Fans / Lighting NZXT RF-AR140-C1 HUE+ & Aer RGB140 Fans Bundle Pack  x1
  • Lighting NZXT HUE+ Extension Kit LED Strips  x2

Component Type (Liquid Cooling)

  • Reservoir / Pump Thermaltake Pacific PR22-D5 Adjustable D5 Pump/Reservoir Combo  x2
  • Fans (Radiator) Corsair ML120, 120mm Magnetic Levitation SP Fan (2-Pack)  x3
  • Radiator XSPC EX360 High Performance Radiator  x2
  • Tubing (Hard) Monsoon Hardline PETG Tubing 1/2" ID, 5/8" OD (16mm) 36inx3  x1
  • Tubing (Soft) PrimoFlex Advanced LRT 3/8in.ID x 5/8in.OD Tubing Bundle (10ft pack)  x1
  • Fittings Monsoon to 1/2" ID, 5/8" OD Hardline Eco V2 Compression Fittings x6  x3
  • Fittings Barrow G1/4" Fittings (Various)  x46
  • Fittings XSPC G1/4" Ball Valve, Black Chrome  x2
  • Waterblock CPU EK X299 Monoblock  x1
  • GPU Waterblock Watercool HEATKILLER for Titan X Pascal - ACRYL Ni  x2
  • Coolant Additive Mayhems Pastel Concentrate White - 250ml  x1
  • Coolant Additive Mayhems Pastel Concentrate Blue - 250ml  x1
  • Misc Barrow Replacement G1/4" O Ring - 10pcs - Blue  x2

Component Type (Mini Case Display)

Friday, December 15, 2017

Review - NESPi Case for Raspberry Pi Console & Arcade Emulator

I have been building mini Emulator Consols for a few years now, and not much has changed in case design. They all house a Raspberry Pi, and give access to the required I/O Ports. They have worked fine, but were pretty simple in design and apperance.

I recently came across a new case that really takes it up a step in quality, presentation, and functionality. Meet the NESPi Case for the Raspberry Pi (Amazon Link).  It will house a Pi B+, 2, and 3.  Aside from a pretty well built case quality wise, it does 3 things that no other case I have seen has been able to achieve, especially at this price point.
     1) It has working Power and Reset buttons in the front of the case
     2) Working LED indicator when the system is powered on (usually I have to add this via a mod)
     3) Reorientation of Port to for a better look and easier cable management

Here is a side by side comparison of some other Pi cases I have to give you a better idea of how large it is.  It is a tad bigger than normal Pi cases, but nothing even close to the size of the original NES console which it mimics.


By using a series of breakout boards, all 4 USB are located in the front, 2 in the where you would normally plug in your controllers, and 2x hidden behind the hinged lid along with the Ethernet port. Power and HDMI ports have also been relocated to the back of the unit. Shown here is everything that comes with the case, including the very simple instructions (Rapsberry Pi does not come with the case).


Here you can see where the Pi installs next to the breakout boards.


And again a view from the front showing the USB and Ethernet ports.


Here you can see the functional LED indicator showing the system is powered on.


And here are views from all the sides of the unit.


Overall I am very pleased with this case, and it is now my "go-to" for my personal systems and those I build for friends and family. For a more detailed walkthrough and to see this particular unit in action, check out the video below.


Monday, October 2, 2017

Prusa i3 MK2s 3D Printer Upgrade Timelapse Video

I have been planning on upgrading my Prusa i3 MK2 to the MK2s version for a while now.  After the MK2s was annouced, I set forth to get the required components. Most of the 3D Printed parts were readily available on the Prusa web site, but I also found a few upgrades (Aaron Yourk's TinkerCAD page) that I wanted to include this time around. Here is a full list of what I decided to modify.
  • Upgraded MK2s Extruder Assembly with Cable Chain adapter
  • New E3D V6 Hotend (last one was pretty messy)
  • Upgrade to 40mm Noctua Extruder Fan and housing
  • Upgraded Cable Chain for Extruder Cables
  • New Y-Axis frame helper to keep things square
  • New Misumi Bearings
  • New Misumi Hardened Rods
Here is a pic of the current MK2.  Has been operational for around 7 months, and prints really well. Very happy with it, but I know from user feedback better bearings and rods will make for quieter operation and possibly allow for faster print times.  


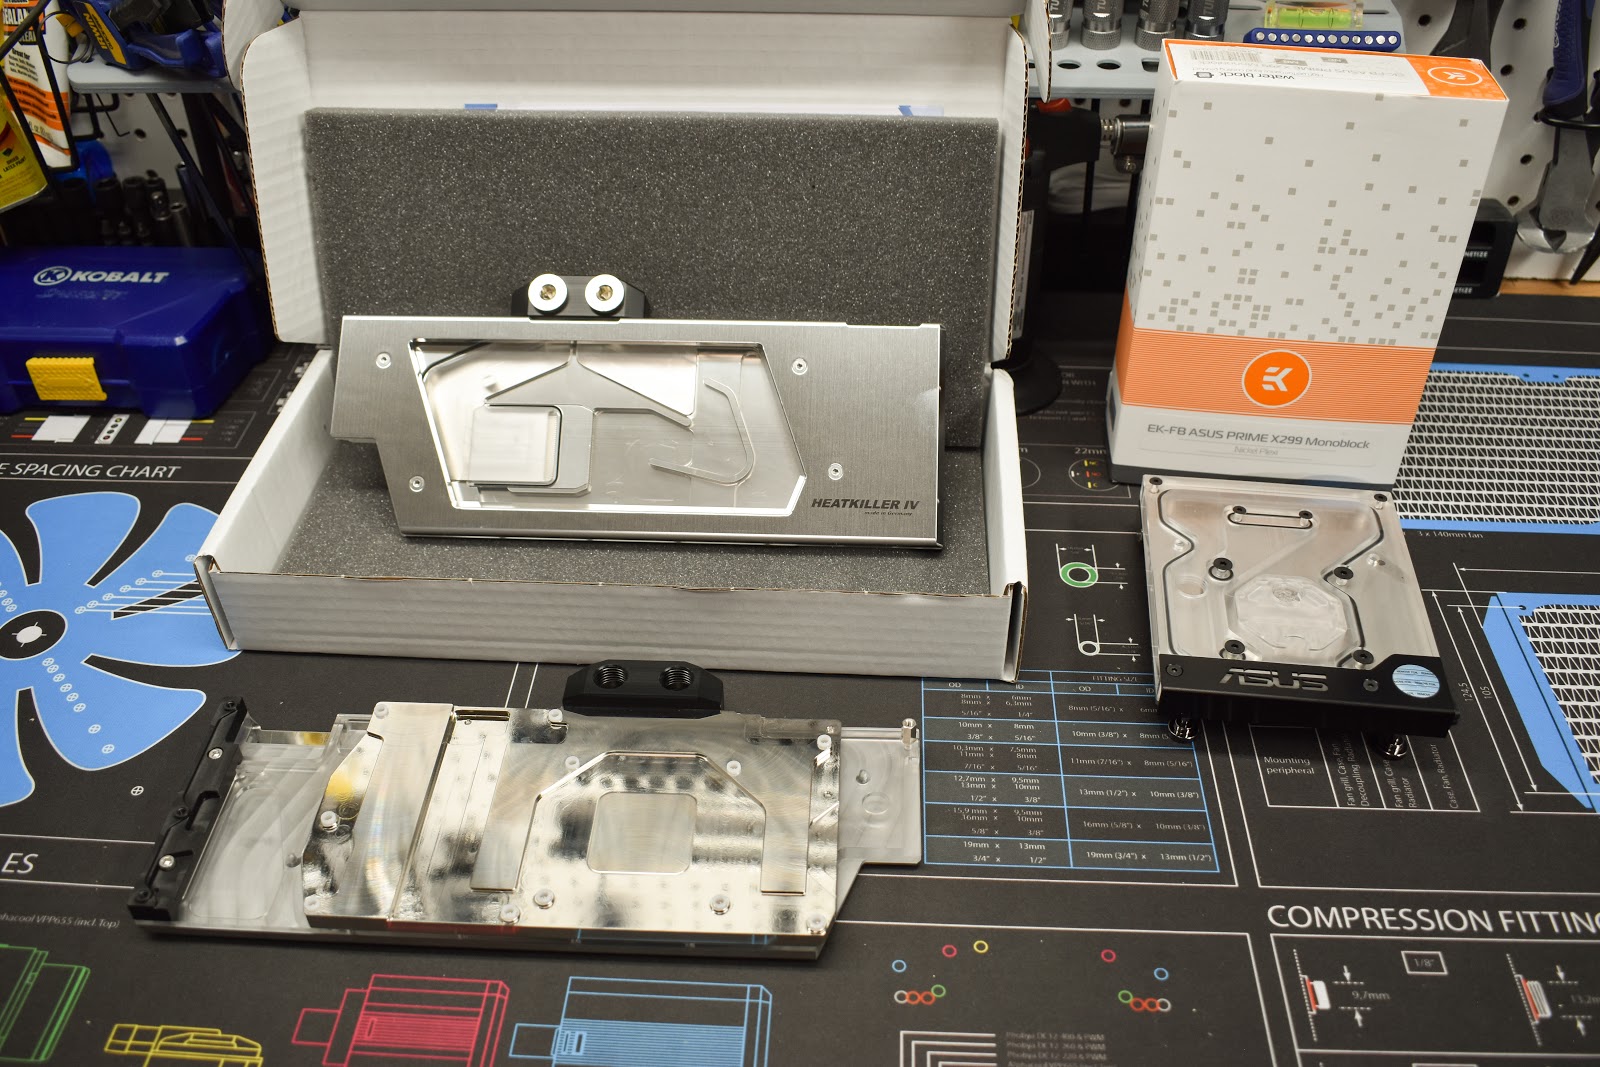
I have a bunch of picture following the process, but if you are just interested in the timelapse video, jump to the bottom of the post.  For anyone interested in the Misumi parts, here is what I purchased:


Here we have all the  parts that will go into the upgrade. Anything around the extruder where it will get hot were printed in ABS, the rest are PLA. 


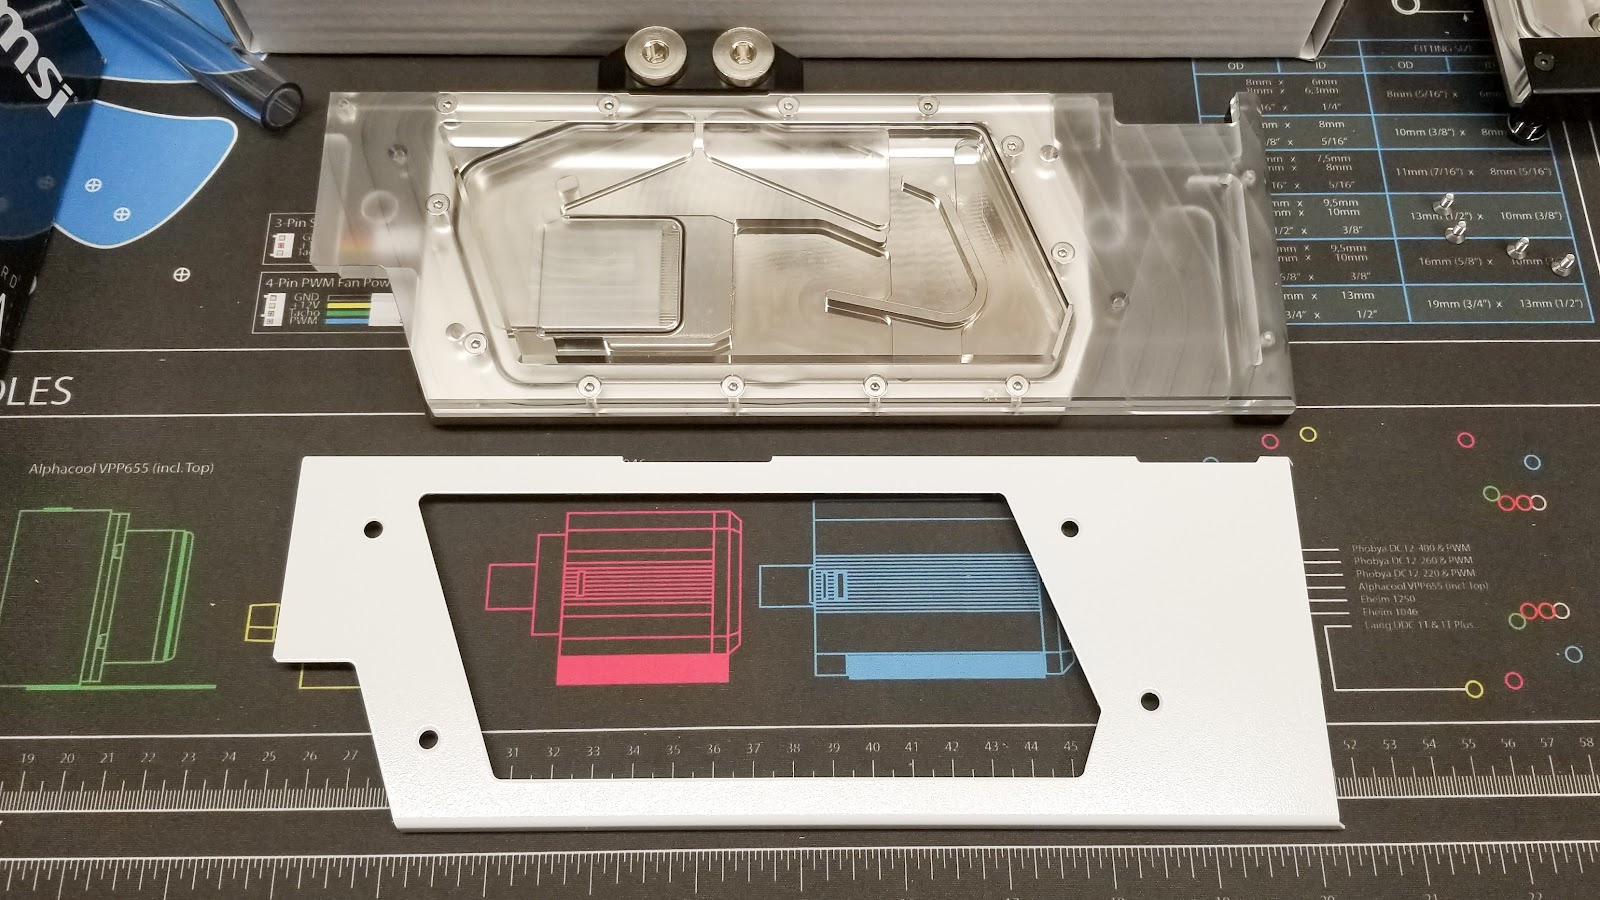
Here is a close up of the parts.


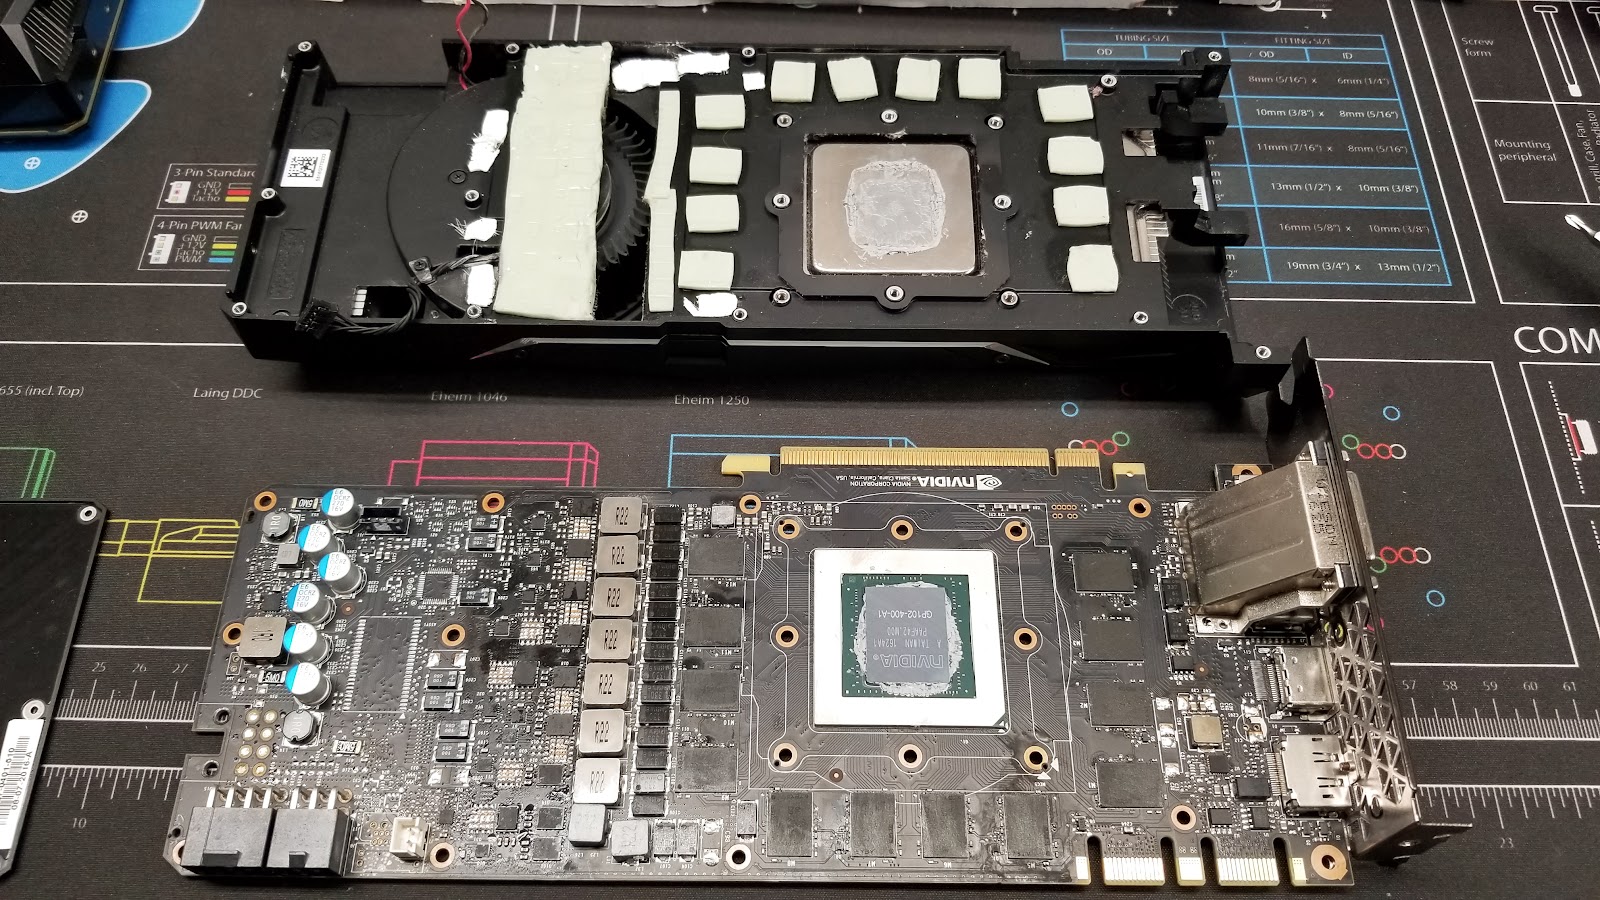
First step was to take apart the existing printer and start assembling the new frame. The upgraded Y-Axis front and back make the entire process much easier, and there is no room for error as it keeps everything nice and square. This is a great upgrade because getting the frame perpendicular was a real challenge with my first Prusa i3. 


With the frame assembled, I got to work on the X-Axis components and extruder assembly. Most of this would be stock components aside from the new 40mm Noctua Fan and Fan Guards. 


Went through the process of attaching the extruder assembly to the X-Axis and leaving the cables behind, awaiting the addition of the cable chain.  As mentioned before I decided to install a new V6 Hotend, as the last one was pretty messy after a few print failures that caused the filament to backup. 


Same but from the front. 


Here is a shot from the back showing the cable chain.  I actually added a few more links (24 total) than what are shown in this picture after testing operation and determining I needed more for it to not bind during certain points of movement. 


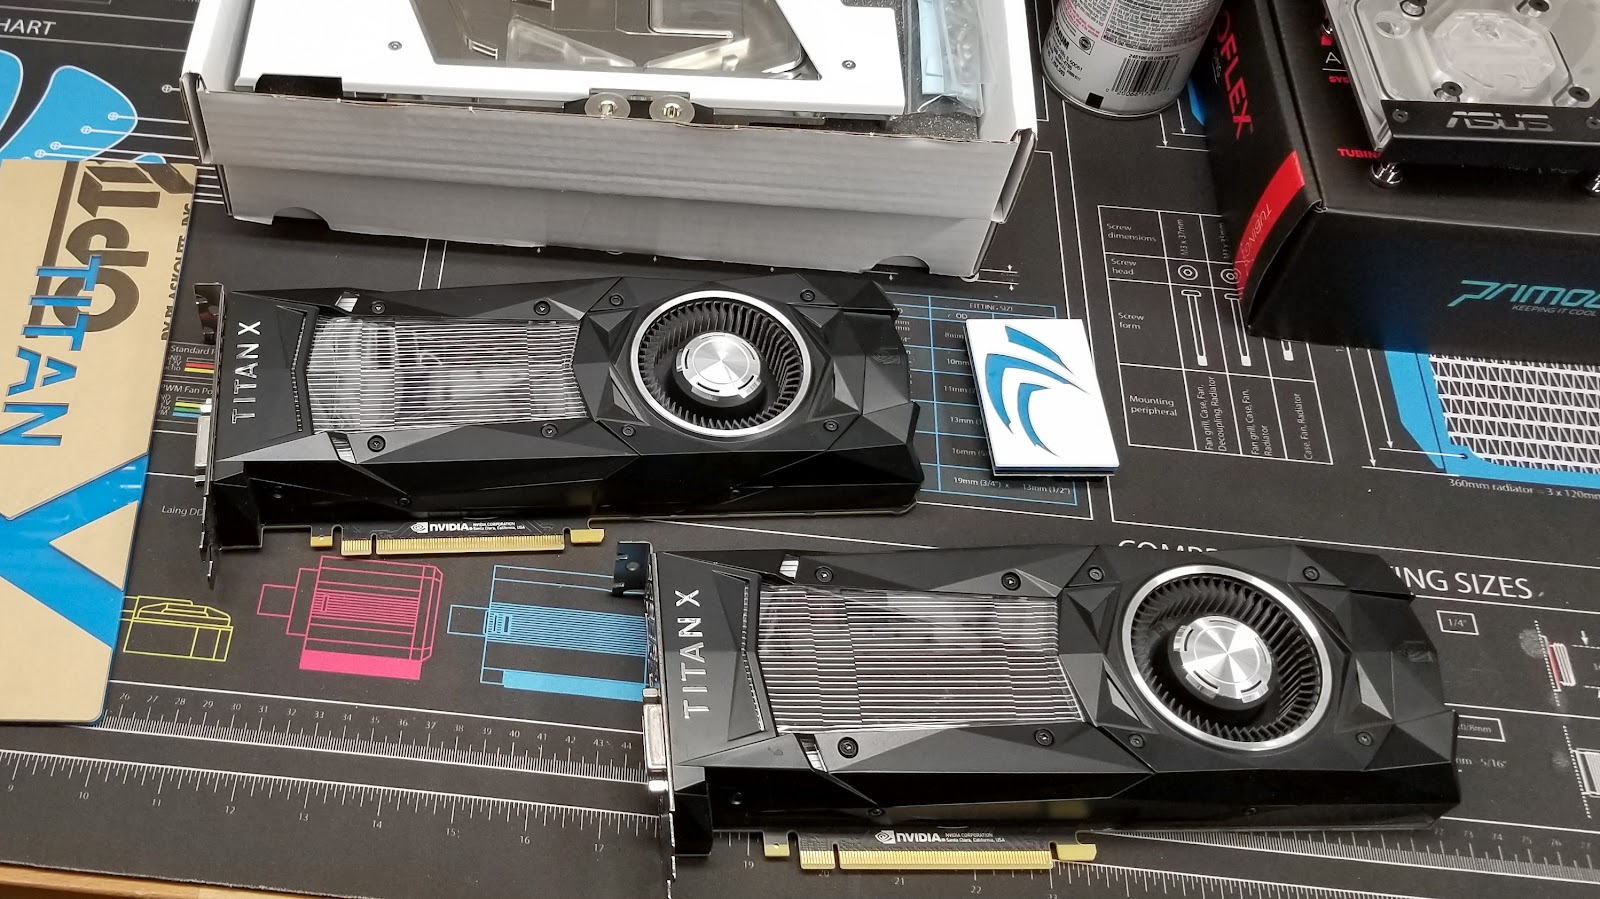
Here we have the fully assembled printer in a side by side comparison withe the previous MK2 configuration. I think the Black / Blue color combo looks a lot better. 


Went through the initial calibration process, and we are Perpendicular after the first try!  Last time it took me a while to get here, so the upgraded parts are already doing their part in saving me time. 


Here is a pic of everything put back into the print Enclosure, ready to start printing. 


My very first print was the TreeFrog Gcode found on the SD Card.  It printed well, so I moved on to some "functional parts". Below can be seen a few parts that will go towards upgrading my Quad Racing Drone. Turned out perfect. Print quality is excellent, and operation is a bit more quiet. 


Very happy overall with how the upgrade turned out, and was also able to capture the entire process with my Nikon D5600 in a Timelapse video. Check it out below.