Featured Post

My Online Courses

Welcome to my project blog! To help you create your own versions of my projects, I've launched a series of comprehensive online courses....

Sunday, January 26, 2014

Quadcopter Drone - UAV with a GoPro

And so it begins...

After roughly 6 months of getting all the parts together (many directly from China which is what took so long), I am ready to start a new project.  I am building a Quadcopter (4 prop) Drone, better known as a UAV (Unmanned Ariel Vehicle).  The controller range of this device should be around 1km, with a flight celing height of about 200m.  I know it can go higher than this, but the risk of losing the device due to signal interruptions and high winds (not to mention current FFA regulations limiting drone flight above 500ft), make going any higher a bad idea.

I will also be strapping my GoPro Hero3 (Black Edition) camera to the drone for aerial video, and eventually enabling FPV (First Person View) flying.

There are a TON of parts that will go into the construction of this drone.  Here is a list of the primary components, and farther down this post, I will included a more detailed parts list:
  • DJI F450 Flame Wheel Kit (frame, legs, motors, and ESCs)
  • Turnigy 9XR Transmitter (Controller)
  • FrSky 2.4GHz (Transmitter / Receiver combo)
  • Hobbyking KK2.1 Multi-rotor LCD Flight Control Board

The last part I was waiting on came in just a few days ago, but I will be traveling a bit for work over the next few weeks and won't be able to do much until I get back.  I wanted to at least get everything together to see what I will be working with before I left.


Larger Image

And here is the more detailed Parts List.  Things may change as the build progresses, but I am pretty sure this will get me off to a good start.


Part Qty Model
DJI F450 Flame Wheel Kit 1 DJI F450 Flame Wheel Kit
DJI F450 Flame Wheel Frame 1 DJI F450 Flame Wheel Frame
Motor 4 Dji 2212 Electric Motor
Propellers 2 Dji 1038 10" CW/CCW PROPELLER SET
Electronic Speed Controllers 4 Dji ESC 30A
Battery Charger 1 Turnigy Accucel-6 50W 6A Balancer/Charger
Power Supply 1 Hobbyking 60w Power Supply (4A)
Battery (Drone) 2 Turnigy 3600mAh 3S 30C Lipo Pack
Flight Controller 1 Hobbyking KK2.1 Multi-rotor LCD Flight Control Board
Voltage Status LED 1 KK2.0 Super Bright Status and Alarm LED
Flight Controller Flashing Tool 2 USBasp AVR Programming Device for ATMEL
Flight Controller Flashing Cable 1 AVR Programming Cable
Flight Controller Housing 1 KK2.1 Delrin Protection Case V3
Transmitter 1 Turnigy 9XR Transmitter Mode 2 (No Module)
Battery (Transmitter) 1 Turnigy 11.1v (3s) 2200mAh 1.5C 
Transmitter Module 1 FrSky 2.4GHz TELEMETRY Transmitter Module
Receiver 1 FrSky V8FR-II 2.4Ghz 8CH Receiver (HV)
Legs / Landing Gear 1 F450/550 Flamewheel Legs
Vibration Dampening 1 Align PU Adhesive Gel
Vibration Dampening 1 Vibration Dampeners M3x8 - Set of 4
Misc Parts 2 Male XT60 connectors (5pcs/bag)
Misc Parts 2 Female XT60 connectors (5pcs/bag)
Misc Parts 1 XT60 Male w/ 12AWG Silicon Wire 10cm (5pcs/bag)
Misc Parts 1 XT60 Female w/ 12AWG Silicon Wire 10cm (5pcs/bag)
Misc Parts 1 Extreme accuracy Prop/Rotor balancer
Misc Parts 1 Battery Connection Wires
Misc Parts 2 Turnigy Battery Strap 330mm
GoPro Mount 1 Batwing Camera Mounts
GoPro Strap 1 Go Pro 3 Strap (Blue)


There were some other small connectors and cables that will also be used, but I already had them from other project, and did not include them in the above parts list.

Next up is the construction of the F450 frame and soldiering the power contacts to the circuit board.  Stay tuned!


Project Index


Saturday, November 2, 2013

[REVIEW] COD iONIC Screen Protector for Samsung Galaxy Note 10.1 (2014 ed) - Anti-Glare vs Ultra Crystal

Hey Guys.  Recently got a hold of the new Samsung Galaxy Note 10.1 (2014 Ed) tablet.  It has probably the BEST screen on a mobile device right now (2560x1600) so I wanted to make sure to protect that panel.  Went ahead and purchased both the Anti-Glare and the Ultra Crystal version of the COD iONIC screen protectors, so that I could do a good comparison between the two of them. The following prices are on Amazon as of Nov 1, 2013:

COD Screen Protector Film Matte (Anti-Glare) for Samsung Galaxy Note 10.1 2014 Ed (3-pack)
$4.85 (+$3.85 shipping)
COD Screen Protector Film Clear (Invisible) for Samsung Galaxy Note 10.1 2014 Ed (3-pack)
$9.85 (free shipping with Prime)

I took a few up close pics with my DSLR to compare text clarity, and also have a video review to compare in addition to calrity, light diffusion, and how they work with the S Pen.


Here we can see all that is included in the packaging.  Each comes with 3 protectors, a microfiber cloth, installation card, and a sticker to remove lint or fuzz that might get stuck under the protector during the install process.


I did a video to better compare not only text clarity, but also light diffusion, and to show how well the S Pen works with each.


Here is a up close picture to compare the text behind the two protectors.  Overall they both look pretty good, but there is a tiny bit of distortion on the Anti-Glare side.


After using both of these protectors you really can't go wrong with either one.  But if you plan on using the S Pen a lot, go with Ultra Crystal and you will be happy.  Thanks for stopping by.

Monday, August 5, 2013

CASE MOD - Poetic Slimline for SamSung Galaxy Note 8

Ok, so the title of the post is a bit misleading... this isn't a true "Case Mod" as the term is intended for PC Case modifications.  Even though this little modification on my tablet case is really simple, it turned out to work really well and deserves a post.  Plus I am going to just copy and paste this info over on XDA-developers for those who can actually make use of it.

I recently started using the Poetic Slimliine Case for my Samsung Galaxy Note 8 tablet and really like it. Thin, light, Sleep/Wake function, and good protection.  The only thing it is missing in my opinion is an elastic holder for a larger S Pen.  I realize the Note 8 already has an smaller S Pen inside the tablet body, but the larger versions you can purchase from Samsung or Wacom are better for taking notes as they are the size / weight of a normal pen, and the back works an an eraser tool for most applications that work with the SPen (S Note, Papyrus, etc).  Here is the one I purchased.  It works really well, much more accurate that the crappy types of stylus you can get for other tablets, accurate and feels very close to pen / paper.


To fix this issue, I commissioned my wife to help with her sewing skills.  Purchased a roll of 1.5in wide black elastic from Hobby Lobby, and had her sew some loops on the top of two bands.


I was going to glue the bands to the inside of the case, but found it wasn't necessary.  The friction grip that occurs once the tablet is snapped into case is plenty strong enough to keep them in and from moving around.


Here we have it installed.  It keeps the Pen securely in place, and is very easy to access.  Also doesn't get in the way when holding the tablet in any orientation.
 Here is a shot from the back.  It is flexible enough to easily plug into the headphone jack.  Doesn't hinder anything on the device.

Overall, this little $2 upgrade has made this case perfect for me now.  Very happy with how it turned out.

Sunday, July 14, 2013

Tannerite vs a Microwave & Cantaloupes

Did a bit of shooting this weekend, and decided to use up some of the Tannerite that I had sitting is my storage room.  Shooting Tanneriate in the containers that it ships in is fun and all, but its a lot MORE fun to put it inside things and watch them go boom.  Here is a little background on what Tannerite is for those who don't know.  From the Tannerite web site:

Tannerite® is a binary explosive used primarily as a target for firearms practice. Tannerite is unique in that it is exceptionally stable when subjected to less severe forces such as a hammer blow or being dropped. It is more than 1000 times safer than ordinary black powder since it is not flammable and can not be initiated by any kind of flame or electricity.  It is supplied as two powders which are combined to produce the explosive.

Tannerite® Company recommends using 0.5-pound (0.23 kg) preparations of the substance, which should detonate when shot by a high-powered rifle. Small caliber rim-fire or slow moving pistol ammunition will not initiate a detonation.

Tannerite® detonations occur at a very high velocity, producing a large explosion and cloud of water vapor. It may be useful for persons who are firing at long ranges; in this scenario, a long-range rifle shooter places targets downrange, retreats to his firing position, and fires. The shooter does not have to walk down range to see if he has a hit, the Tannerite® will detonate and serve as an indicator.
Since the two components are not explosive until mixed, they can legally be purchased in the USA without a license.  They can be legally used for sporting purposes in conjunction with small arms, just like black powder and other exempt sporting powder.

So now that you know what it is, take a look at the video below to see what fun it can be!  I basically just mixed the Tannerite, and placed it into smaller containers, which I then inserted into cantaloupes.


We also used 2 full size containers inside of an old microwave for an impressive demonstration.  Cantaloupes were shot with my AR-15 (5.56mm), microwave was done using my M1A (7.62mm).


Wednesday, March 13, 2013

Install Novelty Ejection Port Cover on AR-15

Around 2 years ago, I purchased a novelty ejection port cover for my Rock River Arms AR-15.  There are lots of these floating around, with various emblems / sayings on them like "Infidel", "ΜΟΛΩΝ ΛΑΒΕ" (Greek: Come and Take), "Get Some", and other more colorful sayings.  Mine is pretty simple and has "Zombie Hunter" etched onto the metal.

The other day, while cleaning my rifle, inside my cleaning tote I came across the port cover that I had completely forgotten about, and decided it was time to install it.  Here is what is needed to complete the task.
  • Novelty Ejection Port Cover
  • Small Needle-nose Pliers
  • Small Roll Punch Pin
  • Tape of some kind
Here is a quick diagram that shows the parts that we will be dealing with:


There are 2 ways to go about replacing the port cover, and I am going to show the easier of the two.  The "correct" method is to remove the the entire barrel assembly (Delta Ring and all) from the Upper Receiver, and slide the ejection port pin out towards the barrel.  But that is way too much of a pain for this simple upgrade.  The method that I will show here took all but 5 minutes to complete.

Start by placing a tape on the Forward Assist so we don't scratch the pretty gun metal while extracting the pin.  The pin will be extracted towards the stock of the rifle.


But first you will have to remove the Pin Retaining Ring.  This can be a challenge as it is extremely tiny, and a tad difficult to remove.  I simply put my small Roll Pin Punch on one side of the ring's opening, and the small Needle-nose pliers on the other and pushed them in the same direction (away from the ring's opening).  BE CAREFUL!!  The ring can shoot off in any direction, and can be hard to locate because of its size.  You have been warned.


With the ring off, we can now gently slide the Ejection Port Cover Pin out towards the stock.  Make sure to secure the Ejection Port Cover Spring before fully extracting the pin being that it can fly off as well.  With the pin fully extracted, replace the old cover with the new one, and line the spring back up where it was previously found.  You will have to bend the longer arm of the spring back a tad so that it will "push" open the Ejection Port Cover when activated.  With everything in place, slide the pin back in towards the barrel.  Once fully inserted, you can now snap the ring back onto the pin.  Easiest way I found was to simply grab the back of the ring with the pliers and push it onto the pin.  Here we have the new cover installed.


That was pretty simple with the right tools, and after 2 years of sitting in the bottom of my cleaning tote, it is finally installed.  Here is a Before and After to compare. 


 Thanks for visiting!


Thursday, November 15, 2012

Project Bright Panel: Final Build Pics


Time to wrap this build log up. It has taken much longer than anticipated, but its finally done, turned out better than I had expected, and of course it also overclocks and performs like a champ. I am going to post a smaller version of each picture in the post, and below each picture, a link to a full size version of the image for those who want some close ups.


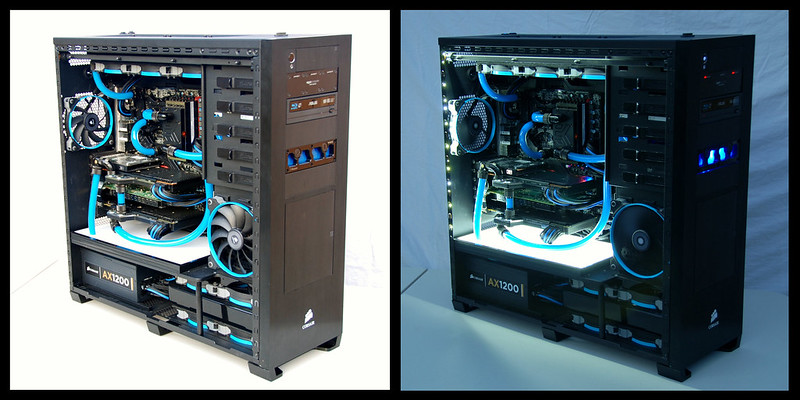
Here we have an angled side shot of the case with the window removed. Really pleased with how the colors of the liquid turned out, matching the Corsair fan rings.


Large Left Image
Large Right Image


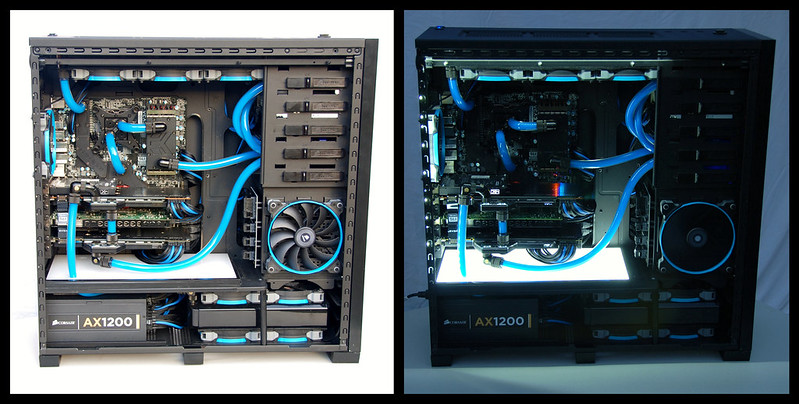
Here we have another shot, directly from the side.


Large Left Image
Large Right Image


Shots with the windows installed. Looks great.


Large Left Image
Large Right Image


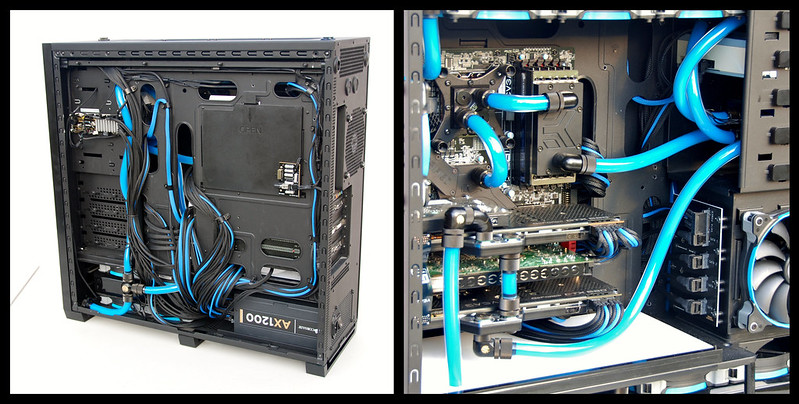
Here we have my attempt at cable management. I did what I could to keep it clean back there, but it was difficult to deal with that many cables, along with their added thickness due to the sleeving, which looks awesome by the way.


Large Left Image
Large Right Image


Here are some artsy fartsy close up shots :D I'm really not that great with a camera, but I wanted to try and get a few shots with my Nikon D80 of the build that were different from the usual side and angled ones we typically see.


Large Left Image
Large Right Image

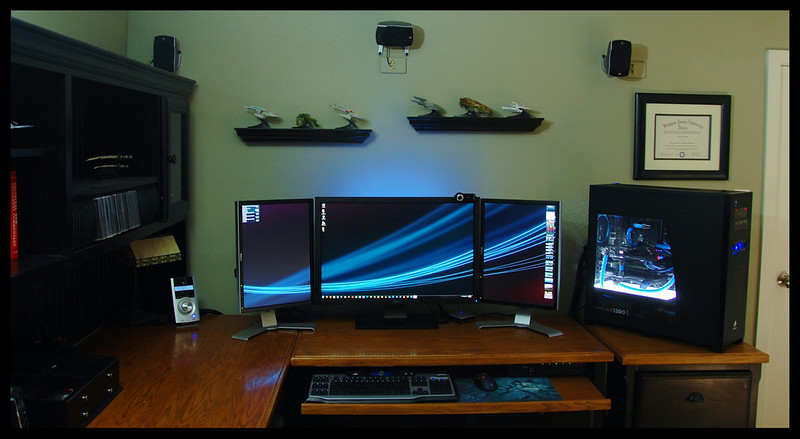
Now on to the Workstation. Using a Dell 3011U as the main display, flanked by a 2007FP on each side for a total resolution of 4,960 x 1,600. I really like how everything works together, and all of that screen real estate is great for productivity... and of course gaming.

Large Image

Well... that's it! Time to put away the modding/build hat for a while, and enjoy my PC. Thanks to everyone for their support and input. If you guys have any questions for me, I am more than happy to help out. Thanks for looking.

Project Index

Monday, November 5, 2012

Project Bright Panel: New Primary Display

Uh oh... I may need to upgrade my graphics cards now after the newest edition to my workspace. :p Going from a resolution of 1920x1200 to 2560x1600 is going to put even more stress on my good ole 580s in SLI.

 
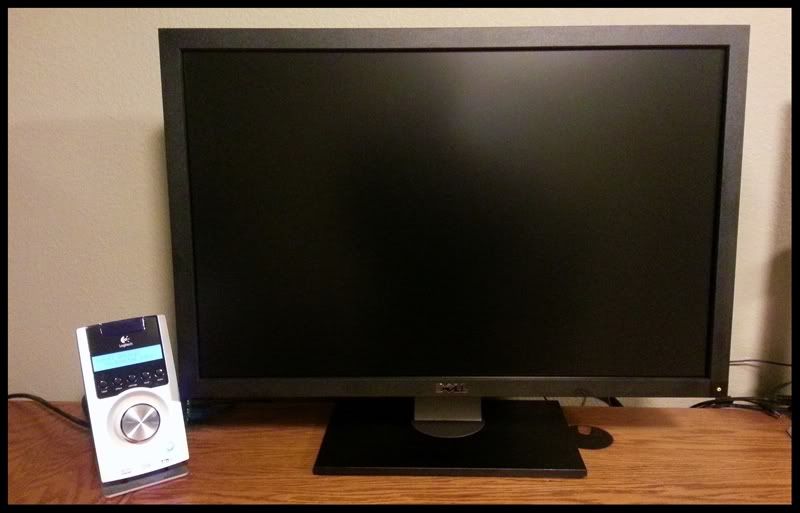
 I finally scored a Dell 3011U monitor! Been wanting a 30in panel for a while, and now my workspace / man cave is in my eyes complete. I will be flanking it with a Dell 2007FP Ultrasharp (1600x1200) on each side, rotated in portrait mode, giving me a semi 3D wrap-around effect with a total resolution of 4,960 x 1,600. :

I am still sorting through the last of the final pictures, and will be posting them all soon. Stay tuned!

Wednesday, October 17, 2012

Project Bright Panel: Battle of the Fan Controllers

Ok, it is review time.

Click on the link below to launch a YouTube video I made that shows both the hardware and software in action.

Video - Corsair Link Cooling & Lighting Kit Overview

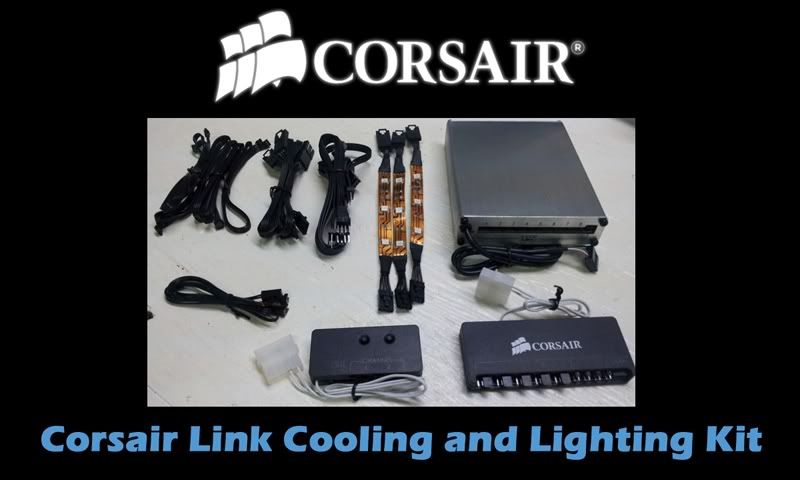
I have two control systems that I have had a chance to play with for the last few days.  I will first post my review for the Corsair Link Cooling & Lighting Kit, followed by the AquaComputer Aquaero 5 LT.  Each contains a video walk-through showing the components and the software, followed by more detailed screen captures of the various setup screens of the software.  And here we go...


The Corsair Link Kit comes in to variants.  The Basic Cooling kit which comes will all that is necessary to control your fans.  Then there is the Cooling & Lighting kit which controls fans and comes with a Lighting Node which controls the RBG LED lighting strips.  
Both kits include one (1) Controller Node which has 5 fan connectors, and a few temperature sensor plugin locations.  Each fan channel can support up to 2 amps, and the node can support a maximum of 4 amps total across all channels.  That being said, if someone is wanting to control both fans, and a liquid cooling pump, they would most likely have to purchase a second Control Node as the single one would be quickly maxed out with multiple fans and pumps.

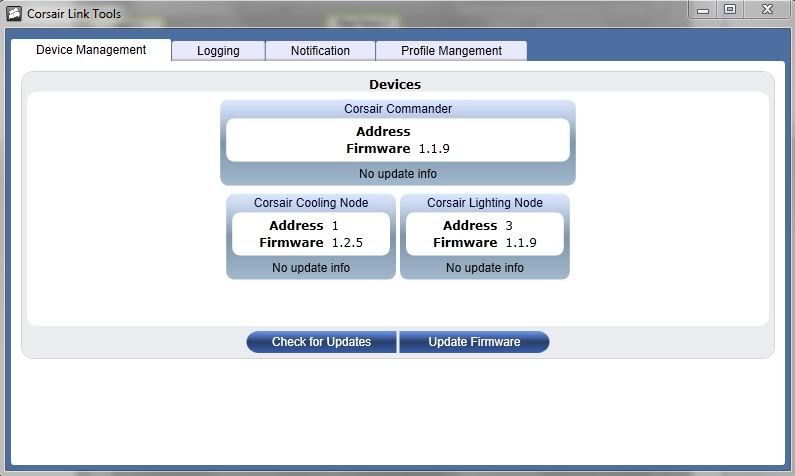
When first starting up the Corsiar Link Software, the first thing that needs to be done is update the firmware for the various components.  This was a necessary step for me because before the firmware update, my fans wouldn't change from spinning at 100% at all times.


Here is an overview of the various sensors and readings that can be seen within the software.  As shown in the above video, you can choose from a variety of computer cases and overlay the sensor data on top of your component locations.  Its is all drag and drop at this point, and you can also easily change the name of any sensor data shown on this screen for better customization.


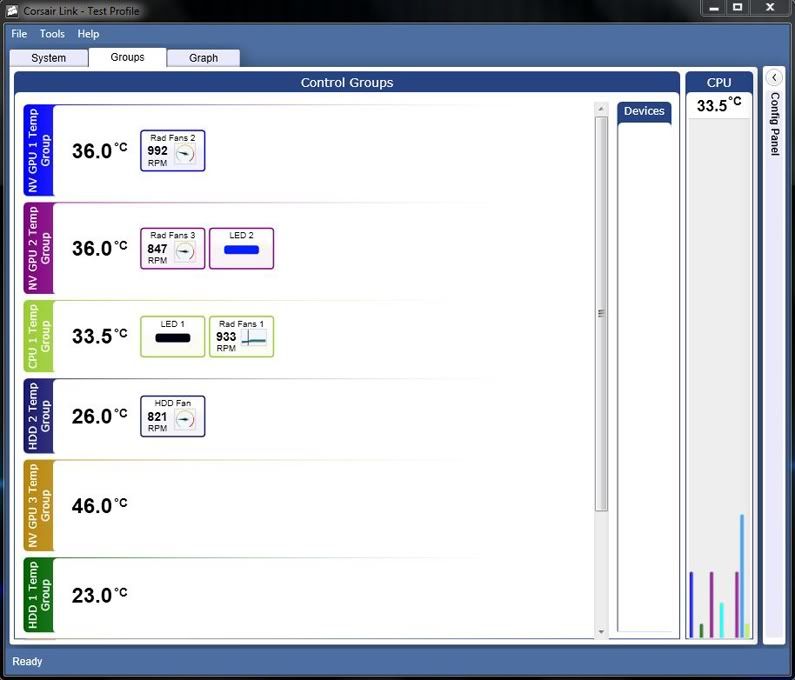
Next up we have the "Groups" screen.  This is where you make connections from sensor data to fan (or pump) control.  This is also drag and drop, and every easy to configure.


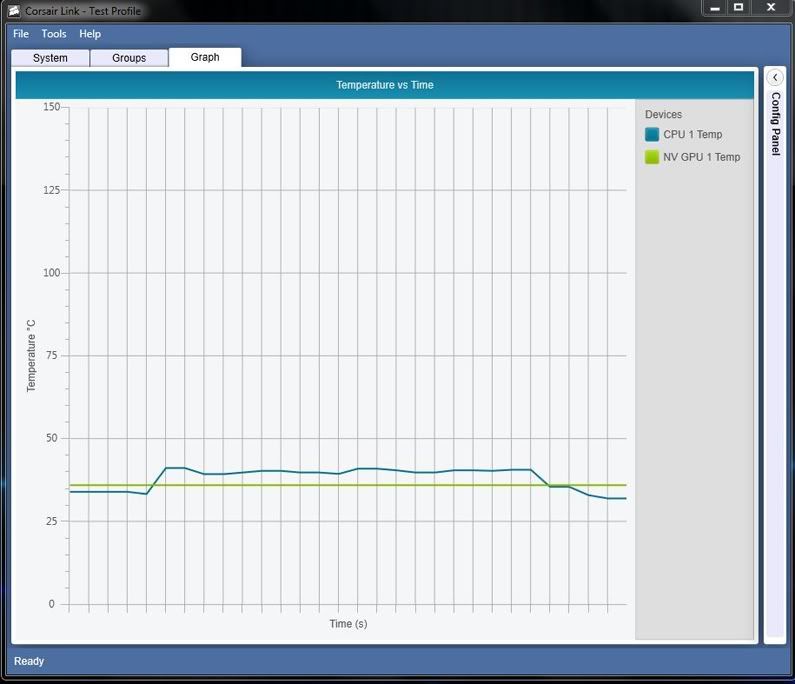
There is also a "Graphs" section that can show any of the sensor data listed on the Overview page.  It is very basic, and doesn't offer much as far as customization goes of colors or graph size.


Once all the grouping is set up between sensor data and fans, we can move on to taking more control of how the fans will operate in our system.  The first bank of options is shown below.  They are per-defined control curves, and the names are pretty self explanatory.  Below them are the "User Defined" settings including custom control curves.  These are easy to set up, and seem to work just fine.


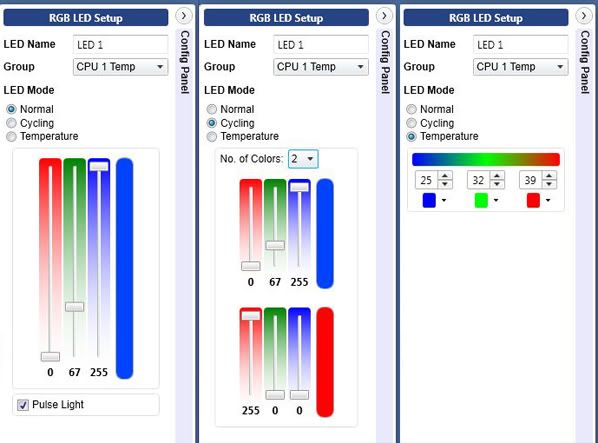
As mentioned earlier, I have the Link Kit with the Lighting Module, so I thought I would show the different LED configuration options.  More detail about these options and how they work can be seen in the above video.


Ok, so that is the Corsair Link Kit.  Very capable software.  Next up I will review the AuqaComputer system.


And now its time for a similar walk-through for the AquaComputer Aquaero 5 LT.


Click on the link below to launch a YouTube video I made that shows both the hardware and software in action.

Video - AquaComputer AqauSuite 2012, Aquaero 5, and PowerAdjust 2 Overview

AquaComputers makes a variety of prodtucts that all communicate together via the Aquasuite software.  They have flow sensors, pumps, radiators, reservoirs, cpu blocks, etc.  I have the main controller unit, the Aquaero 5 LT, and two PowerAdjust 2 modules to control my MCP355 Pumps.

The Aqauero 5 can be pushed up to a maximum of 1.65 amps per channel (20 watts) or 5 amps total.  AquaComputer designed the output based on the temperature of the fan amps themselves to prevent damage.  The cooler you keep them the closer to 1.65 amps they will push.  For this reason, I installed a larger heatsink on my Aquaero, to keep things nice and cool and retain the ability to limit the RPMs as to keep things quiet when maximum performance isn't needed.

This will vary greatly depending on the fans you have, but 1.65amps is enough to run roughly 20x fans at 100%.  However, the load and heat increase as you dial down the RPM's so the real limit is probably closer to 12 - 15 fans, fewer if you use higher amperage units.  This is an amazing amount of fans to control off a single channel and is also enough juice to run a water pump such as the MCP355 or D5.

Even though it is possible to run a pump off one of the fan channels, it is better to use the Poweradjust 2 due to the high start up power draw of these pumps.  Each PowerAdjust2 also has a large heatsink to keep the unit cool when you lower the speed of the pump.  If you want to just run a pump at 100% all the time, you could probably just add it to one of the fan channels on the Aquaero 5.  But if you do a lot of power based throttling like me, it is better to use the Poweradjust 2  for the pumps, and keep the fans on the Aquaero just to be safe.  So, that is how I have set the hardware up.  Lets jump into the software now.

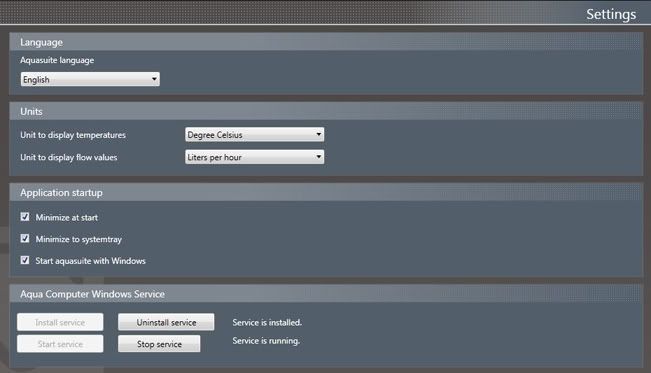
When first opening up AquaSuite 2012, go the the settings tab to set up your basic units, and language.  You can choose what units to use for temps, and flow measurements.  This is also where you configure the software's startup options.


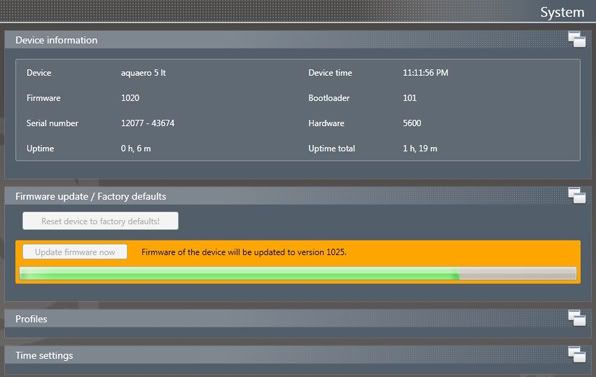
Next head over to the System tab to make sure you are running the most current firmware for your hardware components.


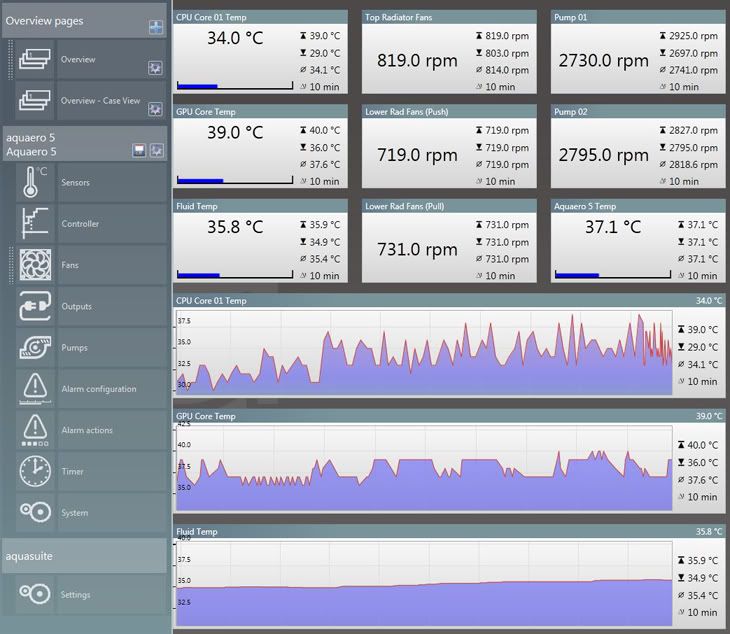
Now we can jump to the Overview page where you can set up how you would like to view the data that Aquasuite (and Open Hardware Monitor as mentioned in the above video).  You can choose what data points you want displayed, and add graphs to monitor temps, flow rates, RPMs, ect.  You have the ability to customize the look of all the items on this page (colors, fonts, opacity, etc.)  But what you see below is just using the default look.  You can set this page to launch automatically when Windows starts so you can monitor everything from a glance.


This is also a view of another Overview page, but this one has a picture of my case, with the various temp and RPM boxes placed over the hardware components in my system.  Its a neat idea, but I personally think it looks a bit too cluttered.  I prefer the look of the above page instead.


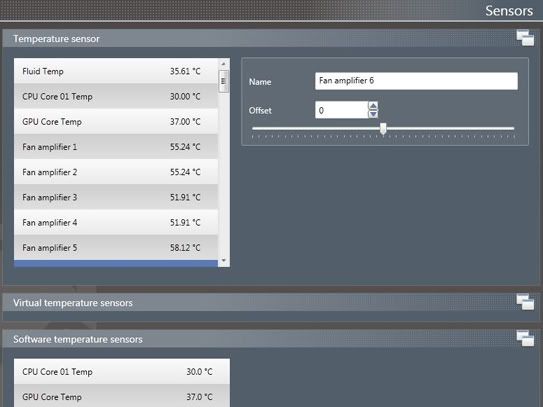
Next up is the Sensors Page.  Here you will see the temps that Aquasutie brings to the table via physical temp sensors (like my in-line temp sensor in my loop), along with software sensors from 3rd party programs like Open Hardware Monitor or AIDA64.  You can modify the names of the various sensors to better suite your needs.


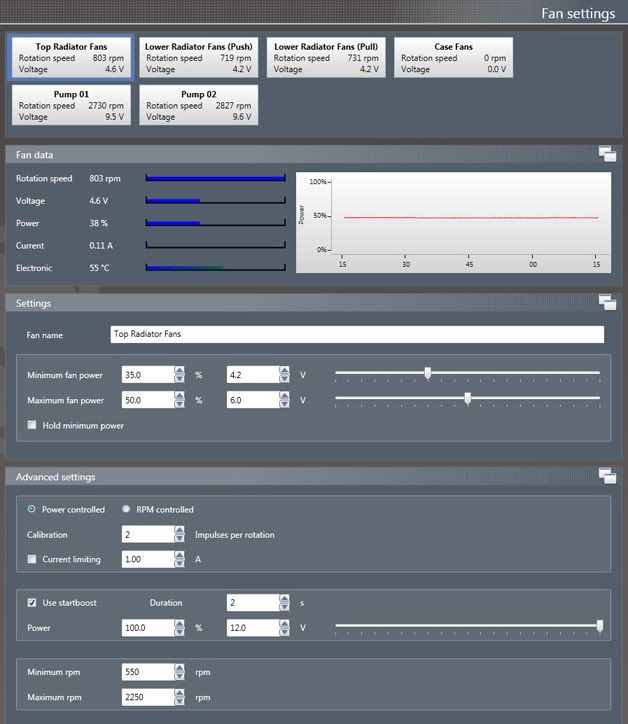
Now we will take a look at the Fan Setup tab.  Here you can name your fan banks, set minimum / Maximum RPM levels, and a ton of other stuff that I haven't had a chance to play with yet.


On the same page you can see that my pumps are also visible.  This is because they are connected in the following manner:
Aquero 5 HighSpeed Aquabus connector -> PA2 Aquabus connector 1 / PA2 Aquabus connector 2 -> PA2 Aquabus connector 1

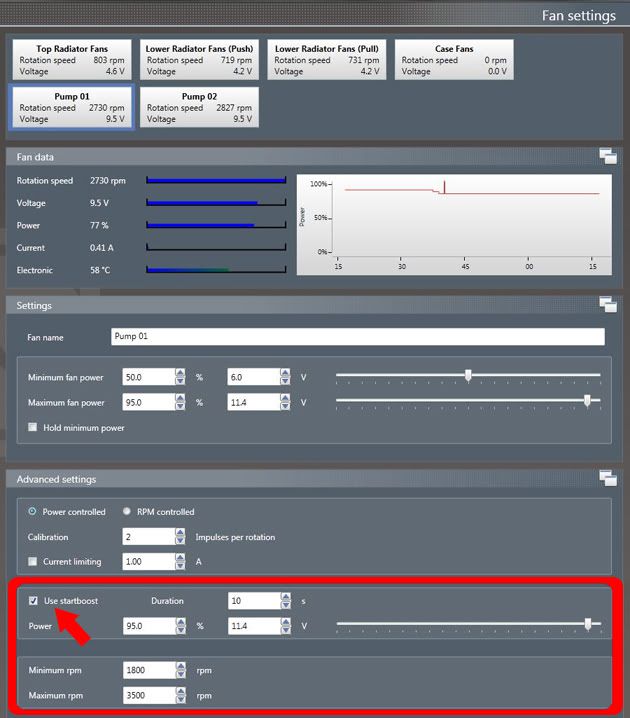
So with that setup, I have 1 pump on each PA2, and they are can both be controlled via the Aquaero 5 in Aquasuite.  The PowerAdjust 2 is a controller which was optimized for the use with a DDC pump (or anything else with a constant load of up to 25W at 12V.)  The maximum surge current can go up to 48W so you have enough reserves for the massive starting current that some pumps or fans generate. A configurable startboost allows you to make sure that for example a pump has enough time to spin-up before it is getting slowed down by the controller.   This Startboost setting can be seen in the image below.


Now we get into the really cool part of the Aquasuite 2012 software... Controller Curves.
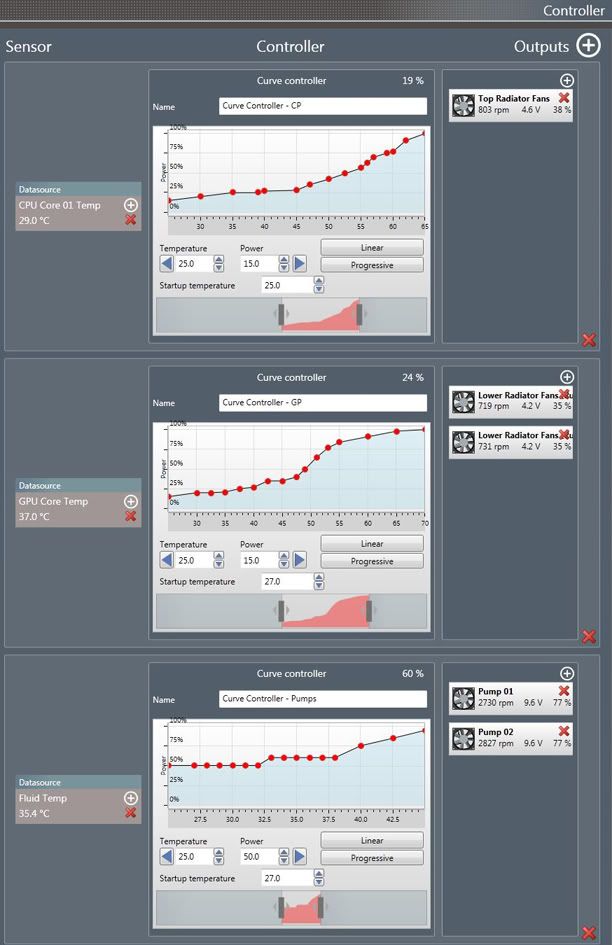
With custom controller curves, you can make it so your system runs silent when high power isn't needed, and rev up to 100% when you need that kind of power.  I have set up 3 different curves so far, and they are working extremely well.  When my system first boots up, it is near silent, yet everything stays nice and cool.   My curves don't look "pretty" at the moment as I haven't had much time to really tweak them, but at this point they are very functional.  Once I get everything overclocked, I may have to adjust the temperature variants of these curves.

Controller Curve 01 - CPU Temp controls the 3 fans on the top radiator
Controller Curve 02 - GPU Temp controls the 4 fans on the bottom radiator
Controller Curve 03 - Liquid Temp controls the speed of my pumps


There are a lot of other tabs in the AquaSuite 2012 software, but I either haven't had a need for them yet, or I don't own components that will register with those pages (Aquacomputer pumps for example).  Overall, I am very pleased with the Aquacomputer components and the new software to control them.  In the past my system was near silent except for the pumps.  Now even the pumps are silent during basic computing tasks.

AquaComputer Aquaero 5 vs Corsiar Link Kit

AquaComputer: Pros
  • Extreme Customization and Options
  • Multiple Components available for liquid cooling systems
  • Easy Hardware installation
  • Works with most fans and pumps currently on the market
  • Controller Curves
  • Software seems stable and is feature rich
  • Build Quality
  • 4 Fan Connectors (Upgradable To 10)
  • Optimized for liquid cooling systems
AquaComputer: Cons
  • Much of the documentation is only in German (English Forum is a big help)
  • Setup isn't as straightforward as could be
  • Cost (for some)

Corsair Link: Pros
  • Easy Hardware installation
  • Controller Curves
  • Software is easy to setup and use
  • Build Quality
  • 5 Fan Connectors (Upgradable with more Control Nodes) 
  • Can read CPU & GPU temps on its own (doesn't require 3rd party programs)
  • Advanced RGB LED lighting control
 Corsair Link: Cons
  • Customization and options not as advanced as competition
  • Not really made for liquid cooling (unless using self contained Corsair cooling products)
  • Fairly new software, can be buggy at times

I have enjoyed taking time to use both units, but after going through various scenarios with my hardware, I will be using the AquaComputer products to control my system components from this point on.  Both kits offer their advantages, but the Aquaero 5 fits my needs better at this time.

Thursday, October 4, 2012

Project Bright Panel: New Koolance Reservoir


Received my new Koolance RP-401X2 Friday to replace my leaking XSPC unit. I really like the look and quality of this new reservoir.


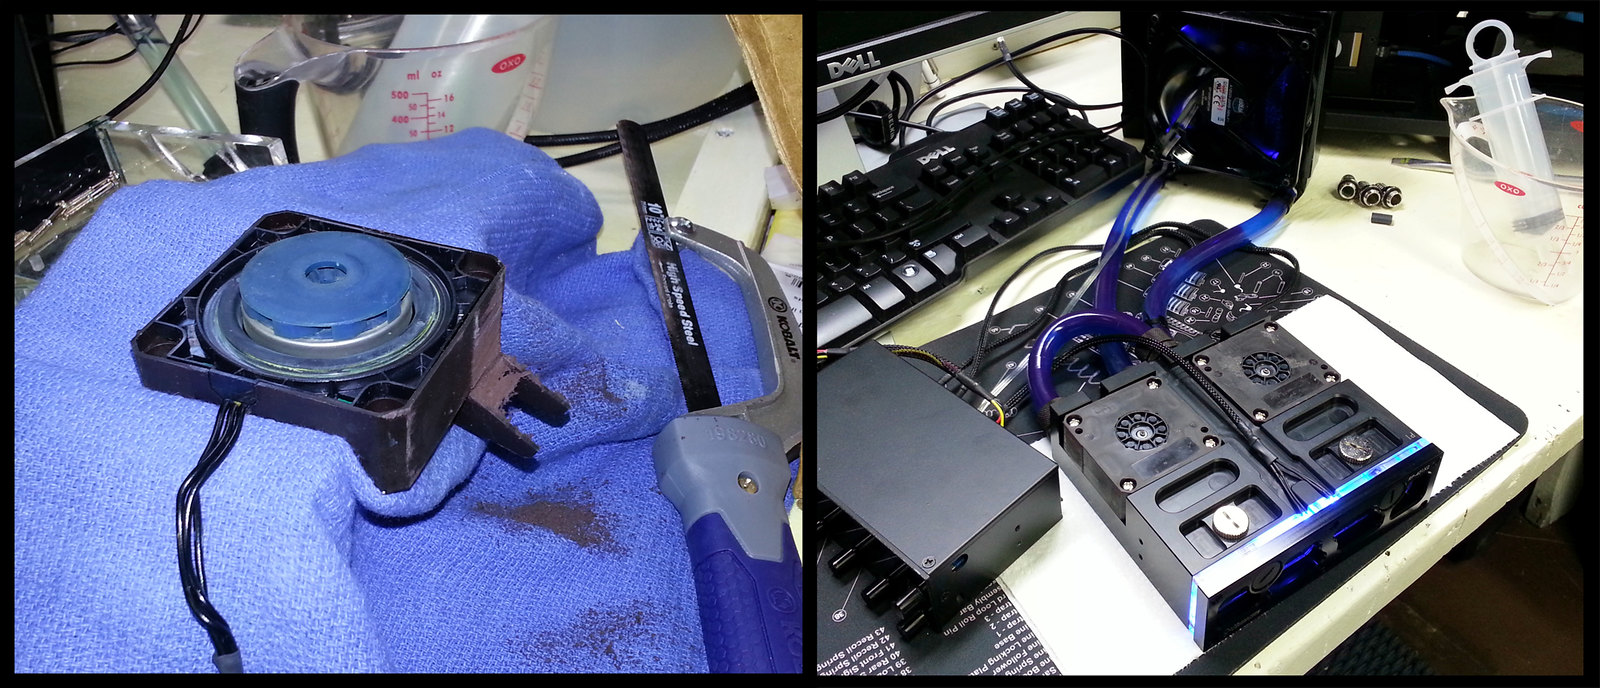
I had to cut the feet off of my Switech MCP355 pumps for them to work with this Res/Pump combo. Once installed they have a lot of head pressure and are pretty quiet.


I then proceeded to bled the entire loop of air bubbles and everything is running cool and quiet. Now I am going to work cable management, and writing up a detailed review / set up guide with the AquaComputer Aquaero 5 LT, and the Corsair Link. Stay tuned.


Thursday, September 27, 2012

I Sprung a LEAK

Just wanted to post a mini-update, along with some crappy findings...
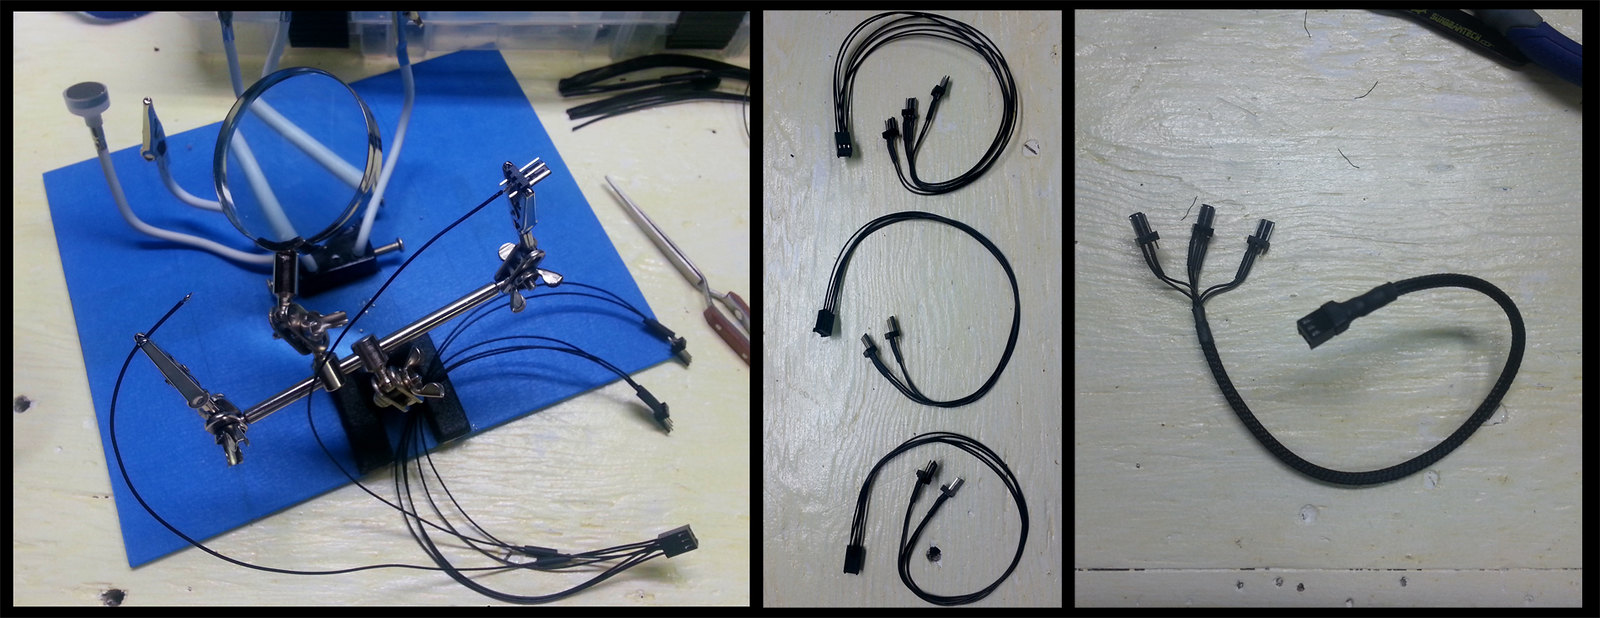
I finished wiring all my fan extensions that I will be using with my fans and the controllers. All have been cut to the exact length, sleeved, tested and work great.


I also decided to post a picture of some of my wiring diagrams that I have done up to help me keep my thoughts straight while making my own cables. Shows how I wired illuminated vandal switches, my light panel, led strip, reservoir LEDs, and fan extensions along with RPM reducers which I may use on the fans not attached to radiators.


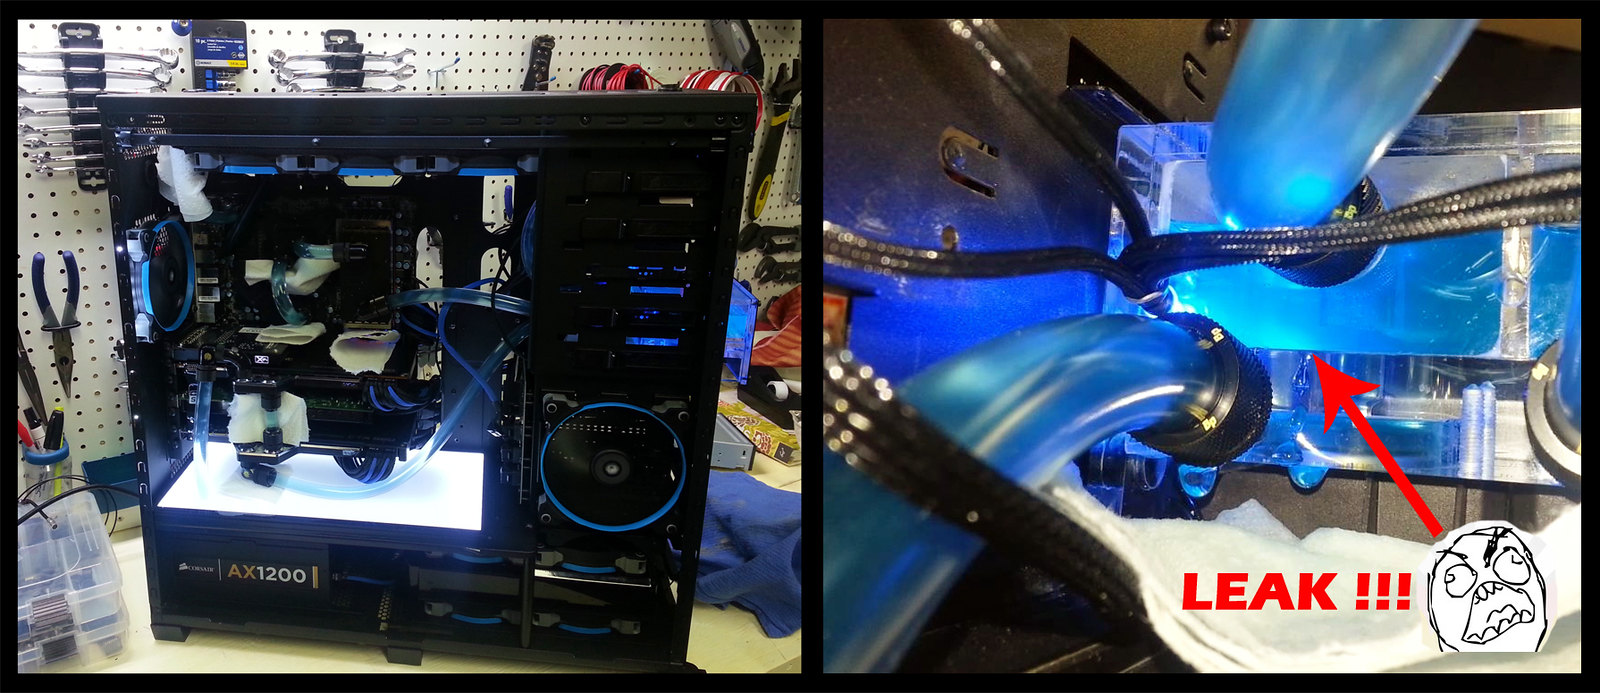
So with everything wired up, I decided to do a leak test. Everything was looking great untill... LEAK!! And not just a leak requiring a tightening of a fitting, it was a leak in the seam of my XSPC reservoir.


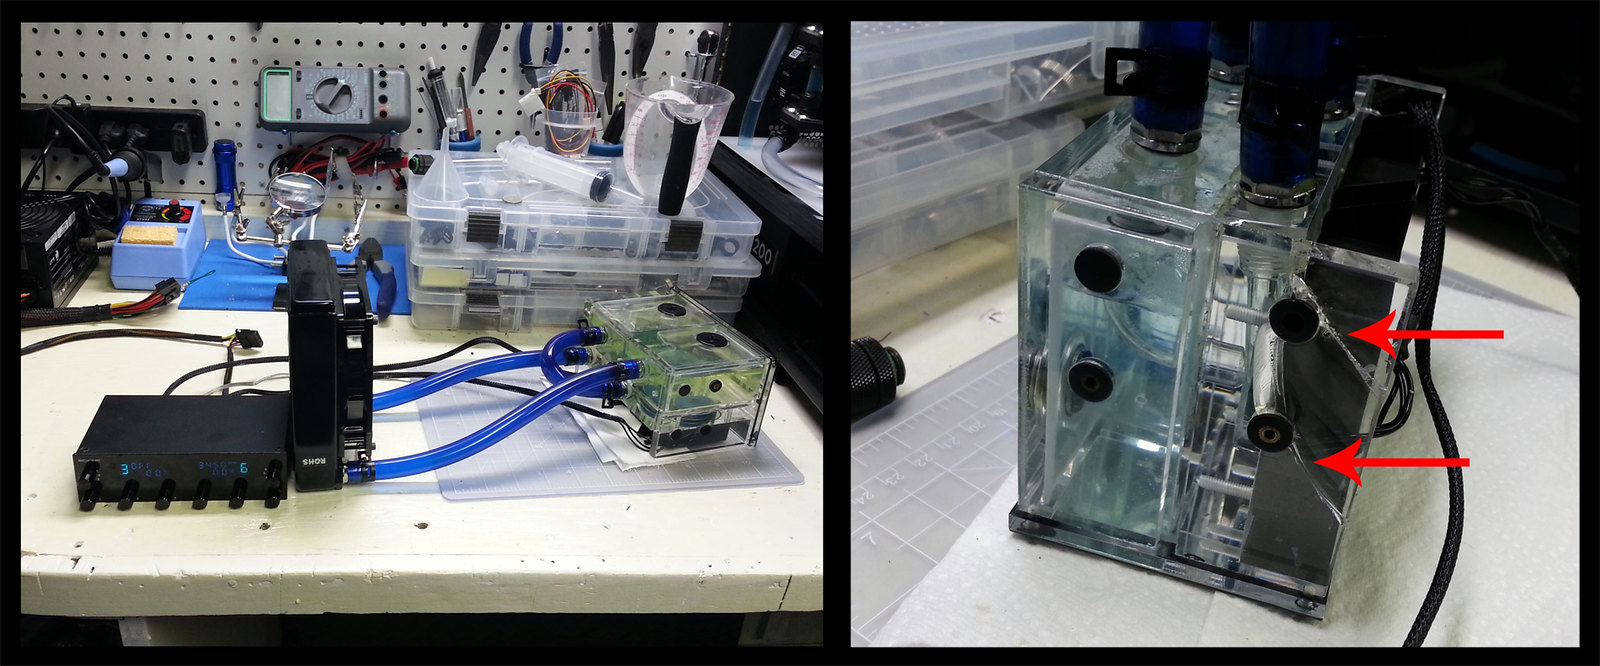
To add insult to injury, I pulled the res out, and had it sitting on my work bench. My son came in behind me, and managed to pull it onto the cement floor, further cracking the unit. 
I was able to put it back together with my liquid acrylic cement, and fill the seam. Also ran an additional leak test with just the res to see what would happen.


It seemed to fix the leak, but at this point, I am going to toss this reservoir, since I can't really trust it for long term use. New one should arrive any day now.