Featured Post

My Online Courses

Welcome to my project blog! To help you create your own versions of my projects, I've launched a series of comprehensive online courses....

Thursday, September 6, 2012

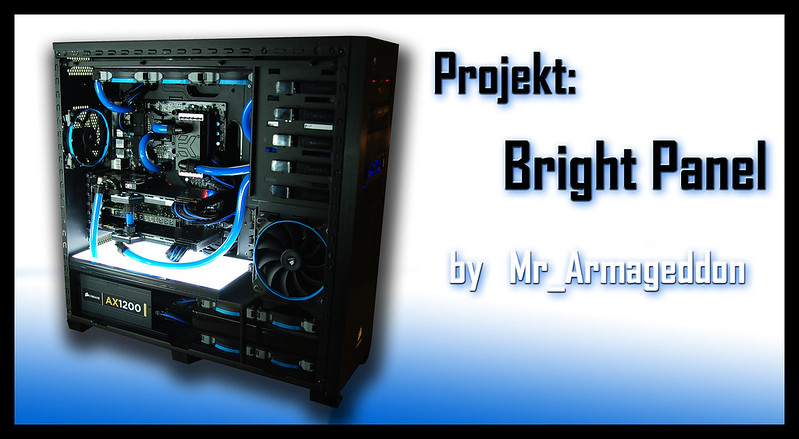
Project Bright Panel: 800D, Liquid Cooled, Illuminated Mid Panel


I have completed my build log, showing the updates to my liquid cooled PC, and have decided to re-post them on my personal blog.  To see the original build log, head over to [H]ard Fourm

 Component wise, not much will change, but I am adding some cool upgrades like enhanced case lighting via an illuminated mid-panel, and an AquaComputer monitoring / control system, custom sleeving, etc. Here is an early design of what I am shooting for, built in Google SketchUp. 
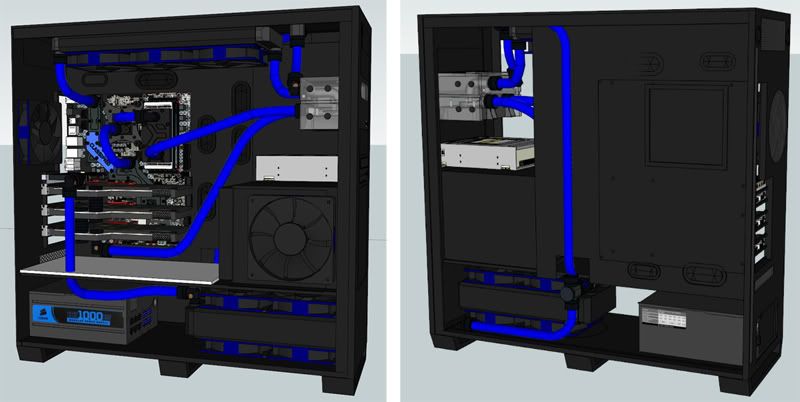


It will be a liquid cooled PC with one giant loop, using 2 pumps in series. I am using the Corsair Obsidian 800D, and this case is a monster. I love the all black look, inside and out. I had to make a few minor modifications for the two loop system to work, but the mod went great, and I am pleased with the results. 


Project Index


Here is the Parts List: 
* Case: Corsair Obsidian 800D Full ATX 
* Power Supply: Silverstone ST1000-P
* Motherbord: EVGA X58 Classified 3
* CPU: Intel i7 Core 970 
* RAM: 12GB Corsair Dominator @ 1600MHz
* GPU: 1 EVGA GTX 580 Hydro Copper 2
* GPU: 2 EVGA GTX 580 Hydro Copper 2
* GPU: 3 EVGA 9800GT (Dedicated PhysX, and to power side LCD monitors when SLI in enabled)
* Sound Card: Creative X-Fi Titanium Fatal1ty Edition
* Hard Drive 1: Intel X-25m 160GB SSD (Operating System & Programs)
* Hard Drive 2: WD Black 1TB (Game/Steam Installs)
* Hard Drive 3: Seagate 500GB (User Files)
* Hard Drive 4: Seagate 2TB (Storage)
* Optical Drive: Asus Blu-Ray / DVD+R
* Fan Pump Controller: AquaComputer Aquaero5
* Pump Controller: AquaComputer Power Adjust Ultimate x2

Loop Section 01
* Tubing: PrimoFlex Pro LRT UV Blue Tubing -3/8in. ID X 5/8in. OD (10ft)
* Coolant: Distilled Water w/ Kill Coil & PT Nuke
* Reservoir: XSPC Acrylic Dual 5.25in. Reservoir 
* Pump: Swiftech MCP350 12 VDC Pump
* Radiator: HardWare Labs X-Flow Extreme III
* CPU Block: Swiftech APOGEE HD
* MoBo Block: EK-EVGA X58 Classified Full Board Waterblock
* Fittings: Bitspower Matte Black... and lots of them
* Fans: Cooler Master R4 120mm Blue LED Fan R4-L2R-20AC-GP (x3) 

Loop Section 02
* Tubing: PrimoFlex Pro LRT UV Blue Tubing -3/8in. ID X 5/8in. OD (10ft)
* Coolant: Distilled Water w/ Kill Coil & PT Nuke
* Reservoir: XSPC Acrylic Dual 5.25in. Reservoir
* Pump: Swiftech MCP350 12 VDC Pump
* Radiator: HardWare Labs GTX240
* GPU Block: The EVGA GTX 580 Hydro Coppers come with a custom Swiftech WB pre-installed
* Fittings: Bitspower Matte Black... and lots of them
* Fans: Cooler Master R4 120mm Blue LED Fan R4-L2R-20AC-GP (x4 - Push/Pull) 

Tuesday, July 24, 2012

Advanced Combustion Spud Gun: Firing Demonstration

So as promised here is a video of me loading and firing the spud gun.  I use a pipe as a "ram-rod" to push the potato down the barrel.  I have seen much more advanced "breech-loading" types of spud guns, that work similar to a bolt action rifle, but that will be held in reserve for a future project.  Here you can see my brother getting ready to fire from the hip.


Here is the actual video of me firing the cannon. Its a bit small (shot before I had an HD Camcorder) and hard to track the spud flying through the air, but we estimate the cannon was slinging potatoes between 300-400 yards.  Enjoy!


Advanced Combustion Spud Gun: Construction

This project is one I did about 2 years ago, but it was a lot of fun to build (and shoot) so I decided to post a build log for it.

At the time I was working with the 14 & 15 year olds in our Church's Boy Scouts program. They had heard rumors of some of the stuff I used to do in high school, and they wanted to experience some of the fun I had. Among the many "fun" and usually dangerous things I did was build Spud Guns (also known as Potato Cannons). I instructed them on how to build their own basic combustion cannons, and they had a blast (literally) doing it. 

To ramp up their excitement for the project, I decided to build a more advanced version. Although it works on the same principles, mine is much more complicated compared to the basic combustion cannons that I showed them how to build.


I built a circuit that allows a fan to blow inside the chamber and circulate the fuel/air mixture.  This assists with combustion and also makes a handy tool to expel the used up propellant out of the cannon once fired.   To the right, you see the ignition system consisting of an electronic grill ignitor and a dual spark gap inside the chamber.  Sounds like a Tazer when the trigger is depressed.


The cannon itself was constructed of ABS SCH40 pipe. The barrel is 6ft long x 2in wide.  It is fixed, but I have made ones in the past with interchangeable barrels to shoot other objects such as marbles, racket balls, even whole rolls of toilet paper.  Below is the same picture from above, but with some labels for the different components involved in the cannon's construction


It features a metered propane injection system to accurately allow me to get just the right amount of propellant into the chamber. I found that around 60 psi is the perfect mixture for this particular cannon.  The ABS already comes black in color, so I used some blue spray paint to spruce up a few of the chambers and add some color.


Head to the next post to see a video of this Spud Gun in action! Thanks for visiting.

Wednesday, June 6, 2012

Custom Longbow: Stringing & Shooting

As promised, here is a short clip of me stringing and shooting my Longbow in my backyard.  As an added bonus, you get to behold my great beard that I brought back from the camping trip last week.


Monday, May 28, 2012

Custom Longbow: Sanding, & Sealing

I was able to finish the bow with enough time to make it "pretty" before needing to take it up in the mountains.  I am taking a Venturing Crew (17-18yr old Boy Scouts) into the Pike National Forest for 5 days.  There we will be teaching them wilderness survival, along with other fun stuff like building shelters, food / water procurement, traps & snares, and primitive weapon construction.  Making this bow was part of getting them excited about the primitive weapons, although they will not be constructing this type of bow, and will be sticking to bundle bows for the camp out.

Here is a pic of it strung up in all its glory.  I also installed "No-Glove" finger protectors on the bow string.  They work really well and allow me to shoot without a glove.  Also installed a rubberized grip on the handle.  It was a bit of a pain to get into place, but has a really nice feel to it.


With the shaping & tilling process complete, it was time to stain and seal the bow.  Before sealing I shot the bow around 30 times just to verify that there were no defects.  Everything went fine during that process, so I started sanding the bow with 220 sand paper.  Once all the major blemishes from the saw rasp were gone, I moved to 400 grit to get a really smooth finish.  As mentioned before, the bow is 60lbs @ 28in draw.  That being said, I have a 31in draw, so I don't really know what the draw strength is at that distance, but its considerably more than 60lbs.


For the belly (Red Oak) I chose a Maple Red stain, and for the backing (Hickory) I went with Ebony.  The Red Oak was very easy, as it just sucked up the stain no problem.  The Hickory on the other hand was much more challenging as it is a denser wood, and didn't accept the stain as well.  The back took it just fine, but the sides was kind of hit and miss.  I did two coats of each, and after giving it a few hours to dry, finished up with two layers of polyurethane to seal and protect the bow.  I am very happy with the results.  Here are some pictures of the bow unstrung from the side and front.


I had a few people ask me questions about the notch for the bow string, so I added some close-up shots without and with the string in place.  I added an extra layer of Red Oak to the backing so that I could cut a groove for the string.  Cutting a notch across the backing (Hickory) is not recommended as it could weaken the bow, and crack at that point.


With the stain and sealing completed, I went out and shot about 30 arrows from it.  Just as before it performed perfectly.  But I found out quickly my arm-guard was not up to the task of actually protecting my forearm.  It was about 2in too short, and I got some pretty nasty string slap a few times.  I now have a longer one that works great, and I haven't had any more bruising or welts while shooting.


That is it for the Longbow Construction pictures.  I will try and get a video posted soon showing the bow in action.  But it will have to wait until I get back from the mountains with the Boy Scouts.


Friday, May 25, 2012

Custom Longbow: Glue, Shaping, & Tilling

As mentioned in the previous post, I am making a 65in Longbow, with a Red Oak belly, and Hickory backing. I picked up the Red Oak 1"x3" board at my local hardware store for around $6.  The belly of the bow isn't as vital as the backing as far as grain direction goes, but I tried to find a board that had some uniformity to the growth lines.  The backing I ordered from 3Rivers Archery for just under $20.  I tried to find some hickory locally that would work for the backing, but couldn't find anything with the right growth ring patterns.  3Rivers is a supply for Longbows / Recurves, and has an awesome selection of just about anything you could need when making you own bow.  Once the hickory arrived, I began the glue and clamping process to make essentially one large piece of wood.


I gave it a good 24 hours to dry and set, then drew in my lines to cut off the excess wood.  I left myself a lot of room to work with as this is my first bow, and I didn't want to cut anything too close.  In the picture below my Shinto Saw Rasp.  These guys work great at rapidly removing wood from unwanted areas.  Great tool


Once I had the basic shape of the bow cut out, the lengthy but vital process of tilling began.  After shaving the bow down to what I though was a good level, I put it on my tilling stick and strung it up to see how well the bends were shaping up.  This picture is the bow with almost no pull applied to it.


Here we have a slight pull, and can start to see where the bend is uneven.  The right side is bending more than the left, so now you remove the bow, and shave off a bit more wood on the the stiffer side.


More bend overall, but still uneven.  Back to tilling...


Here we have the bow fully drawn at 28in.  It is now even, and the tilling process is done.  We removed a lot of wood, and the majority of the bow arms are less than 1/2in thick.


Here is a shot of the bow after the tilling process, and a light sanding.  I shot around 50 arrows from it to make sure there were no defects, and it performed like a champ.


With that completed, I will start the stain & seal process.  More pics to come.

Custom Longbow: Intro & Arrow Construction

For my first Project post, I will be walking through the process of creating from scratch a "Primitive" Longbow.  This is my first attempt that this type of weapon, but I am very pleased with the results.  The end product is a 65in Longbow, with a 60lb pull at 28in.  More importantly, it puts arrows down range just like it should.

Project Index


The belly of the bow is made of Red Oak, and the backing is a strip of Hickory.  I was able to obtain the Red Oak locally, but had to order the Hickory backing online.  While I was waiting for it to arrive, I went ahead and made a few arrows and broadheads.  I started with a chunk of 2in wide x 1/8in thick steel, and drew out the pattern for the broadheads.  Using a hacksaw and my Dremel tool, I began the (long) process of cutting them out.


I then began to file down the sides to a fairly good cutting edge.  They turned out well, and are very durable, but each one took me about 30-45min to make.  Soon after I found some steel broadheads online that were fairly inexpensive at $17 for a set of 6 "Trading Points".  At that price, it was really hard for me to justify spending so much time on making my own broadheads.  I was happy with the few I ended up making, but decided to purchase the rest online.

The Trading Points were a bit longer at 3.5in, and not as thick, but still very durable and can be filed down to a razor sharp edge.  They will work great for target practice and small game.  Using artificial sinew and archer's hot melt glue, I secured the broadheads to the arrow points.


Once that was complete, I cut some feathers in half and used them for fletching.  Again I used hot melt glue and artificial sinew to secure them to the shafts.  I used the right helical method on all the ones I have made so far, giving the 3 feathers a "rifled" look along the shaft.  They work quite well, and make a slight whistle when released from the bow.


I also made a few arrows called "Small Game Thumpers".  The construction is the same except for instead of broadheads, you slide a spend 410 shell over the end of the arrow shaft and hot glue it on.  The brass end of the shell gives you a nice blunt-force trauma arrow for small game / birds, that won't get stuck as easily in trees.  I have yet to use it, but have no doubt of its effectiveness.  Next up... bow construction.

Introduction

As mentioned in the "About Me" part of this blog, many would consider me a "Geek".  I guess I fit the profile considering as a hobby I build High-end Liquid cooled Computers, enjoy PC Gaming (RTS, FPS, and RPGs are my favorites), and am a big Sci-Fi / Fantasy nut.  But on the other side of the equation, I enjoy playing sports and working out (mostly free weights), love to shoot firearms, am an avid camper, and like to make things go boom.   The melding of my various hobbies and interests, has made for some interesting projects.

My name is Zane, but I have been using Mr_Armageddon as a forum nickname / gamer handle for over 15 years.  Anyone who grew up a Simpsons fan may have an idea where the nickname originates.

I am the Father of 4 young children, who keep me busy, and at times hinder progress on my projects. But I love being a Dad, and actually enjoy working on things alongside my kids, in the hope that they will also learn to love to tinker.  My lovely wife is very supporting (and is usually working on projects of her own), although at times she gets frustrated when my projects accidentally take precedence over the "Honey Do" lists she assigns me.  

Over time I will be adding some interesting projects to the blog, and welcome feedback anyone has to offer.