Featured Post

My Online Courses

Welcome to my project blog! To help you create your own versions of my projects, I've launched a series of comprehensive online courses....

Tuesday, June 14, 2016

Project Open Core: Hardware - Fittings

I have used Bitspower fittings in a few of my past builds.  Haven’t had any issues with them, but they are pretty expensive as far as fittings go.  This go around, I decided to give Barrow fittings a shot.  I have read on various forums they are physically the same as Bitspower, but much less expensive, and they have a matte black finish instead of shiny black likes Bitspower do.  I still have a few select bitspower fittings, but the majority will be Barrow for this build.


Also decided to change out the o-rings for all the fittings to better match the theme of the build.  Went with Monsoon replacement o-rings.  They look pretty good when installed, and are nice and thick.


For the hardline tubing, decided to go with Monsoon fittings as well.  They have the same matte black finish as the barrow fittings, and are really easy to install and tighten with the included tool the kit comes with.


For my drain port, I am using a combination of a Bitspower ball shutoff valve, and a Phobya Quick Disconnect Valve.  On a rotary fitting, it sits sung under the radiator, but can swivel out for easy access to drain the loop.  The setup works really well.  Swing it out, attach the female end of the QDC and tubing going to a bucket, then turn the ball valve.  Simple and quick system flush.


You may have noticed in the first picture above, I had a Bitspower flow indicator with the rest of the fittings.  After seeing another option, decided to change it out for one made by AlphaCool .  I like the shape, and it matches the overall look of the build better.


The only thing I don’t like is that ugly yellow spin wheel.  While one side is blue, I doubt I will be able to see that when the Blue Pastel fluid is going through it.  Don’t want any yellow showing (yuck), so used the good ole Vinyl dye to change to color to black.


Color change completed, I put it back together, and tested it with the fluid.  The black looks great, and much better than yellow. I may also install a very dim LED behind the indicator, but will test that out once I have the Pastel Blue fluid in the loops.


Friday, June 10, 2016

Project Open Core: Hardware - Radiator & Fans

My previous build I had 2 separate radiators, one for each loop.  A 360 for the CPU, MoBo, and RAM, and a 240 for the GPUs in Push/Pull configuration.  I have a few less waterblocks this go around, and will not be running SLI, so I opted for a single Alphacool NexXxoS 480 Radiator.  Look and feel is very nice, and the reviews I was able to find show that it performs really well.

Also picked up an inexpensive “gasket” to go between the rad and fans.


One thing I really like about this rad is that it has 6 inlets + 1 fill / bleed port at the top.  Tons of configuration options with that layout.  They also put a metal gaurd below the screw mounts so you don’t damage the radiator fins by going in too far.  That is something my last set of radiators did not have, and is a nice addition.

Comes with everything you need to get started, including port plugs and various lengths of fan and mounting screws.


For the fans on this build, going with the Thermaltake Riing 120mm Blue LED Fans (x4).  These ones are specifically made to work with with radiators (static pressure), and the blue LED accent around the fan is a nice touch.  I saw at computex they just released an RGB version, but for now blue is fine.


I did have to do some cable clean up to make this look nicer. Basically cut to length, sleeved and combined 2 pairs of cables to meet back up at the fan controller.  I didn’t want to have 4 separate cables running through the case so combined  them for a cleaner look.

Verified with ASUS that the fan headers on the MAXIMUS Formula VIII support 1A per header.  Tested these fans and even at peak, none generated more than 160mA.  Combining 4 fans on one header is still well below the max supported current, and will allow for easier fan control.


Although not really a fan controller, the 4 fans meet back up at a Phobya 4Pin PWM to 4x 4Pin Fan Splitter.  They basically act as 1 fan now, and I will use the  ASUS AI Suite Software to control rotation and noise based on temperature curves.


Picture of all 4 installed and spinning up with a nice blue glow. I kind of wish the blue were a bit more towards the green side of the color scale for a lighter blue, as these look a bit more purple.  Will have to play with the RGB setting on rest of the LEDs on the system, and will find something that works for everything.


Thursday, June 9, 2016

Project Open Core: Hardware - Reservoir & Pump

In previous builds I had used reservoirs that fit inside the 5.25in bays on a PC tower.  Being that this case has no optical drive spaces, decided to go with a traditional “tube” res for this build.  Went with the XSPC D5 Photon 270 Reservoir & D5 Pump Combo.  Really like the look of this Res, especially with its glass and aluminum construction.


The pump comes with a mounting bracket, foam anti-vibration pads, and LED that can be inserted into the bottom of the rese to make the internal acrylic tube glow from within.


This particular variant of the D5 pump is the Variable speed type. Not sure what I will keep it at, but I am going to as little noise as possible while still getting good performance so probably around level 3.


Here is a picture of what the glow tube looks like when an LED has been inserted. I like the look of it, but not sure if I will end up going with the White LED as shown below.  My use a Blue LED, but need to test out which one looks better with the fluid that will be added to the system.


The fill port at the top of the Res is larger than a standard fitting to make filling easier.  I also have an adapter to a standard G1/4 fitting size in case i want to use my fill funnel at some point.


The only part of the Res / Pump combo that I didn’t find aesthetically pleasing, was the plastic ring that holds the pump to the res. It just doesn’t go with the high quality look the rest of the unit provides, but luckily XSPC provides and aluminum replacement ring to upgrade the look.  Much better in my opinion.


The Core P5 didn’t have any mounting holes for this particular Res, so I had to drill a few holes, and secure them with the provided mounting hardware.  Very easy to do, and once installed it looks great.  Can’t wait to start filling this thing with some Mayehm’s Pastel Blue liquid!


Wednesday, June 8, 2016

Project Open Core: Hardware - System Status Display, USB 3.1 Card

** I have upgraded to a new System Display, and have a detailed walkthrough showing how I mounted it and configured the CAM software.  Go to this post to see more.

I have wanted to add some sort of system status display to a build for a while now, and decided it was time to do it. I was initially going to place a small 4in display on the front of the case where you can mount an SSD, but decided to go bigger.  Found a 9in HDMI display on fairly cheap on Amazon. Not very high resolution, and the screen quality is not great, but works well for the intended purpose, which is to run the CAM dashboard on it, looking something like this.


Wasn’t a fan of the glossy finish, so wrapped it in Carbon Fibre vinyl.   It also has a camera shoe mount which made attaching it to the case easy.  I like this option as it allows the screen to swivel a bit, so I can point it towards me.  The buttons are pressure sensitive, and aren't’ affected by the vinyl.  I doubt I will actually use the buttons much, as it simply powers on with the system, and also comes with a remote for settings navigation.


Here is a view from the sides to see the connectors.  Requires a 12V power source and either HDMI or VGA (via a VGA to Mini USB adapter) to run the display.


Here is a picture from earlier in the build log, showing it mounted to the case just below the GPU support. I will get additional pictures of the software running on it once I get the system fully built.


I also decided to add a PCIe USB 3.1 expansion card to the build.  The ASUS ROG Maximus Formula VIII has a ton of USB 3.0 ports, and even 2x 3.1, one of which is the new Type C connector. Problem is, I have a lot of peripherals, and with the addition of the Oculus Rift, needed more ports. I have tried various USB 3.0 hubs, but have had issues when using them with the Rift, so going the direct route.


The card is a PCIe x4, so I had to purchase a riser cable to mount it.  It was already shielded, so I just wrapped it in the same Carbon Fibre vinyl to eliminate the reflection.  In order to utilize the full current potential for USB 3.1, you have to attach a SATA power adapter as well.


Install was pretty simple. It sits directly behind the GPU, and will be pretty much hidden from view.  It is also very stable which was nice to see, as that was one of the concerns I had with the vertical GPU mounting method this case uses.


Project Open Core: Hardware - RAM

My previous system had 12GB of DDR3 RAM. Initially I thought that would be plenty, but as I started working more from home, and having 3 separate browsers open plus any applications I was using, started to see my RAM usage hover around 90%.  Making the jump to 16GB was a no brainer for this system, and I thought I would be fine with that.  Decided to go with a kit of Corsair Dominator Platinum DDR4 @ 3200MHz.  Was also planning on adding the light bars for the blue LED effect.

Then came Memorial day and it's accompanying sales.  Not only did I have a promo code, but they also Corsair also had a promotion to get the light bars for free with the purchase of a Dominator RAM kit. At the end of the day I was able to upgrade to 32GB of RAM plus the light bars for an additional $30.  Couldn’t pass on that deal.


The light bars are a nice touch to the Dominator kit, but I did a few modifications to make it better match my build theme. First I colored the sides and bottom of the acrylic “light transmission” pieces so they would glow blue instead of white.  I left the tops alone, as the blue plastic inserts would do a good enough job by themselves.


I then whipped out the Plasti Dip and changed the color of the bars themselves from Silver to Black.  Last coat was Matte Black spray paint to get rid of any gloss.  The end result looks great.


Here is the kit installed, and with the LEDs shining.  I quickly turned on the MoBo just to get everything to light up.  Will take better pictures once I get further into the build and get all my colors working together, but so far I am really liking how this mini-mod turned out.


Tuesday, June 7, 2016

Project Open Core: Hardware - CPU & Waterblock

For this build’s CPU, went with what seems to be the obvious choice nowadays, Intel i7-6700K.  I'm not into super heavy Overclocking anymore, but will still go for a slight OC and probably settle at around 4.5GHz. Looking forward to see how the performance of this CPU stacks up against my current i7-970.


I had considered going with the X99 platform as an upgrade from my X58. But being that I'm not trying to achieve any crazy OC benchmark records, and the there weren't as many options that looked as good with the matte black and RGB LEDs, decided on the Z170 platform.


For the CPU block, went with with an EK-Supremacy EVO Nickel.  It's a really nice looking block, and performance is up there with the rest of the best brands (Swiftech, Heatkiller, etc).


One of the reasons I went with the acrylic top is I wanted to be able to see the fluid as it goes through the block. This one also has holes to insert LEDs.  Not sure if I want blue or white behind the fluid, will have to experiment a bit with that one to see for sure. The same will then be applied to the reservoir, and GPU block.


One thing I didn’t like about the EK kit, was the chrome / shiny finish on the retention knobs. A little spray paint made for an easy fix to match the rest of the build.


Block is now installed, and I have started experimenting a bit with some hardline bends.  Have a good ways to go with that, and will be sure to share my progress in a future post.


Friday, June 3, 2016

Project Open Core: Hardware - Oculus Rift

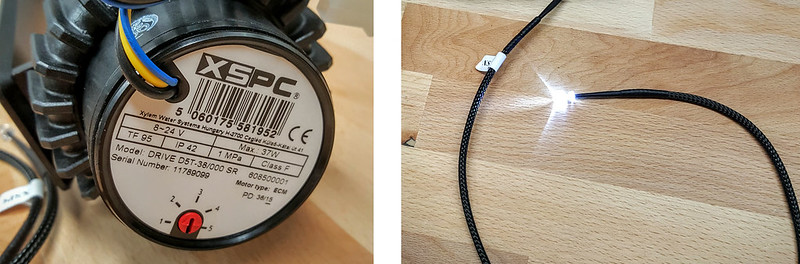
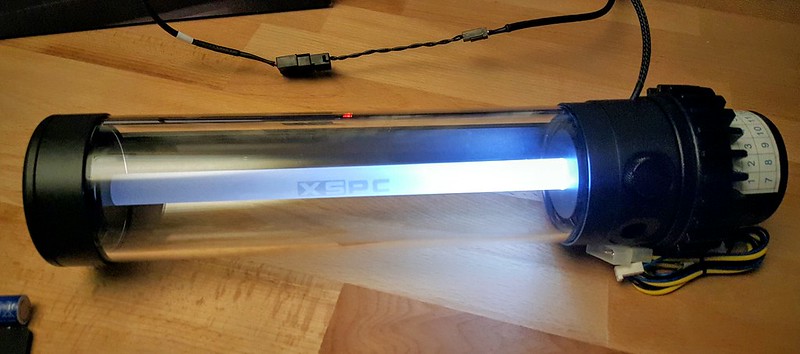
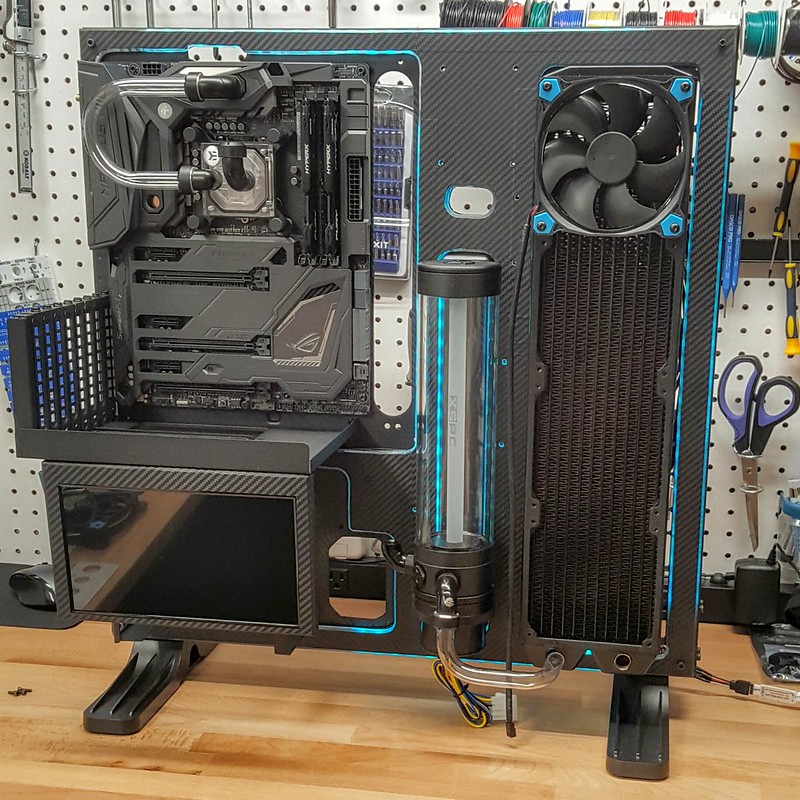
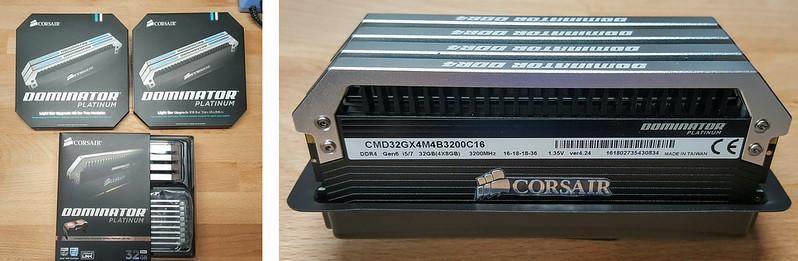
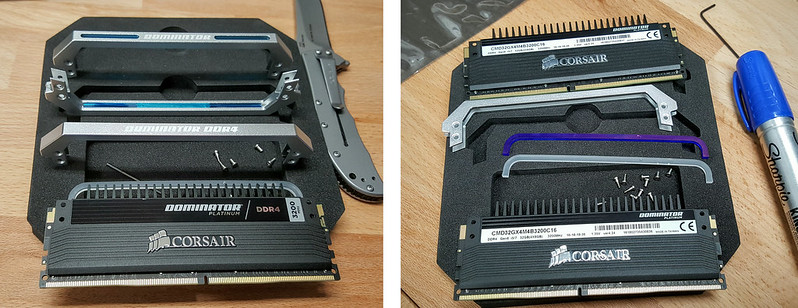
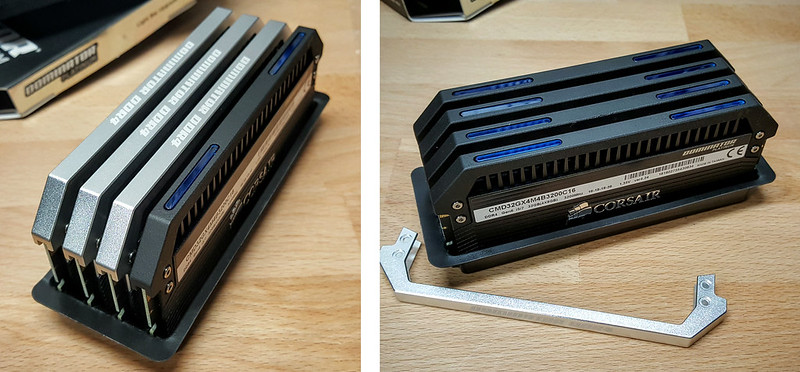
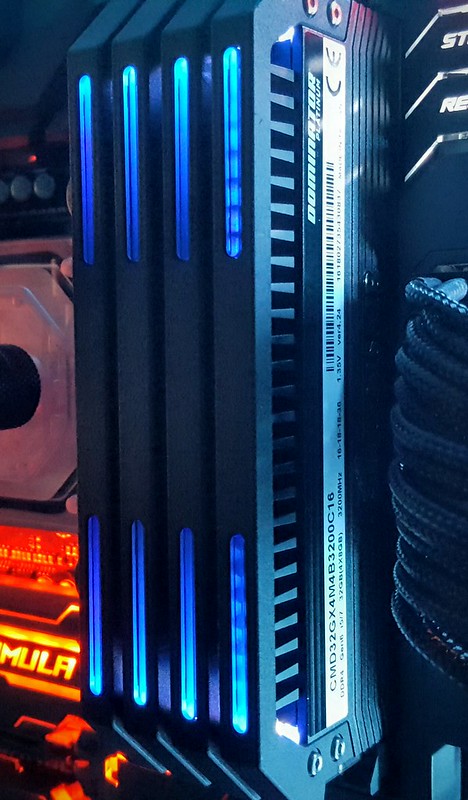
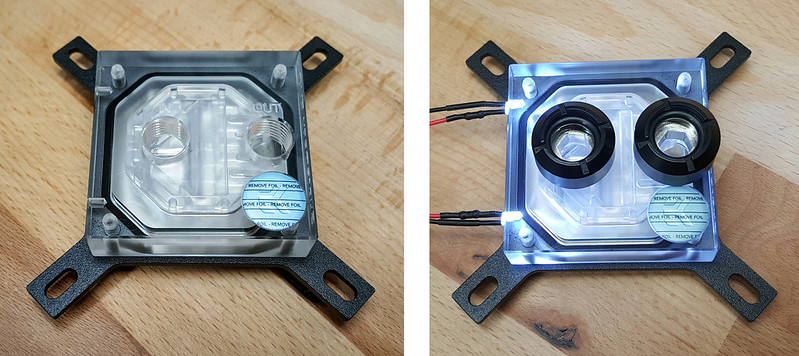
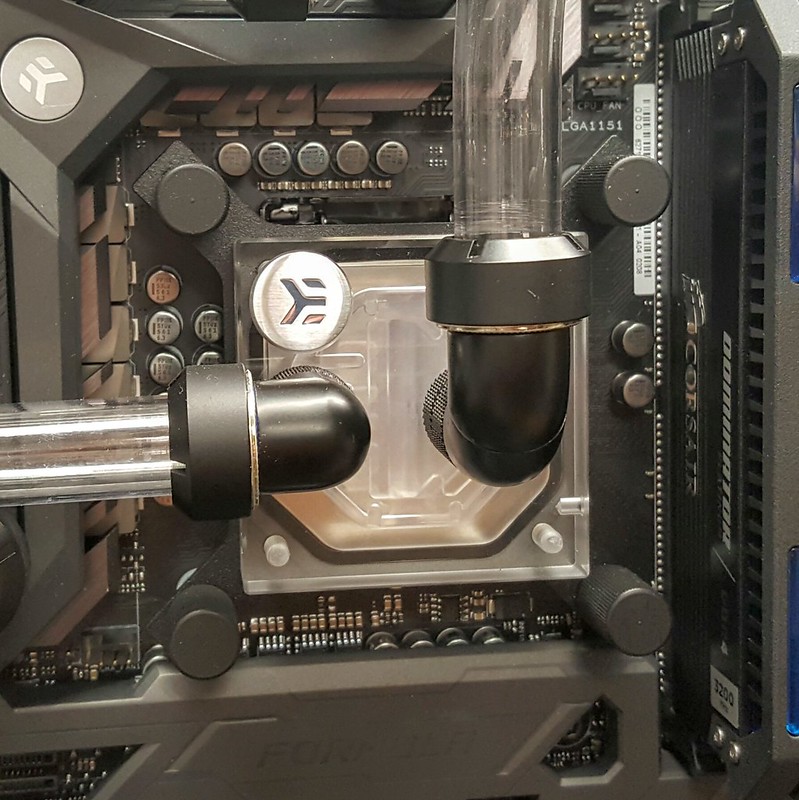
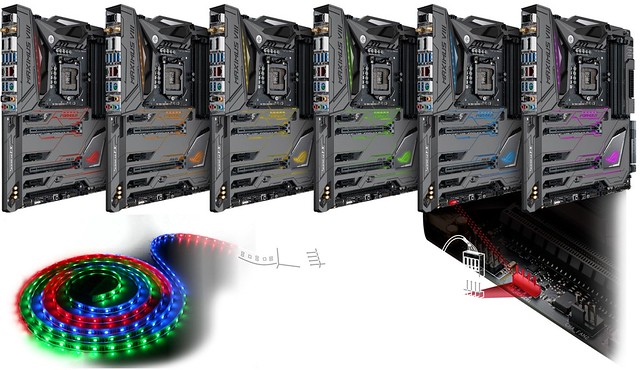
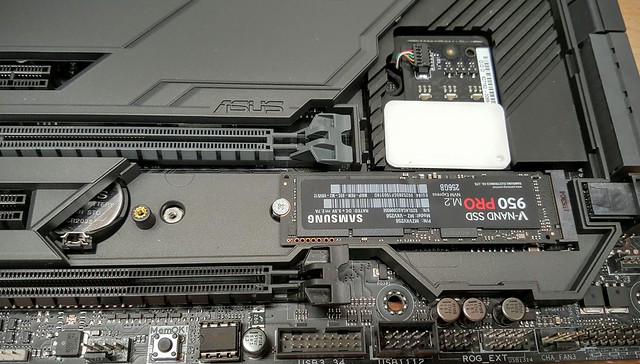
I was planning on posting some of the modifications I am planning with my RAM and CPU Block, but had to catch a plane for work before the RAM arrived, so going with some pictures I already had on hand.

One of the reasons that I decided it was time for a new rig, is that the system I had been using for the last 5 years, just wasn't ready for the VR experience. Although my CPU would theoretically work, my GPUs definitely would not, and I was lacking in USB 3.0 ports.  This wasn't the sole reason that drove the upgrade, but it was a big part of the decision.

I am getting more into Space Flight Sims, and from what I have seen so far, the Rift is going to be amazing for that particular type of game.


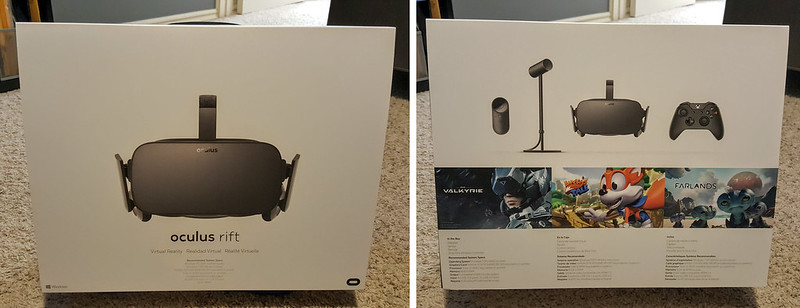
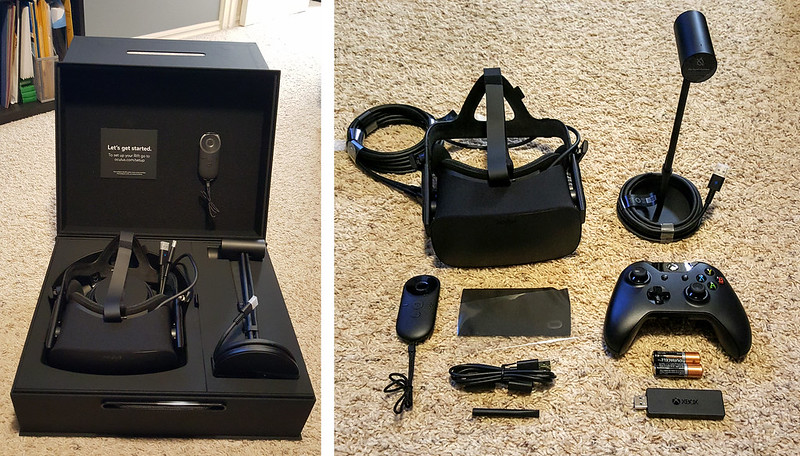
Although I ordered within 5 minutes of the commercial launch, my shipment was delayed until late May.  When the Rift finally arrived, I was pretty excited.

The packaging is really well done, with a look and feel of something very high end.  I don't really see myself playing many games while wearing the Rift that would require a gampad, as I play Space Sims with a HOTAS flight controller, but willing to try it out with some other games since it comes with the package.


I have been dabbling in Virtual Reality for a bit now, as I picked up a Gear VR around Christmas to go with my Samsung Galaxy Note 5.  Even for something limited to what phone hardware is capable of, I have really enjoyed playing games and watching movies on the Gear VR.  Even more so, I love letting someone try it for the first time just to get their reactions.  I have only sampled a few titles with the Oculus and the PCs greatly superior hardware, and so far have been very impressed.  Looking forward to see what else comes out over the next year or two.


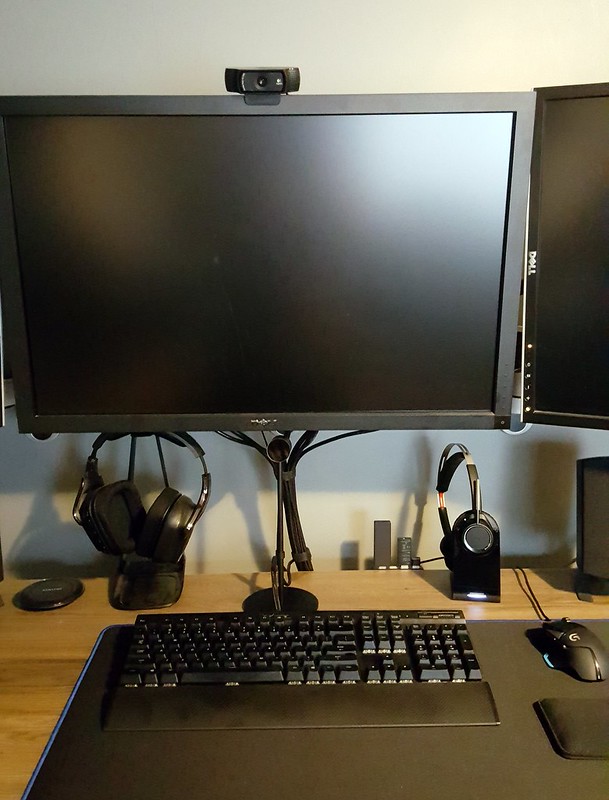
One thing I had trouble with when setting out the Oculus stuff, was the tracking camera.  I have an adjustable Desk, and the camera kept hitting the bottom of my monitor, and took up too much desk space.  My gaming headset was doing the same, so I set out looking for a solution.  Here is what it looked like before, tracking camera directly below the monitor and the gaming headset to the left.


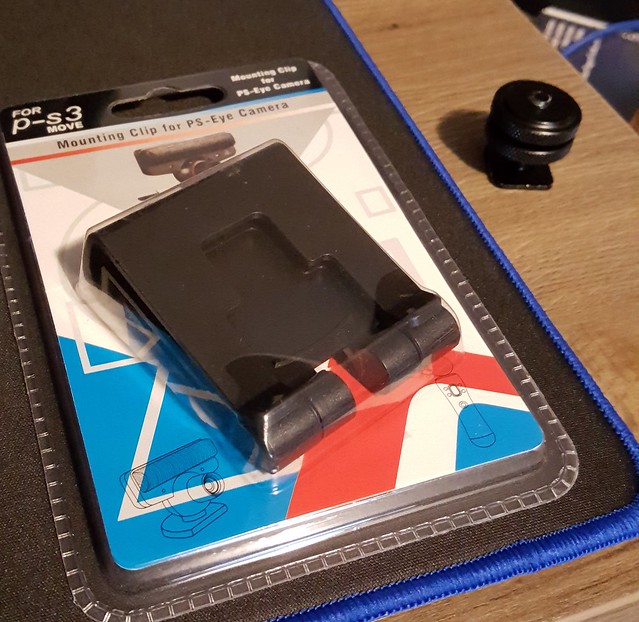
I had read that the shaft holding the camera had a standard camera tripod thread. So I grabbed an  adjustable hot shoe adapter from my DSLR bag, and picked up a monitor mount for the PlayStation Eye Camera online.


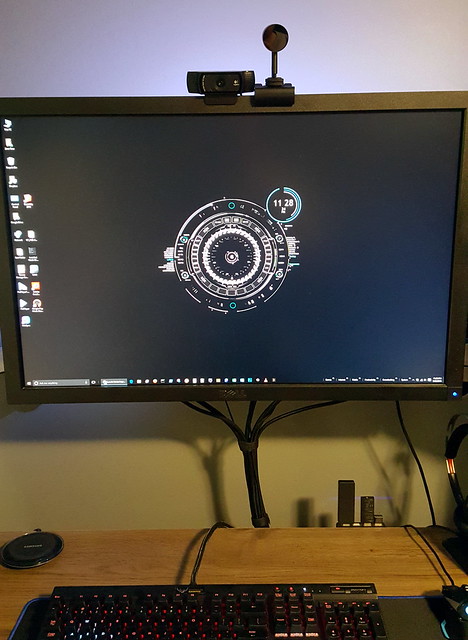
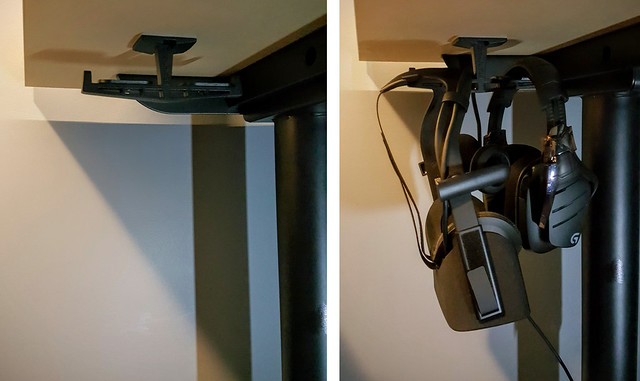
The end result works out pretty well.  The Tracking camera now sits right next to my webcam, doesn't hit my monitor when I change the height of my desk, and uncluttered my desktop a bit.  You will notice in the picture below, the headphones are also gone.


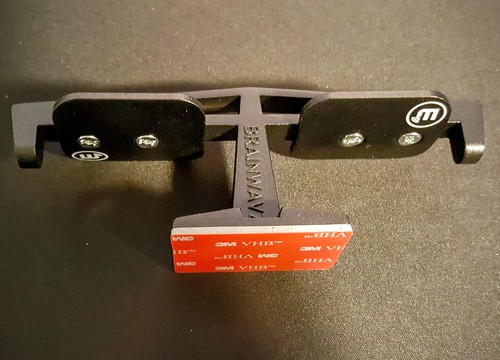
I needed a better place for the gaming headset, and somewhere to stash the Oculus Rift when not in use.  Came across this headphone holder on Amazon, that looked perfect for the job.  Made of a combination of hard plastic and aluminum, it is very solid.  The lips on the end of each arm will also keep the Rift from accidentally sliding off.


It uses a 3M super sticky pad (same that ship with GoPro mounts) to secure to the bottom of my desk.  I tested after placement, and I don't think it will go anywhere without taking a chunk of the desk with it.  As seen below, it hold the gaming headset and Oculus Rift perfectly under the desk. Out of the way, but easily accessible.


I am actually posting this from a plane, on my way back home.  I know via a shipping notification that my RAM and Light Bar upgrade kits have arrived, so the next post will cover some simple mods I plan to make them match the Black / Blue theme of this build.

Thursday, June 2, 2016

Project Open Core: Hardware - Motherboard, M.2 SSD

I have been using an EVGA X58 Classified with an Intel i7-970 in my primary build for the last 5 years.  The six core i7-970 still handles games and video editing without issue. It's been a great combo, and I considered using them again being that performance wise, they still hold up very well.  At the end of the day, I decided 5 years is just too long to go on my primary system without an upgrade, and there were some new Motherboards out supporting a few features that I really wanted to leverage.

Enter the ASUS MAXIMUS ROG Formula VIII


I have always appreciated the features and quality of the ASUS ROG line of products, but wasn’t a fan of the RED themed hardware.  Was very pleased to learn this new Motherboard had a muted black / gray look along with RGB LEDs so users could customize the look to match their system theme.


This MoBo has tons of bells & whistles, but it sufficeth to say that it looks great, and performs even better.  A few of the key things I was also wanting in a motherboard besides what I just listed was built in Wireless N, USB 3.1 C support, and good on-board audio.  The Formula VIII has all that and more.


There are plenty of reviews out there that list all the cool things about this board.  I am going to focus mostly on the aesthetics and how they will play into the theme of this build.


From the front we see the matte black / gray coloring in everything from the “Armor” plating to the PCIe and RAM slots. Another thing that is pretty obvious, and one of the many reasons I went with this board, is the built in waterblock (made by EK) for the MOSFETs.


The software that comes with the board can not only control the RGB LEDs on the board itself, but also an RGB LED light strip via a 4-pin header.  This was really important for this build as it will allow me to easily sync up the colors on the motherboard and light strips behind the acrylic panel.


Here is an exploded view showcasing the “ROG Armor”.  ASUS claims that not only does it physically protect the board, but via thermal pads, it also pulls heat away from critical components.  If it does all of that, great… as long as it does it while looking really good in the process.


Behind the ASUS ROG logo (which also lights up) is where the M.2 SSD is housed. I have been using this storage medium for about a year in my laptop, but have never owned a desktop that supported it.  They were smart with this version of the MoBo as this panel can be removed and the M.2 drive changed out without having to remove GPUs, which would be a real pain if using a traditional liquid cooling setup.


To be installed in this spot and drive my OS and Programs, I will be using the Samsung 950 Pro M.2 SSD.  I considered going 512GB, but since all of my media and game installs are on other HDDs and SSDs, and my current OS / Programs is only using about 40% of the 256GB capacity, didn’t spring for a larger size.


Really amazing how small these things are.  Here is a quick comparison against a USB mouse receiver.


And here we have it installed in the motherboard.  Once the place it put back on, you won’t see any trace of the M.2 SSD, but I am pretty confident it will be quite noticeable performance wise once everything is up and running.